Mammet-9999 (HENM): Difference between revisions
mNo edit summary |
Psykonight (talk | contribs) |
||
| (10 intermediate revisions by 6 users not shown) | |||
| Line 1: | Line 1: | ||
{| | [[File:Mammet-999.png|thumb]] | ||
| | {{Battlefield Header|nd | ||
| name = Mammet-9999 | |||
| type = henm | |||
| tier = 2 | |||
| zone = Misareaux Coast | |||
| location = I-6 | |||
| location2 = F-8 | |||
| location3 = I-11 | |||
| members = 18 | |||
| level = | |||
| time = 60 minutes | |||
| entry item = Faded Gem | |||
| notes = 1 x Tier 1 clear required | |||
}} | |||
{{tocright}} | {{tocright}} | ||
==Mobs== | ==Mobs== | ||
{| class="horizon-table table | {| class="horizon-table bcnm-table center-col-2 center-col-3 table-sm" | ||
!Name | ! Name || Level || Job || Type | ||
|- | |- | ||
| | |[[Mammet-9999 (NM)|Mammet-9999]] | ||
[[Mammet- | |{{question}} | ||
|{{question}} | |{{question}} | ||
|[[:category:Mammets|Mammets]] | |[[:category:Mammets|Mammets]] | ||
|- | |- | ||
|} | |} | ||
==Possible Rewards== | |||
<div class="flex-container"> | |||
<div class="flex-container-item-2"> | |||
{| class="table-xs horizon-table bcnm-table bcnm-table-border no-borders-td no-borders-tr center-col-1 sortable" | |||
! Unknown Grouping | |||
|- | |||
|[[Balladeer's Harp]] | |||
|- | |||
|[[Virology Ring]] | |||
|- | |||
|[[Mammet Fiber]] | |||
|- | |||
|[[Sharpshooter's Ring]] | |||
|- | |||
|[[9999's Broken Collar]] | |||
|} | |} | ||
</div> | |||
= | <div class="flex-container-item-2"> | ||
{| class="horizon-table table- | {| class="table-xs horizon-table bcnm-table bcnm-table-border no-borders-td no-borders-tr center-col-1 sortable" | ||
! | ! Hardmode only | ||
|- | |- | ||
| | |[[Ageist]]<br><small>''Hard Mode Only''</small> | ||
|} | |} | ||
</div> | |||
</div> | |||
[[File:Misareauxhenm.png|thumb]] | |||
==Notes== | ==Notes== | ||
* | * The "[[:Category:HENM#"Hard_Mode"|hard mode]]" version of this fight can be activated by using a [[Yellow Liquid]] on [[Mammet-9999 (NM)|Mammet-9999]] at the start of the fight. | ||
==Strategy== | ==Strategy== | ||
| Line 43: | Line 63: | ||
{{FFXIMap Markers|mapid=141|mapy=107.453|mapx=-265.976|entitytype=Mammet-999|image=|displayposition=}} | {{FFXIMap Markers|mapid=141|mapy=107.453|mapx=-265.976|entitytype=Mammet-999|image=|displayposition=}} | ||
{{FFXIMap Markers|mapid=141|mapy=-450.062|mapx=359.651|entitytype=Mammet-999|image=|displayposition=}} | {{FFXIMap Markers|mapid=141|mapy=-450.062|mapx=359.651|entitytype=Mammet-999|image=|displayposition=}} | ||
Mammet-9999 Guide: | |||
Mammet-9999 Fight consists of 4 phases. Phase 1 (Hand-to-Hand) is from 100% to 75%, Phase 2 (Sword) is from 75%-50%, Phase 3 (Polearm) is from 50% to 25%, Phase 4 (Staff) is from 25% to kill. | |||
To make it transition to its different phases an alliance member needs to do a certain action to trigger the transition. | |||
Each phase the mammet will do specific TP moves depending on the phase, TP moves will also carry over from the previous phase. ie Phase 1 is hand-to-hand mammet. so it will use Transmogrification and other hand-to-hand mammet TP | |||
moves, when we transition it to phase 2 (sword phase) it will start using Sword Mammet TP moves in addition to hand-to-hand TP moves. Phase 3 will be (Polearm Phase) so it will start using Polearm Mammet TP moves + Sword and Hand-to-hand | |||
TP moves. and so on. | |||
At Staff Phase (25%) The Mammet will start using Tier 2 Ancient Magic which do AoE DMG. Melee will need to back off and not take unnecessary damage. SMNs try to time BPs after it finishes casting and not get your pet killed before you BP. | |||
Things to watch out for: | |||
(Transmogrification) | |||
Mammet will randomly use Transmog which Absorbs all physical damage and converts it into restored HP for ~30 seconds. When it does, DDs need to make sure to turn and not heal it. SMNs stop BPs till Transmog wears off. | |||
(Mind Wall) | |||
This ability is used during Staff Phase (25%). it is a Special Magic Shield effect, causing it to absorb and regain HP from all offensive magic used against it for ~30 seconds. Because Ifrit is a hybrid BP my suggestion would be to switch | |||
to Leviathan when its 25%. | |||
This fight is pretty straightforward. As long as we transition it correctly it should be a smooth fight. | |||
----------------------------------------------------------- | |||
Phase Transition Details: | |||
Phase 1 > Phase 2 (75%): | |||
This is the easiest transition, once the boss is around 76% everyone needs to stop DMG and 1 DD will auto-attack it down to 75% until we see it transition after which everyone can go back to dealing DMG. | |||
Also, mages need to stop using DoTs at around 80% to ensure that Auto-attack DMG is triggered. We need to make sure all DoTs are off before 76% to make sure it only takes auto-attack dmg. | |||
Phase 2 > Phase 3 (50%): | |||
For this transition the Trigger is WS damage, at 51% everyone will stop damaging the boss and we will have 1 THF auto-attacking. as soon as it reaches 50% the THF must WS (Evisceration) to trigger that phase transition. | |||
Once it switches to Polearm phase people can start dealing damage to the boss. Again, DoTs need to be off at around 55%. at 51% ONLY the THF is attacking to boss to ensure we trigger the transition correctly. | |||
Phase 3 > Phase 4 (25%): | |||
For this transition the Trigger is Magic DMG, at 26% everyone will stop damaging the boss and our BLM will do a Tier 4 Nuke followed by a volley of tier 2 nukes (Thunder 2 > Blizzard 2 > Fire 2> ... etc.) to trigger the transition. | |||
----------------------------------------------------------- | |||
Job Specific Responsibilities: | |||
Tank: | |||
Tank it! | |||
DDs: | |||
Deal DMG. | |||
Trigger Transitions when needed. (See Phase Transition details above.) | |||
THF needs to accomplice WHMs whenever possible. | |||
SMNs: | |||
BPs: Ifrit is your go to BP from (100%-25%), Leviathan when it's under 25% | |||
Stop DMG when its time to trigger transition. | |||
WHMs: | |||
Keep tank alive! | |||
Ask for accomplice if you think you will pull hate. | |||
BLM: | |||
Be ready for when its time for Magic transition. | |||
Everyone else just do your job ^^; | |||
Latest revision as of 15:44, 29 October 2025

| Mammet-9999 | |
|---|---|
| Type: | HENM (Tier II) |
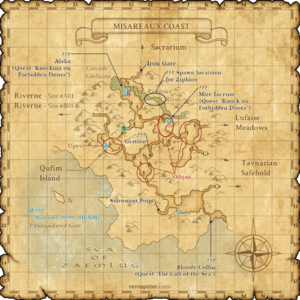
| Zone: | Misareaux Coast (I-6)/ (F-8)/ (I-11) |
| Entry Item: | Faded Gem |
| Level: | No minimum |
| Members: | 18 |
| Time: | 60 minutes |
| Additional Information: | 1 x Tier 1 clear required |
Mobs
| Name | Level | Job | Type |
|---|---|---|---|
| Mammet-9999 | Mammets |
Possible Rewards
| Unknown Grouping |
|---|
| Balladeer's Harp |
| Virology Ring |
| Mammet Fiber |
| Sharpshooter's Ring |
| 9999's Broken Collar |
| Hardmode only |
|---|
| Ageist Hard Mode Only |

Notes
- The "hard mode" version of this fight can be activated by using a Yellow Liquid on Mammet-9999 at the start of the fight.
Strategy
- To be included.
Mammet-9999 Guide:
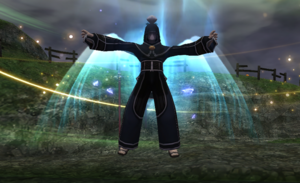
Mammet-9999 Fight consists of 4 phases. Phase 1 (Hand-to-Hand) is from 100% to 75%, Phase 2 (Sword) is from 75%-50%, Phase 3 (Polearm) is from 50% to 25%, Phase 4 (Staff) is from 25% to kill. To make it transition to its different phases an alliance member needs to do a certain action to trigger the transition.
Each phase the mammet will do specific TP moves depending on the phase, TP moves will also carry over from the previous phase. ie Phase 1 is hand-to-hand mammet. so it will use Transmogrification and other hand-to-hand mammet TP moves, when we transition it to phase 2 (sword phase) it will start using Sword Mammet TP moves in addition to hand-to-hand TP moves. Phase 3 will be (Polearm Phase) so it will start using Polearm Mammet TP moves + Sword and Hand-to-hand TP moves. and so on. At Staff Phase (25%) The Mammet will start using Tier 2 Ancient Magic which do AoE DMG. Melee will need to back off and not take unnecessary damage. SMNs try to time BPs after it finishes casting and not get your pet killed before you BP.
Things to watch out for:
(Transmogrification) Mammet will randomly use Transmog which Absorbs all physical damage and converts it into restored HP for ~30 seconds. When it does, DDs need to make sure to turn and not heal it. SMNs stop BPs till Transmog wears off.
(Mind Wall) This ability is used during Staff Phase (25%). it is a Special Magic Shield effect, causing it to absorb and regain HP from all offensive magic used against it for ~30 seconds. Because Ifrit is a hybrid BP my suggestion would be to switch to Leviathan when its 25%.
This fight is pretty straightforward. As long as we transition it correctly it should be a smooth fight.
Phase Transition Details:
Phase 1 > Phase 2 (75%): This is the easiest transition, once the boss is around 76% everyone needs to stop DMG and 1 DD will auto-attack it down to 75% until we see it transition after which everyone can go back to dealing DMG. Also, mages need to stop using DoTs at around 80% to ensure that Auto-attack DMG is triggered. We need to make sure all DoTs are off before 76% to make sure it only takes auto-attack dmg.
Phase 2 > Phase 3 (50%): For this transition the Trigger is WS damage, at 51% everyone will stop damaging the boss and we will have 1 THF auto-attacking. as soon as it reaches 50% the THF must WS (Evisceration) to trigger that phase transition. Once it switches to Polearm phase people can start dealing damage to the boss. Again, DoTs need to be off at around 55%. at 51% ONLY the THF is attacking to boss to ensure we trigger the transition correctly.
Phase 3 > Phase 4 (25%): For this transition the Trigger is Magic DMG, at 26% everyone will stop damaging the boss and our BLM will do a Tier 4 Nuke followed by a volley of tier 2 nukes (Thunder 2 > Blizzard 2 > Fire 2> ... etc.) to trigger the transition.
Job Specific Responsibilities:
Tank: Tank it!
DDs: Deal DMG. Trigger Transitions when needed. (See Phase Transition details above.) THF needs to accomplice WHMs whenever possible.
SMNs: BPs: Ifrit is your go to BP from (100%-25%), Leviathan when it's under 25% Stop DMG when its time to trigger transition.
WHMs: Keep tank alive! Ask for accomplice if you think you will pull hate.
BLM: Be ready for when its time for Magic transition.
Everyone else just do your job ^^;

