Template:Location Tooltip: Difference between revisions
From HorizonXI Wiki
added pos 2, pos 3 and pos 4 parameters to define multiple overlays in one tooltip |
m documentation |
||
| Line 89: | Line 89: | ||
| area = | | area = | ||
| pos = | | pos = | ||
| pos 2 = | |||
| pos 3 = | |||
| pos 4 = | |||
| map = | | map = | ||
| id = | | id = | ||
| Line 99: | Line 102: | ||
| highlight opacity = | | highlight opacity = | ||
| marker pos x = | | marker pos x = | ||
| marker pos y = | | marker pos y = | ||
| marker pos 2 x = | |||
| marker pos 2 y = | |||
| marker pos 3 x = | |||
| marker pos 3 y = | |||
| marker pos 4 x = | |||
| marker pos 4 y = | |||
| marker background = | | marker background = | ||
| marker opacity = | | marker opacity = | ||
| Line 107: | Line 116: | ||
Displays a tooltip map of the area. | Displays a tooltip map of the area. | ||
*'''area''': The map's [[:Category:Areas|area]]. Required. | *'''area''': The map's [[:Category:Areas|area]]. Required. | ||
*'''pos''': The position within the map, such as H-6 or B-5. | *'''pos''': The position within the map, such as H-6 or B-5. | ||
**Optional: '''pos 2''', '''pos 3''', '''pos 4''' | |||
*'''map''': The specific map to be used, such as "Map 2". | *'''map''': The specific map to be used, such as "Map 2". | ||
*'''id''': A unique id to give to the tooltip. Use if the same location is repeated on the same page. | *'''id''': A unique id to give to the tooltip. Use if the same location is repeated on the same page. | ||
| Line 117: | Line 127: | ||
*'''highlight background''': The background styling of the highlight box. | *'''highlight background''': The background styling of the highlight box. | ||
*'''highlight opacity ''': The opacity of the highlight box. | *'''highlight opacity ''': The opacity of the highlight box. | ||
*'''marker pos x''': The x position of the marker within the highlight box. | *'''marker pos x''': The x position of the marker within the highlight box. | ||
*'''marker pos y''': The y position of the marker within the highlight box. | **Optional: '''marker pos 2 x''', '''marker pos 3 x''', '''marker pos 4 x''' | ||
*'''marker pos y''': The y position of the marker within the highlight box. | |||
**Optional: '''marker pos 2 y''', '''marker pos 3 y''', '''marker pos 4 y''' | |||
*'''marker background''': The background styling of the marker. | *'''marker background''': The background styling of the marker. | ||
*'''marker opacity''': The opacity of the marker. | *'''marker opacity''': The opacity of the marker. | ||
Revision as of 17:13, 21 April 2024
Usage
{{Location Tooltip
| area =
| pos =
| pos 2 =
| pos 3 =
| pos 4 =
| map =
| id =
| text =
| tooltip =
| opacity =
| highlight offset x =
| highlight offset y =
| highlight background =
| highlight opacity =
| marker pos x =
| marker pos y =
| marker pos 2 x =
| marker pos 2 y =
| marker pos 3 x =
| marker pos 3 y =
| marker pos 4 x =
| marker pos 4 y =
| marker background =
| marker opacity =
| marker size =
}}
Displays a tooltip map of the area.
- area: The map's area. Required.
- pos: The position within the map, such as H-6 or B-5.
- Optional: pos 2, pos 3, pos 4
- map: The specific map to be used, such as "Map 2".
- id: A unique id to give to the tooltip. Use if the same location is repeated on the same page.
- text: The text to display. Defaults to the pos if it is provided or the area and map if the pos is not provided.
- tooltip: The tooltip to display. Defaults to the labeled section in of the area maps subpage.
- opacity: The opacity of the tooltip.
- highlight offset x: An offset to correct the x positioning of the highlight box.
- highlight offset y: An offset to correct the y positioning of the highlight box.
- highlight background: The background styling of the highlight box.
- highlight opacity : The opacity of the highlight box.
- marker pos x: The x position of the marker within the highlight box.
- Optional: marker pos 2 x, marker pos 3 x, marker pos 4 x
- marker pos y: The y position of the marker within the highlight box.
- Optional: marker pos 2 y, marker pos 3 y, marker pos 4 y
- marker background: The background styling of the marker.
- marker opacity: The opacity of the marker.
- marker size: The size of the marker.
Examples
| Code | Result |
|---|---|
{{Location Tooltip
| area = Windurst Walls
}}
|
|
{{Location Tooltip
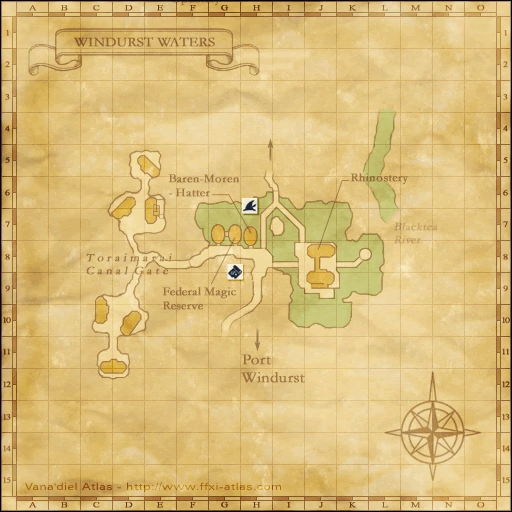
| area = Windurst Waters
| map = South
}}
|
|
{{Location Tooltip
| area = Northern San d'Oria
| pos = L-10
}}
|
|
{{Location Tooltip
| tooltip = [[File:RuAunGardensMain.png]]
| area = Ru'Aun Gardens
| pos = H-10
}}
|
|
{{Location Tooltip
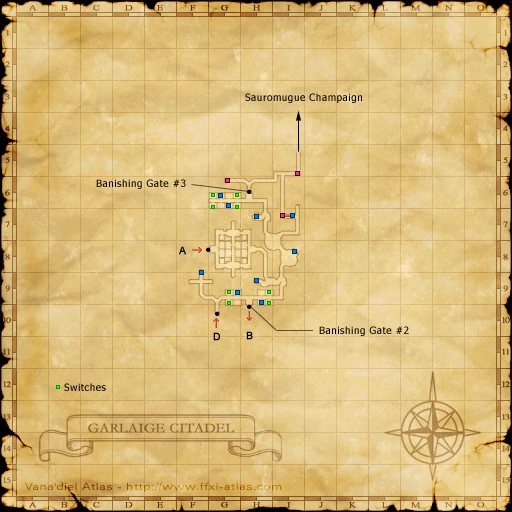
| tooltip = [[File:GarlaigeCitadel2.png]]
| area = Garlaige Citadel
| map = Map 2
| pos = G-6
}}
|
|
{{Location Tooltip
| tooltip = [[File:SouthernSandOria.png]]
| area = Southern San d'Oria
| pos = J-9
| marker pos x = 3
| marker pos y = 7
}}
|
|
{{Location Tooltip
| id = Derfland Regional Merchant
| tooltip = [[File:SouthernSandOria.png]]
| area = Southern San d'Oria
| pos = J-9
| highlight background = transparent
| marker pos x = 3
| marker pos y = 7
}}
|
|
{{Location Tooltip
| text = Valkurm Emperor
| tooltip = [[File:Valkurm Dunes.png]]
| area = Valkurm Dunes
| pos = E-8
| highlight background = transparent
| marker pos x = 2
| marker pos y = -7
| marker size = 35
| marker opacity = 0.4
| marker background = #5555ff
}}
|
|
{{Location Tooltip
| area = Northern San d'Oria
| pos = L-10
| pos 2 = L-11
| pos 3 = M-10
| pos 4 = M-11
}}
|


