Intermediate Macro Guide
Welcome to this Intermediate level macro guide. The aim is to further expand your knowledge on the different ways macros can be used in FFXI. If you're a new player and haven't already read my Beginner's Macro Guide, I suggest you do so before reading any further into this one.
As I suggested in the previous guide, I would read this guide before joining an experience points party for the first time.
Targetting
So far you will have been likely targeting mobs with the tab key/keybind/dpad and this will have worked just fine. Once you find yourself in an party however, suddenly there's 5 other people to tab between. This becomes a problem as we can often find ourselves quickly needing to target a certain party member for a life saving cure or to target the latest pull with provoke. Macros provide us with a much easier way of doing this.
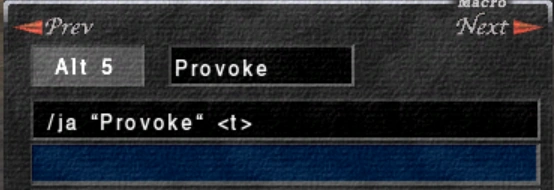
Lets take a look at this macro:
As we know from the previous guide, this macro will use the job ability Provoke on the <t> or target. However with a little change, we can make this macro target the latest mob to be pulled.
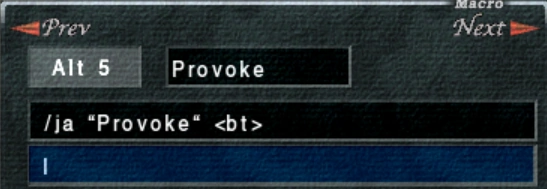
Simply changing <t> to <bt> now tells this macro to provoke the last mob to be acted upon by a party member. Seeing as in an XP party this will be the last pull, that will be the target. Now, imagine the puller gets a link on their way back to camp and you want to provoke the link instead of the mob that was pulled. The above macro wouldn't work as it would provoke the wrong mob! However, if we were to have another macro that looked like this...
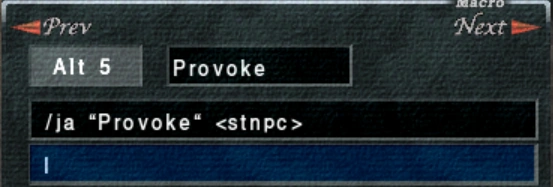
...our provoke macro now brings up a Sub-Targeting tab which will allow us to tab/dpad between all of the NPC's within our vicinty. We can simply tab between the pulled mob and the link, hitting confirm to activate the provoke.
Now let's look at a different example.
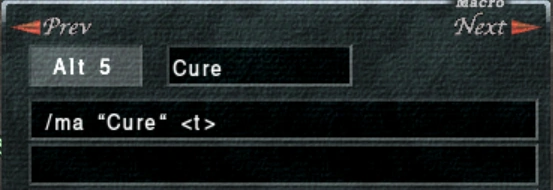
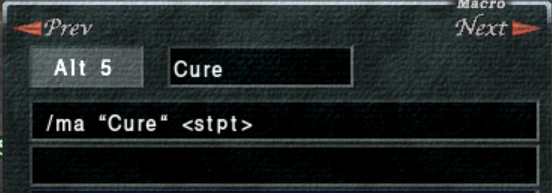
As you should already realise, this is a simple cure macro. Again, this macro encounters the same issue as described in the previous example, targeting. With some simple changes to the macro target, we can make it far more useful.
With the change in the target or <t> to Sub Target Party or <stpt>, a little sub-target cursor appears on the party list. No need to tab through mobs, npcs or other playable characters to find your party members!
We could also use the targets <stal> / Sub Target Alliance or <stpc> / Sub Target Playable Character to target alliance members or any other playable character you may encounter.
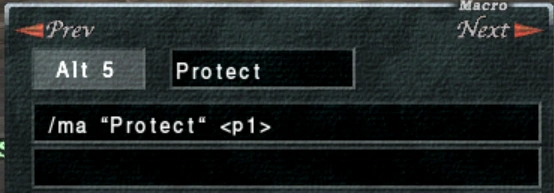
The final targeting syntax we will cover involves targeting invdividual party and alliance members. Here is an example macro:
As you can see we use <p1>, which will target the first party member on the party list. We can use <p1> through to <p5> to target any party member from the party list. Using <p0> is an alternative self-target to <me>.
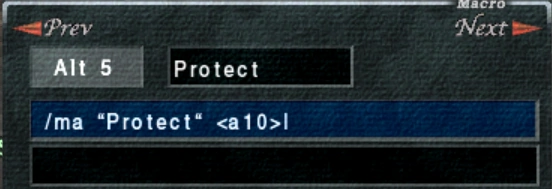
And as you may have already guessed, <a10> will target the first member of the top most alliance and can be used up to <a15> to target the last member. Using <a20> through to <a25> can be used to target the members of the bottom alliance.
For a list of all possible macro targets, please see the Macro's page.
Changing Equipment
Another vital function of macros is their ability to change different pieces of equipment. In 2020, gear swaps have somewhat been replaced by addons suchs as "Gearswap" and "Ashitacast" however, I will focus on the games original method of doing this.
There are 2 methods of swapping gear via macros. We can use the commands /equip and /equipset. In this intermediate level guide, I will only cover /equip. /equipset will be covered in the Advanced Macro Guide. If you feel confident enough, go right ahead and check that guide out as on the most part, /equipset replaces the /equip macro. I cover /equip here solely as it's easier for new players to learn and still has it's place in some situations.
Similarly to a simple command macro (e.g. provoke), an /equip macro is split into 3 parts:
- * The Command
- * The Target
- * The Item to be equipped
The Command
The command is simply /equip. Nothing else to it.
The Target
The target is simply the equipment slot that you wish to change. For example, if i wanted to /equip a subligar, i would use the target prefix legs as that is the slot that my subligar will be equipped to. Below is a list of all equipment slot prefixs:
|
|
|
|
The item to be equipped
To finish off the macro, we need to include the name of the item we wish to equip. We also need to surround the name with quotation marks. The name of the item must match how it is written in the items description (where you can see the items statistics), otherwise it might not work!
So to complete our macro, it would look like one of these examples:
- /equip main "Onion sword"
- /equip legs "Brass subligar"
- /equip ring2 "Saintly ring"
That's all there is to it. At lower levels you can make good use out of this command as there are fewer pieces of equipment to switch between. As you progress in levels and more gear becomes available, you will likely find that the 6 line limit in each macro will make mass gearswaps increasingly difficult. At this point, I would suggest you switch to the /equipset command instead which as I stated earlier, can be read about in the next guide in this series Advanced Macro Guide.
As a final side note, newer players may be wondering why gear swaps are important in FFXI. Simply, they enable players to perform their jobs better. A Red Mage may wish to switch to MND rings when casting spells such as paralyze and then to INT rings when casting spells such as sleep. A Warrior may wish to switch between a haste belt when tp'ing and an accuracy belt when performing a weapon skill. There are countless examples where changing gear is essential to perform your job to it's full capacity.
This guide is clearly not finished yet and very much a work in progress. Please check back at a later date!
Miscellaneous
To finish off this guide, I will cover a few 'Utility' macros and commands, the first of which is <wait>.
Wait
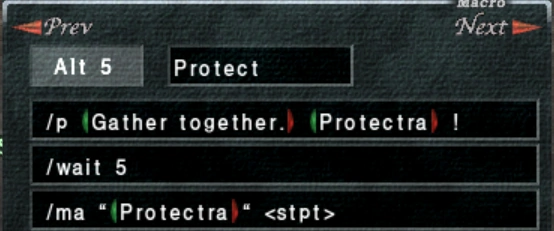
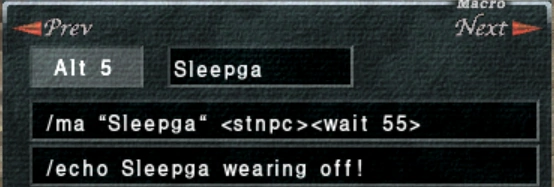
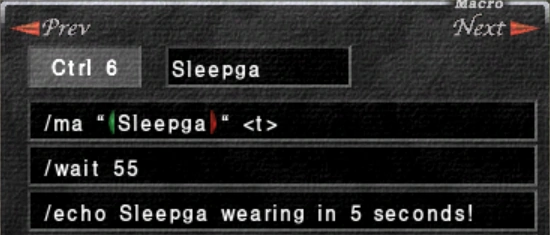
We can use the wait command to you guessed it, wait. You can use either <wait #> or /wait # however I would recommend always using <wait #> as it can be added onto the end of a macro, whereas /wait # takes up a line by itself. The wait command only accepts whole numbers such as <wait 1>, <wait 2> etc. Examples of wait can be seen below:
Echo
When used, /echo will return the text you type after it in the chat window. Only you will see this text. It's somewhat been replaced with 3rd party addons however, it does still have some uses. For example:
Using this macro will return the following text:
Used with the wait command, it can be a useful reminder. For example, the spell Sleepga unresisted keeps a mob slept for 60 seconds. We could use this example below to remind us that sleep is about to wear off.
Recast
Again, a command that is entirely replaced by 3rd party addons. /recast "Name of Spell/Ability" will return the time remaining of the specfied spell/ability in the chat window.
...And Finally
A couple or final commands which can be used to make handy macros.
This macro allows you to use items. It also allows for easier trading of items to npcs howevever, only one item may be traded at a time. If a quest requires you to trade 2 or more of an item, this must be done manually. Target can be defined as <t>, <me> etc.
- /item "Item Name" <define target>
Makes Beastmaster pets, Dragoon pets untargetable until turned back on. Handy to reduce the amount of npcs that need tabbing between.
- /ignorepet on, /ignorepet off
Further Reading
This is just a beginner's guide to macros. They are much more in-depth and useful than described here and i would recommend reading at least the Intermediate Macro Guide before attempting your first XP party.
- Beginner's Macro Guide
- Advanced Macro Guide - Work in Progress
- Macros - For a full list of available macros.

