San d'Oria Mission 2-3: Difference between revisions
mNo edit summary |
|||
| Line 61: | Line 61: | ||
**Trade the [[Pickaxe]] to the ''Mythril Seam'' until you receive some [[Mine Gravel]]. | **Trade the [[Pickaxe]] to the ''Mythril Seam'' until you receive some [[Mine Gravel]]. | ||
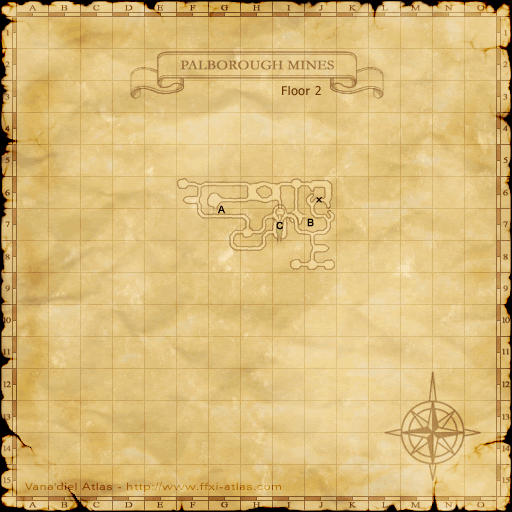
**There is one on the first floor at {{Location Tooltip| area = Palborough Mines | map = Map 1 | pos = I-8}}, one on the second floor at {{Location Tooltip| area = Palborough Mines | map = Map 2 | pos = I-8}} and one on the third floor at {{Location Tooltip| area = Palborough Mines | map = Map 1 | pos = I-9}}. | **There is one on the first floor at {{Location Tooltip| area = Palborough Mines | map = Map 1 | pos = I-8}}, one on the second floor at {{Location Tooltip| area = Palborough Mines | map = Map 2 | pos = I-8}} and one on the third floor at {{Location Tooltip| area = Palborough Mines | map = Map 1 | pos = I-9}}. | ||
**Alternatively, you can purchase it at the AH under Misc. | |||
}} | }} | ||
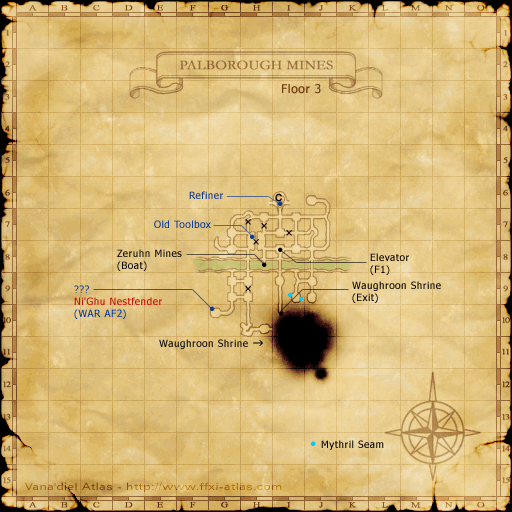
*Once you receive the [[Mine Gravel]], trade it to the refiner on the third floor at {{Location Tooltip| area = Palborough Mines | map = Map 3 | pos = I-6}} and pull the lever. | *Once you receive the [[Mine Gravel]], trade it to the refiner on the third floor at {{Location Tooltip| area = Palborough Mines | map = Map 3 | pos = I-6}} and pull the lever. | ||
Revision as of 23:02, 4 January 2025
| Journey Abroad | |
|---|---|
| Series | San d'Oria Missions |
| Starting NPC | Any San d'Oria Gate Guard |
| Level Restriction: | Level 25 (recommended) |
| Items Needed | Parana Shield (Windurst Path) or Mythril Sand (Bastok Path) |
| Title | Black Dragon Slayer or Dark Dragon Slayer Certified Adventurer |
| Repeatable | No |
| HAAP | 2 points |
| Description | Visit the faraway nations of Bastok and Windurst and receive official recognition as an adventurer. |
| Rewards | |
| Rank 3 3,000 gil 10 Mog Wardrobe  Outpost Teleportation from Jeuno  | |
| ← Previous Mission | Next Mission → |
|---|---|
| The Davoi Report | Infiltrate Davoi |
Notes
- Trade 3~5 Crystal's to a Conquest Overseer to unlock this mission, or one crystal if you completed Mission 2-2.
Start
- Accept the mission from any San d'Oria Gate Guard.
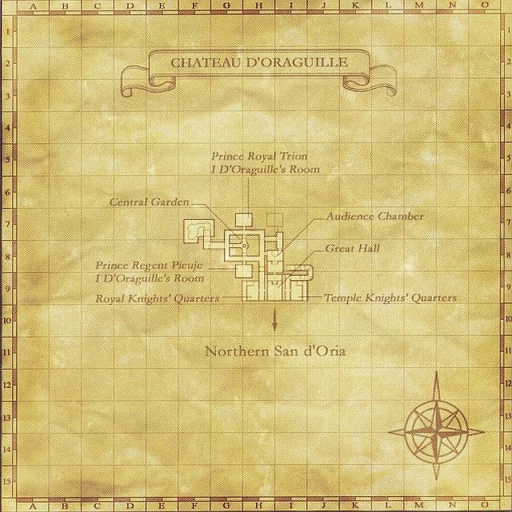
- Talk to Halver in Chateau d'Oraguille (I-9).
Option 1: Windurst Path
San d'Oria to Windurst
- Travel to Port Windurst
- Talk to Mourices in the Consulate of San d'Oria (Windurst Woods at F-10).
- Talk to Kupipi in the clerical chamber on the ground floor of the Heavens Tower (Windurst Walls at H-7) to get the
 Shield offering.
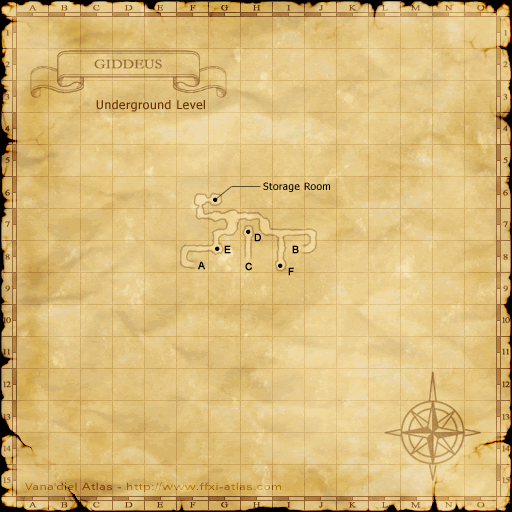
 - Travel to Giddeus and kill Zhuu Buxu the Silent (Map 2: H-7) to obtain a Parana Shield.
- Wait for Zhuu Buxu the Silent to respawn and kill him again to obtain a second Parana Shield.
- Talk to Uu Zhoumo (Map 2: F-7).
- Return to Mourices in the Consulate of San d'Oria (Windurst Woods at F-10) and trade him the two Parana Shields.
Windurst to Bastok
- Travel to Bastok Metalworks.
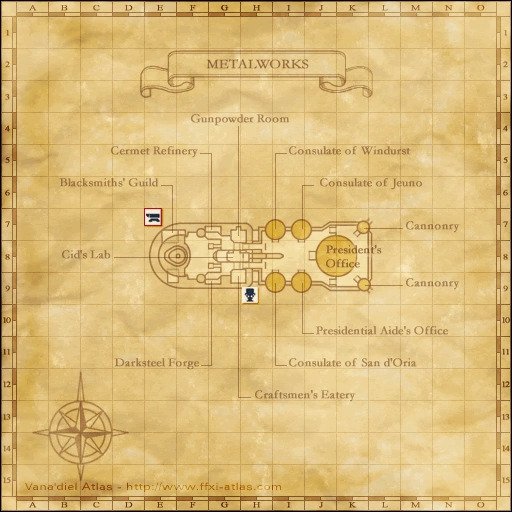
- Talk to Savae E Paleade in the Consulate of San d'Oria (Metalworks at I-9).
- Talk to Pius in the Department of Industry inside the President's Office (Metalworks at J-8).
- Talk to Grohm in the Craftsmen's Eatery (Metalworks at H-9).
- Next, travel through Palborough Mines to Waughroon Shrine.
- Examine the Burning Circle inside to enter the BCNM "The Rank 2 Final Mission".
- Inside you will find a Seeker and Dark Dragon.
- The battle is capped at level 25.
- It is recommended to sleep the Dark Dragon while you take out the Seeker first.
- After exiting the BCNM you will be given the
 Kindred Crest.
- Return to Savae E Paleade in the Consulate of San d'Oria (Metalworks at I-9), who will give you the
 Kindred Report and prompt you to return to San d'Oria.
Option 2: Bastok Path
San d'Oria to Bastok
- Travel to Bastok Metalworks.
- Talk to Savae E Paleade in the Consulate of San d'Oria (Metalworks at I-9).
- Talk to Pius in the Department of Industry inside the President's Office (Metalworks at J-8).
- Talk to Grohm in the Craftsmen's Eatery (Metalworks at H-9) to get 3 Pickaxes to mine Mine Gravel in Palborough Mines.
- You CAN purchase Mine Gravel from the Auction House, check it in Bastok before you leave.
- Consider buying more Pickaxes, as they can break, although 3 should be sufficient.
- Travel to Palborough Mines and mine Mine Gravel from any of the Mythril Seams.
- Trade the Pickaxe to the Mythril Seam until you receive some Mine Gravel.
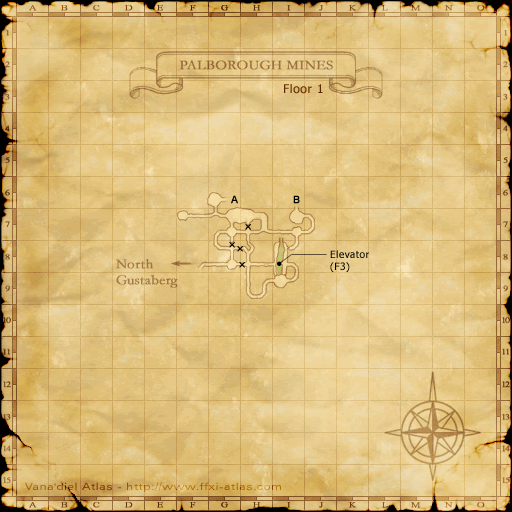
- There is one on the first floor at I-8, one on the second floor at I-8 and one on the third floor at I-9.
- Alternatively, you can purchase it at the AH under Misc.
- Once you receive the Mine Gravel, trade it to the refiner on the third floor at I-6 and pull the lever.
- Drop off the ledge to the second floor and pull another lever to receive Mythril Sand.
- Return to Savae E Paleade in the Consulate of San d'Oria (Metalworks at I-9) and trade the Mythril Sand to him.
Bastok to Windurst
- Travel to Port Windurst
- Talk to Mourices in the Consulate of San d'Oria (Windurst Woods at F-10).
- Talk to Kupipi in the clerical chamber on the ground floor of the Heavens Tower (Windurst Walls at H-7) to get the Dark Key.
- Next, travel through Giddeus to Balga's Dais.
- Examine the Burning Circle inside to enter the BCNM "The Rank 2 Final Mission".
- Inside you will find a Searcher and Black Dragon.
- The battle is capped at level 25.
- It is recommended to sleep the Black Dragon while you take out the Searcher first.
- Optionally, you can speak with Kupipi in Heavens Tower again for a message afterwards.
- After exiting the BCNM you will be given the
 Kindred Crest.
- Return to Mourices in the Consulate of San d'Oria (Windurst Woods at F-10), who will give you the
 Kindred Report and prompt you to return to San d'Oria.
Finish
- Finally, talk to Halver to complete this mission and gain San d'Oria Rank 3.
- To unlock the next mission, you need to fill your rank bar, either by trading crystals to a Conquest Overseer (6 crystals was enough to unlock the next mission) or repeating a repeatable mission.
Note: This mission is essentially identical for all 3 nations. While each nation requires you to travel to the other two, they all follow the same path. San d'Orians and Windurstians who choose Bastok first will do the same things. Therefore, it IS possible to group people together from different nations to ultimately end up on the same BCNM fight. A Windurstian may choose to do the Bastok portion first, and San d'Orian portion second, while a Bastokan can do the Windurstian portion first, and the San d'Orian portion second. In this scenario, Windurstians and Bastokans can enter the same BCNM for the San d'Orian portion.
Note 2: Players who have already completed this mission (for any nation) may enter any of the BC, regardless of their current or former allegiance.
