Ruinous Rocs: Difference between revisions
From HorizonXI Wiki
| (24 intermediate revisions by 14 users not shown) | |||
| Line 1: | Line 1: | ||
{| | {{Battlefield Header | ||
| | | name = Ruinous Rocs | ||
| type = henm | |||
| tier = 1 | |||
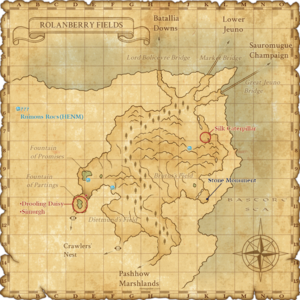
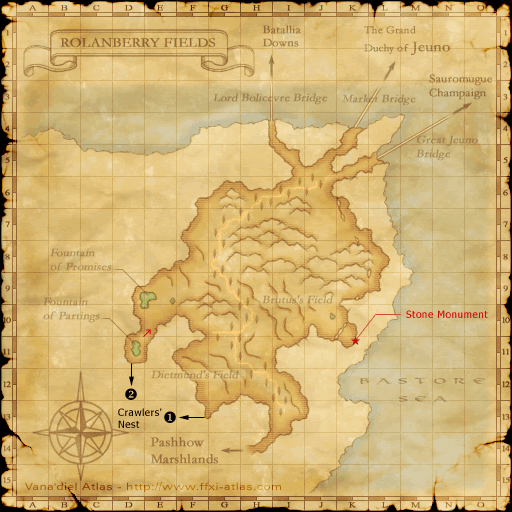
| zone = Rolanberry Fields | |||
| location = E-10 | |||
| | | location2 = J-8 | ||
| location3 = F-10 | |||
| members = 18 | |||
| level = | |||
| time = 60 minutes | |||
| entry item = Faded Stone | |||
}} | |||
{{tocright}} | |||
==Mobs== | ==Mobs== | ||
{| class="horizon-table table-sm | |||
!Name | {| class="horizon-table bcnm-table center-col-2 center-col-3 table-sm" | ||
! Name || Level || Job || Type | |||
|- | |- | ||
| | |[[Teratornis]] | ||
[[Teratornis]] | |88 | ||
| | |[[RDM]] | ||
|[[:category:Rocs|Roc]] | |||
| | |||
[[:category:Rocs|Roc]] | |||
|- | |- | ||
| | |[[Argentavis]] | ||
[[Argentavis]] | |88 | ||
| | |[[BRD]] | ||
|[[:category:Rocs|Roc]] | |||
| | |||
[[:category:Rocs|Roc]] | |||
|- | |- | ||
| | |[[Kelenken]] | ||
[[Kelenken]] | |88 | ||
| | |[[WHM]] | ||
|[[:category:Rocs|Roc]] | |||
| | |||
[[:category:Rocs|Roc]] | |||
|} | |} | ||
== | ==Possible Rewards== | ||
{| class="horizon-table table-xs | <div class="flex-container"> | ||
! | <div class="flex-container-item-2"> | ||
{| class="table-xs horizon-table bcnm-table bcnm-table-border no-borders-td no-borders-tr center-col-1 sortable" | |||
! Zero to One of | |||
|- | |||
|[[Damascus Ingot]] {{Hxi Drop Rate|asb=0|0|0}} | |||
|} | |||
{| class="table-xs horizon-table bcnm-table bcnm-table-border no-borders-td no-borders-tr center-col-1 sortable" | |||
! Zero to one of | |||
|- | |||
|[[Dilation Ring]] {{Hxi Drop Rate|asb=0|0|0}} | |||
|} | |||
{| class="table-xs horizon-table bcnm-table bcnm-table-border no-borders-td no-borders-tr center-col-1 sortable" | |||
! Zero to One of | |||
|- | |||
|[[Luftpause Mark]] {{Hxi Drop Rate|asb=0|0|0}} | |||
|} | |||
{| class="table-xs horizon-table bcnm-table bcnm-table-border no-borders-td no-borders-tr center-col-1 sortable" | |||
! Zero to one of | |||
|- | |- | ||
|[[Trotter Boots]] {{Hxi Drop Rate|asb=0|0|0}} | |||
|} | |||
{| class="table-xs horizon-table bcnm-table bcnm-table-border no-borders-td no-borders-tr center-col-1 sortable" | |||
! Zero to one of | |||
|- | |- | ||
| | |[[Rucke's Rung]] {{Hxi Drop Rate|asb=0|0|0}} | ||
|} | |||
{| class="table-xs horizon-table bcnm-table bcnm-table-border no-borders-td no-borders-tr center-col-1 sortable" | |||
! Zero to one of | |||
|- | |- | ||
|[[Vaulter's Ring]] {{Hxi Drop Rate|asb=0|0|0}} | |||
|} | |||
{| class="table-xs horizon-table bcnm-table bcnm-table-border no-borders-td no-borders-tr center-col-1 sortable" | |||
! Zero to one of | |||
|- | |- | ||
| | |[[Protectra V]] {{Hxi Drop Rate|asb=0|0|0}} | ||
|} | |||
</div> | |||
<div class="flex-container-item-2"> | |||
{| class="table-xs horizon-table bcnm-table bcnm-table-border no-borders-td no-borders-tr center-col-1 sortable" | |||
! One of | |||
|- | |- | ||
| | |[[Reraiser]] {{Hxi Drop Rate|asb=1000/1000|0|0}} | ||
|- | |||
|} | |||
{| class="table-xs horizon-table bcnm-table bcnm-table-border no-borders-td no-borders-tr center-col-1 sortable" | |||
! One of | |||
|- | |- | ||
|[[Hi-Elixir]] {{Hxi Drop Rate|asb=1000/1000|0|0}} | |||
|- | |||
|} | |} | ||
</div> | |||
</div> | |||
[[File:Rolanrocs2.png|thumb]] | |||
==Notes== | ==Notes== | ||
*All three use native [[:category:Rocs|Rocs]] [[TP]] moves. | |||
**[[Stormwind]]: 15 [[Yalm]] High DMG AoE, Wipes shadows. | |||
**[[Dread Dive]]: 1-hit damage + knockback + [[Stun]]. | |||
**[[Blind Vortex]]: 1-hit damage + blindness. | |||
**[[Giga Scream]]: 3-hit single target. High DMG if all 3 hits land. | |||
**[[Feather Barrier]]: Evasion Boost. | |||
*The Whm and Bard use normal spells for their respective jobs. | |||
*[[Teratornis]] the [[RDM]] will use AoE spells up to [[Thundaga III]], | |||
**[[Teratornis]] will [[Chainspell]] AoE blm spells. | |||
*[[Treasure Hunter]] does affect drop rates. {{verification}} | |||
==Strategy== | |||
*When one of the |[[:category:Rocs|Rocs]] is killed all other Monsters will use their respective [[Two Hour Ability]], [[Argentavis]] the Bard also gains [[Hundred Fists]] via some type of Rage mechanic. | |||
*Recommended kill order is: WHM > RDM > BRD, To avoid [[Benediction]] | |||
*The last of the |[[:category:Rocs|Rocs]] must be killed after the bodies of the other two have completely despawned, otherwise no drops will be awarded. | |||
[[category:HENM]] | [[category:HENM]] | ||
<!-- | |||
{{FFXIMap Markers|mapid=48|mapx=128.29|mapy=161.49|entitytype=Ruinous Rocs|image=Kelenken.png|displayposition=}} | |||
{{FFXIMap Markers|mapid=48|mapx=102.32|mapy=74.26|entitytype=Ruinous Rocs|image=Kelenken.png|displayposition=}} | |||
{{FFXIMap Markers|mapid=48|mapx=96.01|mapy=96.12|entitytype=Ruinous Rocs|image=Kelenken.png|displayposition=}} | |||
--> | |||
Latest revision as of 23:01, 3 October 2025
| Ruinous Rocs | |
|---|---|
| Type: | HENM (Tier I) |
| Zone: | Rolanberry Fields (E-10)/ (J-8)/ (F-10) |
| Entry Item: | Faded Stone |
| Level: | No minimum |
| Members: | 18 |
| Time: | 60 minutes |
Mobs
| Name | Level | Job | Type |
|---|---|---|---|
| Teratornis | 88 | RDM | Roc |
| Argentavis | 88 | BRD | Roc |
| Kelenken | 88 | WHM | Roc |
Possible Rewards
| Zero to One of |
|---|
| Damascus Ingot (0%) |
| Zero to one of |
|---|
| Dilation Ring (0%) |
| Zero to One of |
|---|
| Luftpause Mark (0%) |
| Zero to one of |
|---|
| Trotter Boots (0%) |
| Zero to one of |
|---|
| Rucke's Rung (0%) |
| Zero to one of |
|---|
| Vaulter's Ring (0%) |
| Zero to one of |
|---|
| Protectra V (0%) |

Notes
- All three use native Rocs TP moves.
- Stormwind: 15 Yalm High DMG AoE, Wipes shadows.
- Dread Dive: 1-hit damage + knockback + Stun.
- Blind Vortex: 1-hit damage + blindness.
- Giga Scream: 3-hit single target. High DMG if all 3 hits land.
- Feather Barrier: Evasion Boost.
- The Whm and Bard use normal spells for their respective jobs.
- Teratornis the RDM will use AoE spells up to Thundaga III,
- Teratornis will Chainspell AoE blm spells.
- Treasure Hunter does affect drop rates.

Strategy
- When one of the |Rocs is killed all other Monsters will use their respective Two Hour Ability, Argentavis the Bard also gains Hundred Fists via some type of Rage mechanic.
- Recommended kill order is: WHM > RDM > BRD, To avoid Benediction
- The last of the |Rocs must be killed after the bodies of the other two have completely despawned, otherwise no drops will be awarded.

