Healing the Land: Difference between revisions
From HorizonXI Wiki
mNo edit summary |
No edit summary |
||
| (2 intermediate revisions by 2 users not shown) | |||
| Line 1: | Line 1: | ||
{{Quest Header | |||
{{Quest | |Start = Eperdur | ||
| | |Start Location = {{Location|Northern San d'Oria|M-7}} | ||
| | |Fame =San d'Oria | ||
| | |Fame Level = 4 | ||
| | |Level=10 | ||
| | |Title=Pilgrim to Holla | ||
| | |Repeatable=No | ||
| | |Rewards=[[Teleport-Holla|Scroll of Teleport-Holla]] | ||
|Next=[[Sorcery of the North]] | |||
| | |Description=Spirits of the dead in the Gusgen Mines blow an evil wind upon the land. Take a seal of banishing to a shack in the deepest tunnel within. | ||
}} | }} | ||
| Line 18: | Line 17: | ||
*Speak to [[Eperdur]] on the second floor of the cathedral in [[Northern San d'Oria]]. | *Speak to [[Eperdur]] on the second floor of the cathedral in [[Northern San d'Oria]]. | ||
**He will tell you that there is word of a foul wind coming from the [[Gusgen Mines]] that is blowing on the Crag of Dem in [[Konschtat Highlands]]. The seal that stops the dead from walking is weakening. Eperdur gives you a {{KeyItem}}[[Seal of Banishing]]. | **He will tell you that there is word of a foul wind coming from the [[Gusgen Mines]] that is blowing on the Crag of Dem in [[Konschtat Highlands]]. The seal that stops the dead from walking is weakening. Eperdur gives you a {{KeyItem}}[[Seal of Banishing]]. | ||
*Travel to the [[Gusgen Mines]] and follow the path straight and down some stairs until you get to the first set of three levers. Pull the center one. (You can also take the leftmost lever and hug the left wall, staying to the left all the way to the shed in (G-8) using sneak and invisible as needed.) | *Travel to the [[Gusgen Mines]] and follow the path straight and down some stairs until you get to the first set of three levers. Pull the center one. (You can also take the leftmost lever and hug the left wall, staying to the left all the way to the shed in ({{Location Tooltip|area=Gusgen Mines|map=Map 4|pos=G-8}}) using sneak and invisible as needed.) | ||
**Continue on north ahead and down a second set of stairs until you get to the second set of levers. Pull the west-most lever. | **Continue on north ahead and down a second set of stairs until you get to the second set of levers. Pull the west-most lever. | ||
**Simply hug the left-hand wall until you come to a hole in the ground. Cast [[Invisible]] or use your [[Prism Powder]] BEFORE dropping down the hole - it contains bombs, which aggro sight and magic. Do not forget to cast [[Sneak]] or use a [[Silent Oil]]! The flies down the hole aggro sound. | **Simply hug the left-hand wall until you come to a hole in the ground. Cast [[Invisible]] or use your [[Prism Powder]] BEFORE dropping down the hole - it contains bombs, which aggro sight and magic. Do not forget to cast [[Sneak]] or use a [[Silent Oil]]! The flies down the hole aggro sound. | ||
***Take particular note of a [[NM]] that pops once a day directly beneath the hole: [[Juggler Hecatomb]]. | ***Take particular note of a [[NM]] that pops once a day directly beneath the hole: [[Juggler Hecatomb]]. | ||
**The ??? is behind the shed to the southwest, located at (G-8). Deactivate [[Invisible (Status Effect)|Invisible]] when nothing is looking your way, check the ???, and warp out. | **The [[???]] is behind the shed to the southwest, located at ({{Location Tooltip|area=Gusgen Mines|map=Map 4|pos=G-8}}). Deactivate [[Invisible (Status Effect)|Invisible]] when nothing is looking your way, check the [[???]], and warp out. | ||
***NOTE: There are 2 sets of ??? in this room, pay attention to the location AND Make sure that you get the message: "You have found the location of the seal. You place a {{KeyItem}}[[Seal of Banishing]] on it." After examining the ???, if you re-examine the ???, you will get the message: "A {{KeyItem}}[[Seal of Banishing]] is on this seal. | ***NOTE: There are 2 sets of [[???]] in this room, pay attention to the location AND Make sure that you get the message: "You have found the location of the seal. You place a {{KeyItem}}[[Seal of Banishing]] on it." After examining the [[???]], if you re-examine the [[???]], you will get the message: "A {{KeyItem}}[[Seal of Banishing]] is on this seal.[[???]]. | ||
***Everything in this dungeon detects by sound except for the [[:category:Bombs|bombs]] at the end, which detect by sight and magic. | ***Everything in this dungeon detects by sound except for the [[:category:Bombs|bombs]] at the end, which detect by sight and magic. | ||
***Level 50 and above will not get aggro from normal mobs. | ***Level 50 and above will not get aggro from normal mobs. | ||
| Line 29: | Line 28: | ||
*Note: You must zone before you can be offered follow up quest, [[Sorcery of the North]]. | *Note: You must zone before you can be offered follow up quest, [[Sorcery of the North]]. | ||
Latest revision as of 14:56, 5 February 2026
| Healing the Land | |
|---|---|
| Starting NPC | Eperdur, Northern San d'Oria (M-7) |
| Required Fame | San d'Oria Level 4 |
| Level Restriction: | Level 10 |
| Title | Pilgrim to Holla |
| Repeatable | No |
| Description | Spirits of the dead in the Gusgen Mines blow an evil wind upon the land. Take a seal of banishing to a shack in the deepest tunnel within. |
| Rewards | |
| Scroll of Teleport-Holla | |
| ← Previous Quest | Next Quest → |
|---|---|
| None | Sorcery of the North |


Walkthrough
- Speak to Eperdur on the second floor of the cathedral in Northern San d'Oria.
- He will tell you that there is word of a foul wind coming from the Gusgen Mines that is blowing on the Crag of Dem in Konschtat Highlands. The seal that stops the dead from walking is weakening. Eperdur gives you a
 Seal of Banishing.
- He will tell you that there is word of a foul wind coming from the Gusgen Mines that is blowing on the Crag of Dem in Konschtat Highlands. The seal that stops the dead from walking is weakening. Eperdur gives you a
- Travel to the Gusgen Mines and follow the path straight and down some stairs until you get to the first set of three levers. Pull the center one. (You can also take the leftmost lever and hug the left wall, staying to the left all the way to the shed in (G-8) using sneak and invisible as needed.)
- Continue on north ahead and down a second set of stairs until you get to the second set of levers. Pull the west-most lever.
- Simply hug the left-hand wall until you come to a hole in the ground. Cast Invisible or use your Prism Powder BEFORE dropping down the hole - it contains bombs, which aggro sight and magic. Do not forget to cast Sneak or use a Silent Oil! The flies down the hole aggro sound.
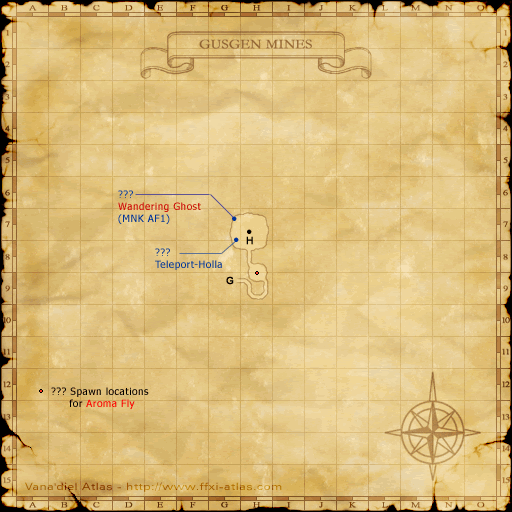
- Take particular note of a NM that pops once a day directly beneath the hole: Juggler Hecatomb.
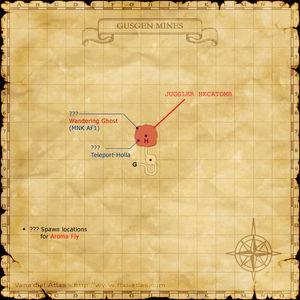
- The ??? is behind the shed to the southwest, located at (G-8). Deactivate Invisible when nothing is looking your way, check the ???, and warp out.
- NOTE: There are 2 sets of ??? in this room, pay attention to the location AND Make sure that you get the message: "You have found the location of the seal. You place a
 Seal of Banishing on it." After examining the ???, if you re-examine the ???, you will get the message: "A
  Seal of Banishing is on this seal.???.
 - Everything in this dungeon detects by sound except for the bombs at the end, which detect by sight and magic.
- Level 50 and above will not get aggro from normal mobs.
- NOTE: There are 2 sets of ??? in this room, pay attention to the location AND Make sure that you get the message: "You have found the location of the seal. You place a
- Return to Eperdur for your reward.
- Note: You must zone before you can be offered follow up quest, Sorcery of the North.


