Chasing Dreams: Difference between revisions
From HorizonXI Wiki
No edit summary Tag: visualeditor |
No edit summary |
||
| Line 1: | Line 1: | ||
{ | {{Quest | ||
|startnpc=[[Rudolfo]]/[[Zoriboh]] - [[Rabao]] F-6/7 | |||
{ | |requirements=[[An Invitation West]] | ||
| | |items=[[Eastern Gem]] x5<br>{{KeyItem}} [[Washu's Flask]]<br>{{KeyItem}} [[Flask of Clam Water]]<br>{{KeyItem}} [[Storeroom Key]] | ||
|title= | |||
|repeatable=No | |||
| | |reward=[[Venerer Ring]]<br>4000 gil | ||
|previous= | |||
| | |next=[[The Search for Goldmane]] | ||
}} | |||
| | |||
| | |||
| | |||
| | |||
| | |||
==Walkthrough== | ==Walkthrough== | ||
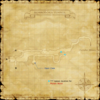
[[Image:Korroloka Tunnel Composite.PNG|thumb|100px|Korroloka Tunnel Composite Map]] | |||
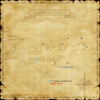
[[Image:KorrolokaTunnel1.png|thumb|100px|Korroloka Tunnel Map 1]] | |||
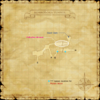
[[Image:KorrolokaTunnel2.png|thumb|100px|Korroloka Tunnel Map 2]] | |||
[[Image:KorrolokaTunnel3.png|thumb|100px|Korroloka Tunnel Map 3]] | |||
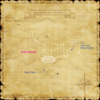
[[Image:KorrolokaTunnel5.png|thumb|100px|Korroloka Tunnel Map 4]] | |||
===Starting Up=== | ===Starting Up=== | ||
*First head to [[Rabao]] and talk to [[Rudolfo]] near the [[Auction House]] (J-7). | *First head to [[Rabao]] and talk to [[Rudolfo]] near the [[Auction House]] (J-7). You will get a cutscene involving a man named [[Chelvadurai]], who is looking for his daughter, [[Sanctia]]. | ||
*Next head over to the oasis and talk to [[Zoriboh]] at F-6/7. You will get a cutscene. He will ask you to go find Sanctia. | *Next head over by the tent close to the oasis and talk to [[Zoriboh]] at (F-6/7). You will get a cutscene. He will ask you to go find [[Sanctia]]. | ||
===Norg=== | ===Norg=== | ||
*Head to [[Norg]]. Go up the stairs and through the | *Head to [[Norg]]. Go up the stairs and through the '''Oaken Door''' on the left and talk to [[Sohyon]] (J-8). You will get a cutscene. | ||
*Then talk to [[Washu]], who is right behind | *Then talk to [[Washu]], who is right behind Sohyon, and receive {{KeyItem}} [[Washu's Flask]]. | ||
===Korroloka=== | ===Korroloka=== | ||
*Next head to [[Korroloka Tunnel]] to fill your flask with water from four Giant Clams. | *Next head to [[Korroloka Tunnel]] to fill your flask with water from four Giant Clams. | ||
*The first Giant Clam can be found at F-10 on Map 1 as you zone into | *The first Giant Clam can be found at F-10 on Map 1 as you zone into Korroloka Tunnel from [[Zeruhn Mines]]. Click on the Giant Clam in this room to partially fill your flask. | ||
*The second Giant Clam can be found at K-6 on Map 3. | *The second Giant Clam can be found at K-6 on Map 3. | ||
**To get there, cross over the bridge at F/G-9, and head west to Tunnel H. This will take you to Map 3. | **To get there, cross over the bridge at F/G-9, and head west to Tunnel H. This will take you to Map 3. | ||
| Line 46: | Line 32: | ||
**Head west to Tunnel F. You will be back on Map 3. | **Head west to Tunnel F. You will be back on Map 3. | ||
**Head north, take the first right and head east until you reach the Giant Clam. Fill your flask again. | **Head north, take the first right and head east until you reach the Giant Clam. Fill your flask again. | ||
*The third Giant Clam can be found at G-11 on Map | *The third Giant Clam can be found at G-11 on Map 5. | ||
**Go back | **Go back the way you came, but this time take Tunnel E. You will be on Map 2. | ||
**Head west to Tunnel D. You will be on Map | **Head west to Tunnel D. You will be on Map 5. | ||
**Just follow the tunnel straight west to the Giant Clam. Fill up your flask. | **Just follow the tunnel straight west to the Giant Clam. Fill up your flask. | ||
*The final Giant Clam can be found at I-10 on Map 2. | *The final Giant Clam can be found at I-10 on Map 2. | ||
**Head back | **Head back the way you came onto Map 2. | ||
**Cross south over the bridge a H/I-8. | **Cross south over the bridge a H/I-8. | ||
**The path will veer west, then south until it reaches a T intersection. | **The path will veer west, then south until it reaches a T intersection. | ||
**Head east to the Giant Clam. Fill your flask up all the way. | **Head east to the Giant Clam. Fill your flask up all the way. | ||
*Your flask will now be full and be changed into the | *Your flask will now be full and be changed into the {{KeyItem}} [[Flask of Clam Water]]. | ||
===Travel Travel Travel=== | ===Travel, Travel, Travel=== | ||
*First, in | *First, in Norg, talk to [[Sohyon]] (J-8). He'll give you a {{KeyItem}} [[Storeroom Key]]. | ||
*Next, while still in | *Next, while still in Norg, talk to [[Gimb]] (H-9) who is near the [[Chocobo Renter]]. | ||
*Then, in [[Port Bastok]] talk to [[Kagetora]] in the Tenshodo Warehouse 2 | *Then, in [[Port Bastok]] talk to [[Kagetora]] (F-6) in the Tenshodo Warehouse 2 on the top floor. | ||
*After talking to him, go downstairs and out the door (on your left)and trade 5 [[Eastern Gem]]s to [[Patient Wheel]] (F-5). Regardless of your answer, you will get a cut scene. | *After talking to him, go downstairs and out the door (on your left) and trade 5 [[Eastern Gem]]s to [[Patient Wheel]] (F-5). Regardless of your answer, you will get a cut scene. | ||
** | **Eastern Gems drop from [[Stream Sahagin]] and [[River Sahagin]] in [[Yuhtunga Jungle]], and from [[Pond Sahagin]], [[Spring Sahagin]], [[Riparian Sahagin]] and [[Lake Sahagin]] in [[Sea Serpent Grotto]], or may be bought at the [[Auction House]] under Materials -> [[Goldsmithing]]. | ||
*Next, in [[Selbina]], talk to the mayor | *Next, in [[Selbina]], talk to the mayor [[Abelard]] at (G-9). | ||
*After that, take the [[Swirling Vortex]] in [[Valkurm Dunes]] in a cave at I-9 to [[Lufaise Meadows]]. | *After that, take the [[Swirling Vortex]] in [[Valkurm Dunes]] in a cave at I-9 to [[Lufaise Meadows]]. | ||
*You will get a | *You will get a cutscene when you zone into Lufaise Meadows. | ||
*Finally, go back to [[Rabao]]. Talk to [[Zoriboh]] for your reward. | *Finally, go back to [[Rabao]]. Talk to [[Zoriboh]] for your reward. | ||
{{Quest/Description | |||
|client=Zoriboh (Near the oasis, Rabao) | |||
|summary=A young cargo hauler named [[Sanctia]] has suddenly left [[Rabao]] and [[Zoriboh]] wants you to find her. According to [[Zoriboh]], she has probably headed for [[Norg]] to board a ship bound for the Tavnazian Marquisate... | |||
}} | |||
[[Category:Quests]] [[Category:Outlands Quests]] | [[Category:Quests]] [[Category:Outlands Quests]] | ||
Revision as of 05:42, 7 February 2023
| Chasing Dreams | |
|---|---|
| Starting NPC | Rudolfo/Zoriboh - Rabao F-6/7 |
| Required Fame | None |
| Items Needed | Eastern Gem x5 |
| Additional Requirements | An Invitation West |
| Title | None |
| Repeatable | No |
| Rewards | |
| Venerer Ring 4000 gil | |
| ← Previous Quest | Next Quest → |
|---|---|
| None | The Search for Goldmane |
Walkthrough


Starting Up
- First head to Rabao and talk to Rudolfo near the Auction House (J-7). You will get a cutscene involving a man named Chelvadurai, who is looking for his daughter, Sanctia.
- Next head over by the tent close to the oasis and talk to Zoriboh at (F-6/7). You will get a cutscene. He will ask you to go find Sanctia.
Norg
- Head to Norg. Go up the stairs and through the Oaken Door on the left and talk to Sohyon (J-8). You will get a cutscene.
- Then talk to Washu, who is right behind Sohyon, and receive
 Washu's Flask.
Korroloka
- Next head to Korroloka Tunnel to fill your flask with water from four Giant Clams.
- The first Giant Clam can be found at F-10 on Map 1 as you zone into Korroloka Tunnel from Zeruhn Mines. Click on the Giant Clam in this room to partially fill your flask.
- The second Giant Clam can be found at K-6 on Map 3.
- To get there, cross over the bridge at F/G-9, and head west to Tunnel H. This will take you to Map 3.
- Head west to Tunnel G. You will be on Map 2.
- Head west to Tunnel F. You will be back on Map 3.
- Head north, take the first right and head east until you reach the Giant Clam. Fill your flask again.
- The third Giant Clam can be found at G-11 on Map 5.
- Go back the way you came, but this time take Tunnel E. You will be on Map 2.
- Head west to Tunnel D. You will be on Map 5.
- Just follow the tunnel straight west to the Giant Clam. Fill up your flask.
- The final Giant Clam can be found at I-10 on Map 2.
- Head back the way you came onto Map 2.
- Cross south over the bridge a H/I-8.
- The path will veer west, then south until it reaches a T intersection.
- Head east to the Giant Clam. Fill your flask up all the way.
- Your flask will now be full and be changed into the
 Flask of Clam Water.
Travel, Travel, Travel
- First, in Norg, talk to Sohyon (J-8). He'll give you a
 Storeroom Key.
 - Next, while still in Norg, talk to Gimb (H-9) who is near the Chocobo Renter.
- Then, in Port Bastok talk to Kagetora (F-6) in the Tenshodo Warehouse 2 on the top floor.
- After talking to him, go downstairs and out the door (on your left) and trade 5 Eastern Gems to Patient Wheel (F-5). Regardless of your answer, you will get a cut scene.
- Eastern Gems drop from Stream Sahagin and River Sahagin in Yuhtunga Jungle, and from Pond Sahagin, Spring Sahagin, Riparian Sahagin and Lake Sahagin in Sea Serpent Grotto, or may be bought at the Auction House under Materials -> Goldsmithing.
- Next, in Selbina, talk to the mayor Abelard at (G-9).
- After that, take the Swirling Vortex in Valkurm Dunes in a cave at I-9 to Lufaise Meadows.
- You will get a cutscene when you zone into Lufaise Meadows.
- Finally, go back to Rabao. Talk to Zoriboh for your reward.
