
Zeruhn Mines: Difference between revisions
From HorizonXI Wiki
No edit summary |
mNo edit summary |
||
| Line 1: | Line 1: | ||
{| | {{Zone Infobox | ||
| ToC = | |||
[[#Involved in Quests/Missions|Quests/Missions]] • [[#fishing|Fishing]] • [[#mining|Mining]] • [[#NPCs Found Here|NPCs]] • [[#Regular Monsters Found Here|Regular Monsters]] | |||
| Description = These mines were recently dug out of the large rock formation that lies in the [[Bastok Mines|Mines District of Bastok]] when a vein of [[Darksteel Ore]] was discovered within. Zeruhn has since become a reliable source of iron and a small supplier of zinc, silver, and darksteel, and because of its location within the walls of [[Bastok]], Zeruhn Mines is safer for miners than the nearby [[Palborough Mines]]. | |||
[[File:Zeruhn-mines-pic.jpg|300px|center]] | |||
| Connections = | |||
*[[Bastok Mines]]: {{Location Tooltip|area=Zeruhn Mines|pos=I-7}} | |||
*[[Korroloka Tunnel]]: {{Location Tooltip|area=Zeruhn Mines|pos=F-7}} | |||
*[[Palborough Mines]]: {{Location Tooltip|area=Zeruhn Mines|pos=H-6}} (exit only) | |||
| Stats = {{Tractor}} | |||
| Region = Gustaberg | |||
| Type = Dungeon | |||
| Maps = {{Zone Tooltip Map|Map 1}} | |||
| Map Acquisition = [[Map of the Zeruhn Mines|Purchase]] | |||
| Weather = None | |||
| Restrictions = None | |||
| Requirements = None | |||
| Expansion = Final Fantasy XI | |||
| Monstrosity = | |||
| BGM = None | |||
| Notes = You cannot go past the gate at ({{Location Tooltip|area=Zeruhn Mines|pos=H-7}}) without the [[Rise of the Zilart]] expansion pack installed and registered. | |||
}} | |||
== Involved in [[:Category:Quests|Quests]]/[[:Category:Missions|Missions]] == | |||
{{TableQuestHeader}} | |||
{{TableQuestLine |Name= Blade of Darkness| Type= Job: [[Dark Knight]]| Starter= [[Gumbah]]| Zone= [[Bastok Mines]]| Coordinates= {{Location Tooltip|area=Bastok Mines|pos=J-7}}}} | |||
{{TableQuestLine |Name= Groceries| Type= General| Starter= [[Tami]]| Zone= [[Bastok Mines]]| Coordinates= {{Location Tooltip|area=Bastok Mines|pos=J-8}}}} | |||
{{TableQuestLine |Name= Minesweeper| Type= General| Starter= [[Gerbaum]]| Zone= [[Bastok Mines]]| Coordinates= {{Location Tooltip|area=Bastok Mines|pos=F-8}}}} | |||
{{TableQuestLine |Name= The Darksmith| Type= General| Starter= [[Mighty Fist]]| Zone= [[Metalworks]]| Coordinates= {{Location Tooltip|area=Metalworks|pos=G-9}}}} | |||
{{TableMissionHeader}} | |||
{{TableMissionLine |Name=The Zeruhn Report|Mission 1-1: The Zeruhn Report| Nation= [[Bastok Missions|Bastok]]| Starter= [[Bastok Gate Guard]]| Zone= [[Bastok]]| Coordinates= }} | |||
{{TableMissionLine |Name=Return of the Talekeeper|Mission 6-1: Return of the Talekeeper| Nation= [[Bastok Missions|Bastok]]| Starter= [[Bastok Gate Guard]]| Zone= [[Bastok]]| Coordinates= }} | |||
{{TableMissionLine |Name=Enter the Talekeeper|Mission 8-2: Enter the Talekeeper| Nation= [[Bastok Missions|Bastok]]| Starter= [[Bastok Gate Guard]]| Zone= [[Bastok]]| Coordinates= }} | |||
{{TableQuestFooter}} | |||
==Other Information== | |||
{| border="0" width="100%" cellpadding="5" cellspacing="2" | |||
{{Zone Section Header|mining}} | |||
{{:{{PAGENAME}}/Mining}} | |||
|BGCOLOR="#DFDFDF" rowspan="1" width="50%" valign="top"| | |||
{{Zone Section Header|fishing}} | |||
{{:{{PAGENAME}}/Fishing}} | |||
==Treasure Casket== | |||
{| border="0" width="100%" cellpadding="0" cellspacing="1" | |||
|- | |||
! style="background:#A58D63;" colspan="2" |Brown Casket | |||
! style="background:#63C4DC;" colspan="2" |Blue Casket | |||
|- | |||
! style="background:#A58D63;" width="25%"|Item | |||
! style="background:#A58D63;" width="25%"|Abundance | |||
! style="background:#63C4DC;" width="25%"|Item | |||
! style="background:#63C4DC;" width="25%"|Abundance | |||
|- | |||
| style="background:#ECD2A5; padding-left:1em;" | [[Prouesse Ring]] {{Rare|nc}}{{Exclusive|nc}} | |||
| style="background:#ECD2A5; padding-left:1em;" | {{Abundance| 02|274}} | |||
| style="background:#BBE6E6; padding-left:1em;" | [[Catholicon]] | |||
| style="background:#BBE6E6; padding-left:1em;" | {{Abundance|5|33}} | |||
|- | |||
| style="background:#ECD2A5; padding-left:1em;" | [[Aluminum Ingot]] | |||
| style="background:#ECD2A5; padding-left:1em;" | {{Abundance| 12|274}} | |||
| style="background:#BBE6E6; padding-left:1em;" | [[Fool's Tonic]] | |||
| style="background:#BBE6E6; padding-left:1em;" | {{Abundance|2|33}} | |||
|- | |||
| style="background:#ECD2A5; padding-left:1em;" | [[Antlion Quiver]] | |||
| style="background:#ECD2A5; padding-left:1em;" | {{Abundance| 05|274}} | |||
| style="background:#BBE6E6; padding-left:1em;" | [[Fanatic's Tonic]] | |||
| style="background:#BBE6E6; padding-left:1em;" | {{Abundance|2|33}} | |||
|- | |||
| style="background:#ECD2A5; padding-left:1em;" | [[Barrage Turbine]] | |||
| style="background:#ECD2A5; padding-left:1em;" | {{Abundance| 01|274}} | |||
| style="background:#BBE6E6; padding-left:1em;" | [[Ascetic's Tonic]] | |||
| style="background:#BBE6E6; padding-left:1em;" | {{Abundance|1|33}} | |||
|- | |||
| style="background:#ECD2A5; padding-left:1em;" | [[Barrier Module]] | |||
| style="background:#ECD2A5; padding-left:1em;" | {{Abundance| 03|274}} | |||
| style="background:#BBE6E6; padding-left:1em;" | [[Stalwart's Tonic]] | |||
| style="background:#BBE6E6; padding-left:1em;" | {{Abundance|3|33}} | |||
|- | |||
| style="background:#ECD2A5; padding-left:1em;" | [[Beastcoin]] | |||
| style="background:#ECD2A5; padding-left:1em;" | {{Abundance| 01|274}} | |||
| style="background:#BBE6E6; padding-left:1em;" | [[Champion's Tonic]] | |||
| style="background:#BBE6E6; padding-left:1em;" | {{Abundance|1|33}} | |||
|- | |||
| style="background:#ECD2A5; padding-left:1em;" | [[Beehive Chip]] | |||
| style="background:#ECD2A5; padding-left:1em;" | {{Abundance| 02|274}} | |||
| style="background:#BBE6E6; padding-left:1em;" | [[Cleric's Drink]] | |||
| style="background:#BBE6E6; padding-left:1em;" | {{Abundance|2|33}} | |||
|- | |||
| style="background:#ECD2A5; padding-left:1em;" | [[Black Pepper]] | |||
| style="background:#ECD2A5; padding-left:1em;" | {{Abundance| 03|274}} | |||
| style="background:#BBE6E6; padding-left:1em;" | [[Monarch's Drink]] | |||
| style="background:#BBE6E6; padding-left:1em;" | {{Abundance|2|33}} | |||
|- | |||
| style="background:#ECD2A5; padding-left:1em;" | [[Bomb Arm]] | |||
| style="background:#ECD2A5; padding-left:1em;" | {{Abundance| 02|274}} | |||
| style="background:#BBE6E6; padding-left:1em;" | [[Vicar's Drink]] | |||
| style="background:#BBE6E6; padding-left:1em;" | {{Abundance|1|33}} | |||
|- | |||
| style="background:#ECD2A5; padding-left:1em;" | [[Bone Chip]] | |||
| style="background:#ECD2A5; padding-left:1em;" | {{Abundance| 03|274}} | |||
| style="background:#BBE6E6; padding-left:1em;" | [[Braver's Drink]] | |||
| style="background:#BBE6E6; padding-left:1em;" | {{Abundance|2|33}} | |||
|- | |- | ||
| style="background:#ECD2A5; padding-left:1em;" | [[Cobalt Cell]] | |||
| style="background:#ECD2A5; padding-left:1em;" | {{Abundance| 04|274}} | |||
| style="background:#BBE6E6; padding-left:1em;" | [[Champion's Gambir]] | |||
| style="background:#BBE6E6; padding-left:1em;" | {{Abundance|1|33}} | |||
|- | |- | ||
| style="background:#ECD2A5; padding-left:1em;" | [[Cotton Thread]] | |||
| style="background:#ECD2A5; padding-left:1em;" | {{Abundance| 07|274}} | |||
| style="background:#BBE6E6; padding-left:1em;" | [[Healing Salve I]] | |||
| style="background:#BBE6E6; padding-left:1em;" | {{Abundance|2|33}} | |||
|- | |- | ||
| style="background:#ECD2A5; padding-left:1em;" | [[Disruptor]] | |||
| style="background:#ECD2A5; padding-left:1em;" | {{Abundance| 01|274}} | |||
| style="background:#BBE6E6; padding-left:1em;" | [[Healing Salve II]] | |||
| style="background:#BBE6E6; padding-left:1em;" | {{Abundance|2|33}} | |||
|- | |||
| style="background:#ECD2A5; padding-left:1em;" | [[Dogwood Log]] | |||
| style="background:#ECD2A5; padding-left:1em;" | {{Abundance| 03|274}} | |||
| style="background:#BBE6E6; padding-left:1em;" | [[Healing Mist]] | |||
| style="background:#BBE6E6; padding-left:1em;" | {{Abundance|1|33}} | |||
|- | |||
| style="background:#ECD2A5; padding-left:1em;" | [[Dragon Ring]] | |||
| style="background:#ECD2A5; padding-left:1em;" | {{Abundance| 03|274}} | |||
| style="background:#BBE6E6; padding-left:1em;" | [[Healing Powder]] | |||
| style="background:#BBE6E6; padding-left:1em;" | {{Abundance|2|33}} | |||
|- | |||
| style="background:#ECD2A5; padding-left:1em;" | [[Elixir]] | |||
| style="background:#ECD2A5; padding-left:1em;" | {{Abundance| 13|274}} | |||
| style="background:#BBE6E6; padding-left:1em;" | [[Mana Mist]] | |||
| style="background:#BBE6E6; padding-left:1em;" | {{Abundance| 02|33}} | |||
|- | |||
| style="background:#ECD2A5; padding-left:1em;" | [[Ether +1]] | |||
| style="background:#ECD2A5; padding-left:1em;" | {{Abundance| 06|274}} | |||
| style="background:#BBE6E6; padding-left:1em;" | [[Mana Powder]] | |||
| style="background:#BBE6E6; padding-left:1em;" | {{Abundance|2|33}} | |||
|- | |||
| style="background:#ECD2A5; padding-left:1em;" | [[Ether +2]] | |||
| style="background:#ECD2A5; padding-left:1em;" | {{Abundance| 13|274}} | |||
| style="background:#BBE6E6; padding-left:1em;" | [[Lucid Wings I]] | |||
| style="background:#BBE6E6; padding-left:1em;" | {{Abundance|3|33}} | |||
|- | |||
| style="background:#ECD2A5; padding-left:1em;" | [[Galvanizer]] | |||
| style="background:#ECD2A5; padding-left:1em;" | {{Abundance| 05|274}} | |||
| style="background:#BBE6E6; padding-left:1em;" | [[Daedalus Wing]] | |||
| style="background:#BBE6E6; padding-left:1em;" | {{Abundance|1|33}} | |||
|- | |||
| style="background:#ECD2A5; padding-left:1em;" | [[Giant Femur]] | |||
| style="background:#ECD2A5; padding-left:1em;" | {{Abundance| 06|274}} | |||
| style="background:#BBE6E6; padding-left:1em;" | [[Lucid Potion I]] | |||
| style="background:#BBE6E6; padding-left:1em;" | {{Abundance|3|33}} | |||
|- | |||
| style="background:#ECD2A5; padding-left:1em;" | [[Giant Stinger]] | |||
| style="background:#ECD2A5; padding-left:1em;" | {{Abundance| 07|274}} | |||
| style="background:#BBE6E6; padding-left:1em;" | [[Lucid Potion II]] | |||
| style="background:#BBE6E6; padding-left:1em;" | {{Abundance|2|33}} | |||
|- | |||
| style="background:#ECD2A5; padding-left:1em;" | [[Gold Nugget]] | |||
| style="background:#ECD2A5; padding-left:1em;" | {{Abundance| 07|274}} | |||
| style="background:#BBE6E6; padding-left:1em;" | [[Lucid Potion III]] | |||
| style="background:#BBE6E6; padding-left:1em;" | {{Abundance|3|33}} | |||
|- | |||
| style="background:#ECD2A5; padding-left:1em;" | [[Heat Capacitor]] | |||
| style="background:#ECD2A5; padding-left:1em;" | {{Abundance| 03|274}} | |||
| style="background:#BBE6E6; padding-left:1em;" | [[Lucid Ether I]] | |||
| style="background:#BBE6E6; padding-left:1em;" | {{Abundance|4|33}} | |||
|- | |||
| style="background:#ECD2A5; padding-left:1em;" | [[Hi-Ether +1]] | |||
| style="background:#ECD2A5; padding-left:1em;" | {{Abundance| 12|274}} | |||
| style="background:#BBE6E6; padding-left:1em;" | [[Lucid Ether II]] | |||
| style="background:#BBE6E6; padding-left:1em;" | {{Abundance|1|33}} | |||
|- | |||
| style="background:#ECD2A5; padding-left:1em;" | [[Hi-Ether +3]] | |||
| style="background:#ECD2A5; padding-left:1em;" | {{Abundance| 02|274}} | |||
| style="background:#BBE6E6; padding-left:1em;" | [[Lucid Ether III]] | |||
| style="background:#BBE6E6; padding-left:1em;" | {{Abundance|1|33}} | |||
|- | |||
| style="background:#ECD2A5; padding-left:1em;" | [[Hi-Potion +1]] | |||
| style="background:#ECD2A5; padding-left:1em;" | {{Abundance| 02|274}} | |||
| style="background:#BBE6E6; padding-left:1em;" | [[Stalwart's Gambir]] | |||
| style="background:#BBE6E6; padding-left:1em;" | {{Abundance|1|33}} | |||
|- | |||
| style="background:#ECD2A5; padding-left:1em;" | [[Hi-Potion +3]] | |||
| style="background:#ECD2A5; padding-left:1em;" | {{Abundance| 01|274}} | |||
| style="background:#BBE6E6; padding-left:1em;" | [[Dusty Elixir]] | |||
| style="background:#BBE6E6; padding-left:1em;" | {{Abundance|2|33}} | |||
|- | |||
| style="background:#ECD2A5; padding-left:1em;" | [[Holly Lumber]] | |||
| style="background:#ECD2A5; padding-left:1em;" | {{Abundance| 11|274}} | |||
| style="background:#BBE6E6; padding-left:1em;" | [[Clear Salve I]] | |||
| style="background:#BBE6E6; padding-left:1em;" | {{Abundance|1|33}} | |||
|- | |||
| style="background:#ECD2A5; padding-left:1em;" | [[Honey]] | |||
| style="background:#ECD2A5; padding-left:1em;" | {{Abundance| 07|274}} | |||
| style="background:#BBE6E6; padding-left:1em;" | [[Gnostic's Drink]] | |||
| style="background:#BBE6E6; padding-left:1em;" | {{Abundance|1|33}} | |||
|- | |||
| style="background:#ECD2A5; padding-left:1em;" | [[Jade Cell]] | |||
| style="background:#ECD2A5; padding-left:1em;" | {{Abundance| 05|274}} | |||
| style="background:#BBE6E6; padding-left:1em;" | <!-- Item Name --> | |||
| style="background:#BBE6E6; padding-left:1em;" | <!-- Abundance --> | |||
|- | |||
| style="background:#ECD2A5; padding-left:1em;" | [[Lizard Skin]] | |||
| style="background:#ECD2A5; padding-left:1em;" | {{Abundance| 08|274}} | |||
| style="background:#BBE6E6; padding-left:1em;" | <!-- Item Name --> | |||
| style="background:#BBE6E6; padding-left:1em;" | <!-- Abundance --> | |||
|- | |||
| style="background:#ECD2A5; padding-left:1em;" | [[Percolator]] | |||
| style="background:#ECD2A5; padding-left:1em;" | {{Abundance| 01|274}} | |||
| style="background:#BBE6E6; padding-left:1em;" | <!-- Item Name --> | |||
| style="background:#BBE6E6; padding-left:1em;" | <!-- Abundance --> | |||
|- | |||
| style="background:#ECD2A5; padding-left:1em;" | [[Potion +2]] | |||
| style="background:#ECD2A5; padding-left:1em;" | {{Abundance| 12|274}} | |||
| style="background:#BBE6E6; padding-left:1em;" | <!-- Item Name --> | |||
| style="background:#BBE6E6; padding-left:1em;" | <!-- Abundance --> | |||
|- | |||
| style="background:#ECD2A5; padding-left:1em;" | [[Potion +3]] | |||
| style="background:#ECD2A5; padding-left:1em;" | {{Abundance| 12|274}} | |||
| style="background:#BBE6E6; padding-left:1em;" | <!-- Item Name --> | |||
| style="background:#BBE6E6; padding-left:1em;" | <!-- Abundance --> | |||
|- | |||
| style="background:#ECD2A5; padding-left:1em;" | [[Power Cooler]] | |||
| style="background:#ECD2A5; padding-left:1em;" | {{Abundance| 01|274}} | |||
| style="background:#BBE6E6; padding-left:1em;" | <!-- Item Name --> | |||
| style="background:#BBE6E6; padding-left:1em;" | <!-- Abundance --> | |||
|- | |||
| style="background:#ECD2A5; padding-left:1em;" | [[Pro-Ether +1]] | |||
| style="background:#ECD2A5; padding-left:1em;" | {{Abundance| 13|274}} | |||
| style="background:#BBE6E6; padding-left:1em;" | <!-- Item Name --> | |||
| style="background:#BBE6E6; padding-left:1em;" | <!-- Abundance --> | |||
|- | |||
| style="background:#ECD2A5; padding-left:1em;" | [[Pro-Ether +3]] | |||
| style="background:#ECD2A5; padding-left:1em;" | {{Abundance| 11|274}} | |||
| style="background:#BBE6E6; padding-left:1em;" | <!-- Item Name --> | |||
| style="background:#BBE6E6; padding-left:1em;" | <!-- Abundance --> | |||
|- | |||
| style="background:#ECD2A5; padding-left:1em;" | [[Red Moko Grass]] | |||
| style="background:#ECD2A5; padding-left:1em;" | {{Abundance| 01|274}} | |||
| style="background:#BBE6E6; padding-left:1em;" | <!-- Item Name --> | |||
| style="background:#BBE6E6; padding-left:1em;" | <!-- Abundance --> | |||
|- | |||
| style="background:#ECD2A5; padding-left:1em;" | [[Rubicund Cell]] | |||
| style="background:#ECD2A5; padding-left:1em;" | {{Abundance| 05|274}} | |||
| style="background:#BBE6E6; padding-left:1em;" | <!-- Item Name --> | |||
| style="background:#BBE6E6; padding-left:1em;" | <!-- Abundance --> | |||
|- | |||
| style="background:#ECD2A5; padding-left:1em;" | [[Sheepskin]] | |||
| style="background:#ECD2A5; padding-left:1em;" | {{Abundance| 07|274}} | |||
| style="background:#BBE6E6; padding-left:1em;" | <!-- Item Name --> | |||
| style="background:#BBE6E6; padding-left:1em;" | <!-- Abundance --> | |||
|- | |||
| style="background:#ECD2A5; padding-left:1em;" | [[Silver Beastcoin]] | |||
| style="background:#ECD2A5; padding-left:1em;" | {{Abundance| 02|274}} | |||
| style="background:#BBE6E6; padding-left:1em;" | <!-- Item Name --> | |||
| style="background:#BBE6E6; padding-left:1em;" | <!-- Abundance --> | |||
|- | |||
| style="background:#ECD2A5; padding-left:1em;" | [[Skull Locust]] | |||
| style="background:#ECD2A5; padding-left:1em;" | {{Abundance| 01|274}} | |||
| style="background:#BBE6E6; padding-left:1em;" | <!-- Item Name --> | |||
| style="background:#BBE6E6; padding-left:1em;" | <!-- Abundance --> | |||
|- | |||
| style="background:#ECD2A5; padding-left:1em;" | [[Tarutaru Sash]] | |||
| style="background:#ECD2A5; padding-left:1em;" | {{Abundance| 01|274}} | |||
| style="background:#BBE6E6; padding-left:1em;" | <!-- Item Name --> | |||
| style="background:#BBE6E6; padding-left:1em;" | <!-- Abundance --> | |||
|- | |||
| style="background:#ECD2A5; padding-left:1em;" | [[Vermihumus]] | |||
| style="background:#ECD2A5; padding-left:1em;" | {{Abundance| 03|274}} | |||
| style="background:#BBE6E6; padding-left:1em;" | <!-- Item Name --> | |||
| style="background:#BBE6E6; padding-left:1em;" | <!-- Abundance --> | |||
|- | |||
| style="background:#ECD2A5; padding-left:1em;" | [[Vivi-Valve]] | |||
| style="background:#ECD2A5; padding-left:1em;" | {{Abundance| 05|274}} | |||
| style="background:#BBE6E6; padding-left:1em;" | <!-- Item Name --> | |||
| style="background:#BBE6E6; padding-left:1em;" | <!-- Abundance --> | |||
|- | |||
| style="background:#ECD2A5; padding-left:1em;" | [[Voiddust]] | |||
| style="background:#ECD2A5; padding-left:1em;" | {{Abundance| 08|274}} | |||
| style="background:#BBE6E6; padding-left:1em;" | <!-- Item Name --> | |||
| style="background:#BBE6E6; padding-left:1em;" | <!-- Abundance --> | |||
|- | |||
| style="background:#ECD2A5; padding-left:1em;" | [[War Beret]] | |||
| style="background:#ECD2A5; padding-left:1em;" | {{Abundance| 01|274}} | |||
| style="background:#BBE6E6; padding-left:1em;" | <!-- Item Name --> | |||
| style="background:#BBE6E6; padding-left:1em;" | <!-- Abundance --> | |||
|- | |||
| style="background:#ECD2A5; padding-left:1em;" | [[War Boots]] | |||
| style="background:#ECD2A5; padding-left:1em;" | {{Abundance| 01|274}} | |||
| style="background:#BBE6E6; padding-left:1em;" | <!-- Item Name --> | |||
| style="background:#BBE6E6; padding-left:1em;" | <!-- Abundance --> | |||
|- | |||
| style="background:#ECD2A5; padding-left:1em;" | [[War Brais]] | |||
| style="background:#ECD2A5; padding-left:1em;" | {{Abundance| 02|274}} | |||
| style="background:#BBE6E6; padding-left:1em;" | <!-- Item Name --> | |||
| style="background:#BBE6E6; padding-left:1em;" | <!-- Abundance --> | |||
|- | |||
| style="background:#ECD2A5; padding-left:1em;" | [[War Gloves]] | |||
| style="background:#ECD2A5; padding-left:1em;" | {{Abundance| 03|274}} | |||
| style="background:#BBE6E6; padding-left:1em;" | <!-- Item Name --> | |||
| style="background:#BBE6E6; padding-left:1em;" | <!-- Abundance --> | |||
|- | |||
| style="background:#ECD2A5; padding-left:1em;" | [[Xanthous Cell]] | |||
| style="background:#ECD2A5; padding-left:1em;" | {{Abundance| 06|274}} | |||
| style="background:#BBE6E6; padding-left:1em;" | <!-- Item Name --> | |||
| style="background:#BBE6E6; padding-left:1em;" | <!-- Abundance --> | |||
|- | |||
| style="background:#ECD2A5; padding-left:1em;" | [[X-Potion +1]] | |||
| style="background:#ECD2A5; padding-left:1em;" | {{Abundance| 13|274}} | |||
| style="background:#BBE6E6; padding-left:1em;" | <!-- Item Name --> | |||
| style="background:#BBE6E6; padding-left:1em;" | <!-- Abundance --> | |||
|- | |||
| style="background:#ECD2A5; padding-left:1em;" | [[X-Potion +3]] | |||
| style="background:#ECD2A5; padding-left:1em;" | {{Abundance| 11|274}} | |||
| style="background:#BBE6E6; padding-left:1em;" | <!-- Item Name --> | |||
| style="background:#BBE6E6; padding-left:1em;" | <!-- Abundance --> | |||
|- | |- | ||
|} | |} | ||
{| | ==[[:Category:NPCs|NPCs]] Found Here== | ||
|- | {{TableNPCHeader}} | ||
|} | {{TableNPCLine | Name= [[Alaric]]| Coordinates= {{Location Tooltip|area=Zeruhn Mines|pos=I-6}} | Type= }} | ||
{{TableNPCLine | Name= [[Balgamirob]]| Coordinates= {{Location Tooltip|area=Zeruhn Mines|pos=K-9}} | Type= }} | |||
{{TableNPCLine | Name= [[Dodoi]]| Coordinates= {{Location Tooltip|area=Zeruhn Mines|pos=I-11}} | Type= }} | |||
{{TableNPCLine | Name= [[Drake Fang]]| Coordinates= {{Location Tooltip|area=Zeruhn Mines|pos=H-6}} | Type= Mission NPC}} | |||
{{TableNPCLine | Name= [[Gavergo]]| Coordinates= {{Location Tooltip|area=Zeruhn Mines|pos=H-7}} | Type= }} | |||
{{TableNPCLine | Name= [[Gildge]]| Coordinates= {{Location Tooltip|area=Zeruhn Mines|pos=H-10}} | Type= }} | |||
{{TableNPCLine | Name= [[Lasthenes]]| Coordinates= {{Location Tooltip|area=Zeruhn Mines|pos=H-7}}| Type=Sentry }} | |||
{{TableNPCLine | Name= [[Makarim]]| Coordinates= {{Location Tooltip|area=Zeruhn Mines|pos=H-11}}| Type= Mission NPC}} | |||
{{TableNPCLine | Name= [[Rasmus]]| Coordinates= {{Location Tooltip|area=Zeruhn Mines|pos=I-6}} | Type= }} | |||
{{TableNPCLine | Name= [[Ormr (NPC)|Ormr]]| Coordinates= {{Location Tooltip|area=Zeruhn Mines|pos=H-10}} | Type= }} | |||
{{TableNPCLine | Name= [[Smoke Breath]]| Coordinates= {{Location Tooltip|area=Zeruhn Mines|pos=I-9}} | Type= }} | |||
{{TableNPCLine | Name= [[Subodh]]| Coordinates= {{Location Tooltip|area=Zeruhn Mines|pos=I-9}} | Type= }} | |||
{{TableNPCLine | Name= [[Vorzill]]| Coordinates= {{Location Tooltip|area=Zeruhn Mines|pos=I-6}} | Type= }} | |||
{{TableNPCLine | Name= [[Zelman]]| Coordinates= {{Location Tooltip|area=Zeruhn Mines|pos=I-8}} | Type=Quest NPC }} | |||
{{TableNPCFooter}} | |||
==[[:Category:Bestiary|Regular Monsters]] Found Here== | |||
{{TableMobHeader-Regular}} | |||
{{TableMobLine-Regular | Name= Burrower Worm| Spawn= | Lvl= 75-79| Drop= [[Flint Stone]]<br>[[Silver Ore]]<br>[[Zeruhn Soot]]<br>[[Zinc Ore]]| Steal= | Family= Worms| NumSpawns= ??| Note= H}} | |||
{{TableMobLine-Regular | Name= Colliery Bat| Spawn= | Lvl= 75-80| Drop= [[Bat Wing]]<br>[[Zeruhn Soot]]| Steal= [[Bat Wing]] ([[Despoil]]])<br>[[Beastman Blood]] ([[Despoil]])| Family= Giant Bats| NumSpawns= ??| Note= H}} | |||
{{TableMobLine-Regular | Name= Ding Bats| Spawn= | Lvl= 01-03| Drop= [[Bat Wing]] <br>[[Zeruhn Soot]]| Steal= | Family= Bat Trios| NumSpawns= 6| Note= H}} | |||
{{TableMobLine-Regular | Name= River Crab| Spawn= | Lvl= 02-04| Drop= [[Rock Salt]]<br>[[Zeruhn Soot]]| Steal= [[Rock Salt]]| Family= Crabs| NumSpawns= 4| Note= H}} | |||
{{TableMobLine-Regular | Name= Soot Crab| Spawn= | Lvl= 75-78| Drop= [[Rock Salt]]<br>[[Zeruhn Soot]]| Steal= | Family= Crabs| NumSpawns= 5| Note= H}} | |||
{{TableMobLine-Regular | Name= Veindigger Leech| Spawn= | Lvl= 75-80| Drop= [[Zeruhn Soot]]| Steal= | Family= Leeches| NumSpawns= 4| Note= L, H, Sc}} | |||
{{TableMobFooter-Regular}} | |||
Revision as of 20:41, 13 August 2023
Description
These mines were recently dug out of the large rock formation that lies in the Mines District of Bastok when a vein of Darksteel Ore was discovered within. Zeruhn has since become a reliable source of iron and a small supplier of zinc, silver, and darksteel, and because of its location within the walls of Bastok, Zeruhn Mines is safer for miners than the nearby Palborough Mines.
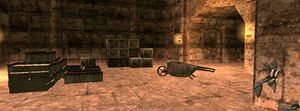

Table of Contents
Connections
- Bastok Mines: I-7
- Korroloka Tunnel: F-7
- Palborough Mines: H-6 (exit only)

Interactive Map
| Zone Information | |||
|---|---|---|---|
| Area Name | Zeruhn Mines | ||
| Type | Dungeon | ||
| Maps | |||
| Map Acquisition | Purchase | ||
| Miscellaneous | |||
| Hobbies |
| ||
| Weather | None | ||
| Region | Gustaberg | ||
| Expansion | Final Fantasy XI | ||
| Requirements | None | ||
| Restrictions | None | ||
| Background music | None | ||
| Notes | You cannot go past the gate at (H-7) without the Rise of the Zilart expansion pack installed and registered. | ||
Weather Forecast
| VanaDays from Today | Normal (50%) | Common (35%) | Rare (15%) |
|---|---|---|---|
Involved in Quests/Missions
| Quest | Type | Starter | Location |
|---|---|---|---|
| Blade of Darkness | Job: Dark Knight | Gumbah | Bastok Mines ([[Bastok Mines/Maps|J-7]] |
| Groceries | General | Tami | Bastok Mines ([[Bastok Mines/Maps|J-8]] |
| Minesweeper | General | Gerbaum | Bastok Mines ([[Bastok Mines/Maps|F-8]] |
| The Darksmith | General | Mighty Fist | Metalworks ([[Metalworks/Maps|G-9]] |
| Mission | Nation | Starter | Location |
| The Zeruhn Report | Bastok | Bastok Gate Guard | Bastok |
| Return of the Talekeeper | Bastok | Bastok Gate Guard | Bastok |
| Enter the Talekeeper | Bastok | Bastok Gate Guard | Bastok |


Other Information
| Item | Abundance |
|---|---|
| Iron Ore | Very Common(26.1%) |
| Pebble | Common(19.9%) |
| Copper Ore | Common(19.4%) |
| Zinc Ore | Uncommon(14.9%) |
| Tin Ore | Uncommon(11.5%) |
| Snapping Mole | Rare(6%) |
| Silver Ore | Very Rare(1.5%) |
| Darksteel Ore | Extremely Rare(0.8%) |
|
Mining Map | |

| Fish | Cap | Body of Water |
|---|---|---|
| Crayfish |
7 | Pond |
| Tricolored Carp |
27 | |
| Black Eel |
47 | |
| Rusty Bucket |
0 | |
| Rusty Subligar |
0 | |
| Rusty Leggings |
0 | |
| Crayfish |
7 | River |
| Moat Carp |
11 | |
| Copper Frog |
16 | |
| Tricolored Carp |
27 | |
| Giant Catfish |
31 | |
| Black Eel |
47 | |
| Rusty Bucket |
0 | |
| Rusty Leggings |
0 | |
| Rusty Subligar |
0 | |
|
Fishing Map | ||

Treasure Casket
NPCs Found Here
| Name | Location | Type |
|---|---|---|
| Alaric | I-6 | |
| Balgamirob | K-9 | |
| Dodoi | I-11 | |
| Drake Fang | H-6 | Mission NPC |
| Gavergo | H-7 | |
| Gildge | H-10 | |
| Lasthenes | H-7 | Sentry |
| Makarim | H-11 | Mission NPC |
| Rasmus | I-6 | |
| Ormr | H-10 | |
| Smoke Breath | I-9 | |
| Subodh | I-9 | |
| Vorzill | I-6 | |
| Zelman | I-8 | Quest NPC |
Regular Monsters Found Here
| Name | Level | Drops | Steal | Family | Spawns | Notes | |||||||
|---|---|---|---|---|---|---|---|---|---|---|---|---|---|
| Burrower Worm
|
75-79 | Flint Stone Silver Ore Zeruhn Soot Zinc Ore |
Worms | ?? | H | ||||||||
| Colliery Bat
|
75-80 | Bat Wing Zeruhn Soot |
Bat Wing (Despoil]) Beastman Blood (Despoil) |
Giant Bats | ?? | H | |||||||
| Ding Bats
|
01-03 | Bat Wing Zeruhn Soot |
Bat Trios | 6 | H | ||||||||
| River Crab
|
02-04 | Rock Salt Zeruhn Soot |
Rock Salt | Crabs | 4 | H | |||||||
| Soot Crab
|
75-78 | Rock Salt Zeruhn Soot |
Crabs | 5 | H | ||||||||
| Veindigger Leech
|
75-80 | Zeruhn Soot | Leeches | 4 | L, H, Sc | ||||||||
|
HP = Detects Low HP; M = Detects Magic; Sc = Follows by Scent; T(S) = True-sight; T(H) = True-hearing JA = Detects job abilities; WS = Detects weaponskills; Z(D) = Asleep in Daytime; Z(N) = Asleep at Nighttime; A(R) = Aggressive to Reive participants | |||||||||||||