Promathia Mission 5-3/Ulmia's Path
From HorizonXI Wiki
(Redirected from Promathia Mission 5-3/Ulmia Path)
| Where Messengers Gather (Ulmia's Path) | |
|---|---|
| Series | Chains of Promathia Missions |
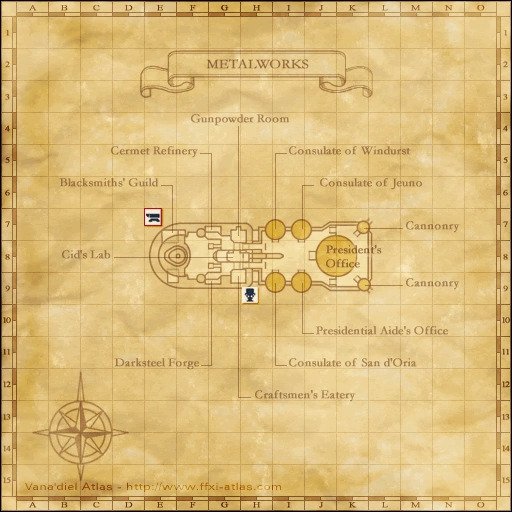
| Starting NPC | Cid, Metalworks (H-8) |
| Title | Ulmia's Soulmate, Delta Enforcer, True Companion of Louverance |
| Repeatable | No |
| HAAP | 2 points |
| Description | Ulmia has journeyed to San d'Oria to search for any word on the whereabouts of Prishe. |
| Rewards | |
| 1000 Experience Points | |
| ← Previous Mission | Next Mission → |
|---|---|
| Desires of Emptiness | For Whom the Verse is Sung |
| Fork 1 | Fork 2 | Fork 3 |
|---|---|---|
| Tenzen Path | Ulmia Path | Louverance Path |
Walkthrough
- Talk to Hinaree in the Count Chaffaules Manor in Southern San d'Oria (B-6).
- Upstairs behind the door to the right.
5-3U1: Entanglement
- Zone into Port San d'Oria for a cutscene.
- Talk to Chasalvige in the manuscript room of the Northern San d'Oria (L-6) in the cathedral, the first door on the left as you enter.
5-3U2: Head Wind
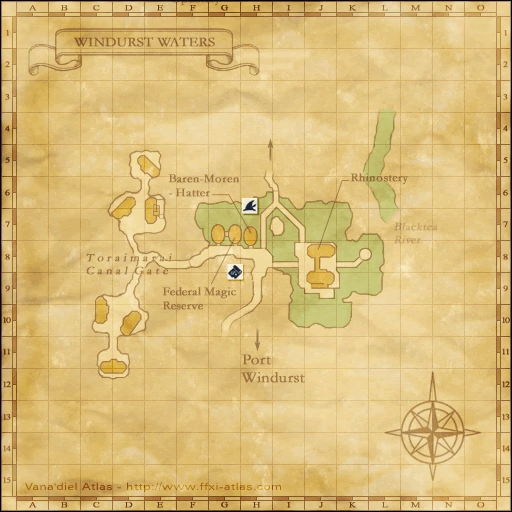
- Talk to Kerutoto in the Rhinostery, Windurst Waters, South (J-8).
- Note: This is the same NPC that gives you the key item for the uncapped Diabolos fight. If you receive this cutscene first, talk to her twice afterwards to watch the correct cutscene to continue on with this mission.
- Talk to Yoran-Oran in Yoran-Oran's Manor in Windurst Walls (E-5).
- Note: It might be necessary to talk to Yoran-Oran multiple times to trigger the needed dialogue. Make sure he mentions Attohwa Chasm.
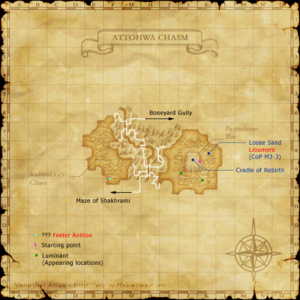
Boneyard Gully
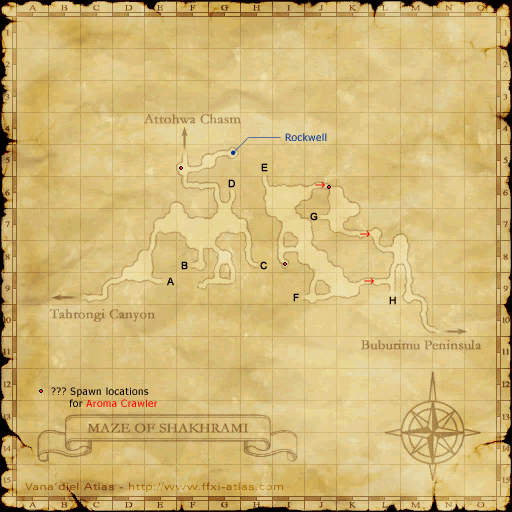
- Travel to Attohwa Chasm (exit Tahrongi Canyon (K-5) into Maze of Shakhrami then follow the left wall until you zone into Attohwa Chasm @ Maze of Shakhrami (F-5).
- Once inside Boneyard Gully follow the left wall to the top of F-6.
When you zone into Boneyard Gully, follow the left wall until you come to a Dark Miasm for a cutscene and a level-50 BCNM battle (Head Wind).
Note: In Attohwa Chasm, you will need antidotes and sneak. There are purple flowers that spray a purple mist of poison. The Antilions in this area are decent-challenge at level 75, they will aggro to sound and low-HP.
Level 50 Cap BCNM - Head Wind
- There is a large ridge in the center of the Boneyard Gully and on the far side of the ridge are your three opponents: the Mithran Trackers Shikaree X, Shikaree Y, and Shikaree Z.
- Shikaree X is a BST/NIN wielding two daggers. She calls Shikaree X's Rabbit.
- Shikaree Y is a DRK/MNK wielding a Scythe. Be sure not to attack her from the front, as she can Counter.
- Shikaree Z is a DRG/WHM wielding a Polearm. She calls Shikaree Z's Wyvern.
- The three Trackers have a strong innate Regain effect, giving them high rate of TP gain. They can use all standard Weapon Skills up to and including Level 240+ WSes (Evisceration, Spiral Hell, Impulse Drive). They will use these WSes rapidly, producing Skillchains in turn (even with themselves, in some cases).
- Using a Blackened Muddy Siredon (obtained from the quest Mithran Delicacies) on the Trackers will remove their Regain effect for an unknown amount of time.
- The Trackers have about 2000 HP each; the pets have about 900.
- Strategy tips
-
- The Trackers' hate works in a different manner than most other fights. It's not completely shared—they will attack different targets if they are Provoked by different players—but when they have TP for a weaponskill they all attack the same target so they can skillchain (They talk to each before doing this so you can Stun/Bind them to stop weaponskills connecting).
- Their pets have normal hate rules, and can be kited away.
- Sleep any Trackers and pets you aren't fighting to prevent Skillchains. Note that the Tracker you are fighting can wake the others up by talking to them.
- Beastmaster pets and dragoon wyverns will not vanish when their masters fall. They must be defeated separately.
- Shikaree X can resummon her pet.
- Pets will despawn if you have killed there master and wiped
- Sleepga, when combined with Elemental Seal, can be of use on the Trackers, however it may not last very long.
- Astral Flow is known to be an effective method to assist in clearing this battle. Two Astral Flow Blood Pacts are known to be enough to defeat both pets and leave the three Trackers with severe damage.
- Drag the Trackers away from the arena; on a wipe, all enemies will return to their positions in the battlefield, leaving you to Reraise/Raise, rest to full, and return to fight remaining opponents. The Trackers will recover HP in the meantime, though any defeated Trackers or pets will remain defeated until the battle ends.
- The Trackers' hate works in a different manner than most other fights. It's not completely shared—they will attack different targets if they are Provoked by different players—but when they have TP for a weaponskill they all attack the same target so they can skillchain (They talk to each before doing this so you can Stun/Bind them to stop weaponskills connecting).
- Highly damaging two hours, used in conjunction by your party damage dealers, is another good way to quickly improve your chances of winning. Hundred Fists, Meikyo Shisui, Mighty Strikes, and Eagle Eye Shot all used simultaneously at the beginning of a fight will quickly take down a Mithra's low overall HP. The faster your party can take one out, the less liabilities you have to deal with. Invincible from a Paladin tank is a good way to make sure this method works at its full potential. By taking out at least one mithra, you have increased your chances of winning in the event of a wipe and reraise.
- You receive 1000 experience/limit points upon defeating the Mithra
- Note: It is not necessary to kill the pets. You only need to kill the 3 Mithra.
5-3U3: Flames for the Dead
Bearclaw Pinnacle - Level 60 Cap BCNM
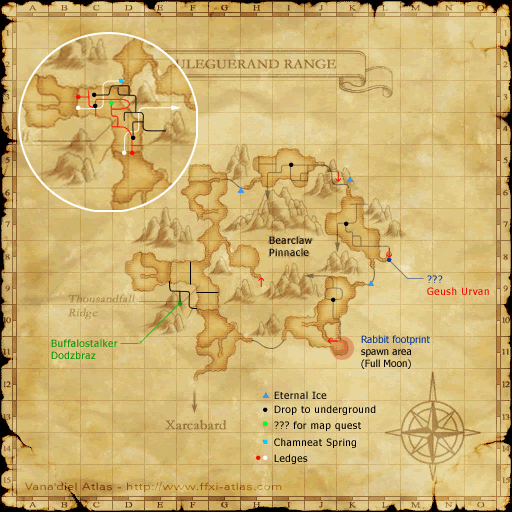
- Head to Bearclaw Pinnacle from Uleguerand Range (J-9). Enter the battlefield. Flames for the Dead
- Take as much time as you want to buff, Meditate, etc. The Snoll Tzar won't aggro until you enter the ice circle.
- Once the Snoll Tzar aggroes you have 45 seconds to defeat it before it blows up. At 15 and 30 seconds it will grow in both actual size and in brute force of attacks. Once the 45 seconds are up it will use a Hypothermal Combustion move that does heavy damage to everyone. If this happens, even if someone survives the blast, you lose, and are ejected from the battlefield. Even if this ability is stunned or you kill it during the animation, you will lose the fight. It must not proc at all for successful completion.
- If your party wipes before Snoll Tzar uses Hypothermal Combustion you will not be ejected from BC. You will either have to Raise and hope he does not aggro, or you HP. Even if one of your party members HP's and returns he/she will not be able to re-enter battleifled to raise you. So it would be wise to fight near the tunnel.
- The Snoll Tzar's TP attacks are:
- The AoE attacks have a fairly small area, so it's not hard for mages to avoid them.
- Snoll Tzar's basic attacks do (~290) damage per hit to a Paladin Tank.
- It is estimated that the Snoll Tzar has 7500 HP.
- You can complete the quest Bombs Away! to obtain the Shu'Meyo Salt, which can be used to gain an additional 20 seconds. Alternatively, you may purchase the salt from the Auction House.
- The Shu'Meyo Salt takes 10 second to use; when used, you'll see a message that "The Snoll Tzar has begun to melt!". 7 and 14 seconds later, you see "The Snoll Tzar is emitting a large amount of steam." Finally, 21 seconds after the first message you see “The Snoll Tzar shakes off the salt!” The melting time does not count against you. You can use multiple salts in a given battle, but do not overlap their use, for it'll have "no effect". You should also note that you will be unable to execute any commands after a salt activates for a second or two, same as potions or any other items.
- Upon defeating the Snoll Tzar, everyone in the party will receive 1000 Experience Points (or Limit Points)
- Strategy tips
-
- Shu'Meyo Salt has a use timer of 10 second. Plan out a salt strategy, and keep an eye on the chat log. Once the Snoll Tzar shakes off the Salt, its time to have the next person in line use their salt. Keep a watch for it, every second counts!
- Don't panic and keep calm. This is one of the most tense missions in the game. Go over your plan and do some dry runs on normal enemies to get the procedures down.
- 2-hour abilities are not necessary for victory if you have the salts to spare, although they are a great bonus.
- Talk to Cid in Metalworks for a cutscene.
- If Ulmia's Path is your final path to complete on mission 5-3, you will get an additional cutscene at Cid that leads into the next mission; if not, head to another fork.
| Three Paths Overview | ||
|---|---|---|
| Fork 1 | Fork 2 | Fork 3 |
| Tenzen Path | Ulmia Path | Louverance Path |
