Whence Blows the Wind
From HorizonXI Wiki
| Whence Blows the Wind | |
|---|---|
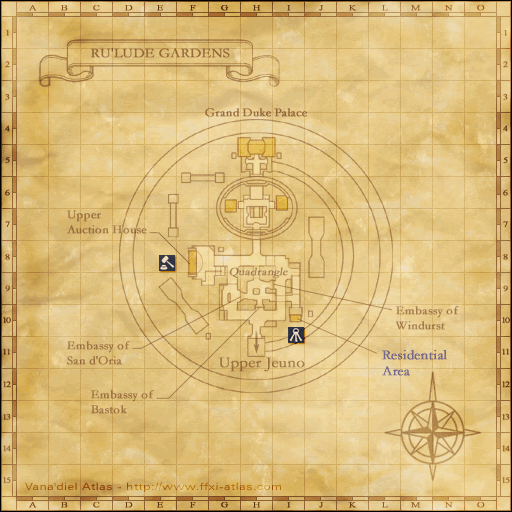
| Starting NPC | Maat, Ru'Lude Gardens (H-5) |
| Required Fame | None |
| Level Restriction: | Level 56 |
| Items Needed | |
| Additional Requirements | Started Nation Mission 4-1 (Magicite) |
| Title | Sky Breaker |
| Repeatable | no |
| Description | Your innate limits can be pushed further by collecting the crests of the Orcs, the Quadav, and the Yagudo. |
| Rewards | |
| Raises level cap to 65 Mog Wardrobe: 5 Slots 
| |
| ← Previous Quest | Next Quest → |
|---|---|
| Atop the Highest Mountains | Riding on the Clouds |
Walkthrough
Maat asks you to get the ![]() Orcish Crest, the
Orcish Crest, the ![]() Quadav Crest and the
Quadav Crest and the ![]() Yagudo Crest. Each Key Item is hidden in the corresponding beastman stronghold as a ???.
Yagudo Crest. Each Key Item is hidden in the corresponding beastman stronghold as a ???.
Orcish Crest
NOTE: You will need Invisibility for this entire section.
You need to pass the Wall of Banishing on the upper level at Davoi (J-9). The Wall of Banishing can only be opened by someone with the ![]() Crimson Orb in their possession. So either obtain one yourself (for a walkthrough see Obtaining a Crimson Orb) or bring someone who has it.
Crimson Orb in their possession. So either obtain one yourself (for a walkthrough see Obtaining a Crimson Orb) or bring someone who has it.
- Travel to Davoi and enter Monastic Cavern at Davoi (H-11).
- Go to the path at Monastic Cavern (I-8) and zone back to Davoi. This will put you in the house area at the center of Davoi in the SE corner of Davoi (H-8).
- Head east across the bridge, and then south to the Wall of Banishing in the the SW corner of Davoi (J-9).
You need a ![]() Crimson Orb to open the Wall of Banishing. If no one in your party has one, see Obtaining a Crimson Orb.
Crimson Orb to open the Wall of Banishing. If no one in your party has one, see Obtaining a Crimson Orb.
- Have a person with the
 Crimson Orb open the Wall of Banishing by clicking on it. This will open a hole in the wall which anyone can walk through.
 - Follow the path and zone into Monastic Cavern.
- Hug the left wall and proceed to the SW corner of Monastic Cavern (J-6). Note: The ??? is at the western wall on the upper level, do not drop down the ledge.
- WARNING: There are true sight Orc NMs that lurk in the big room before the ledge.
- Click the ??? to receive your
 Orcish Crest.
Quadav Crest


- NOTE: You will want Sneak for this section, but Invisible is not needed (unless you come across Broo). A party member must have completed Mysteries of Beadeaux I and II (can only be flagged if you were on Magicite mission) to be able to complete this part.
- NOTE: The Mute's silence effect will last a very long time. (Approximately 10-15 real life minutes.)
- NOTE: The Afflictor's curse will bring your HP and MP down far more than the average curse effect. (Approximately 10% of max HP and 50% of max MP.)
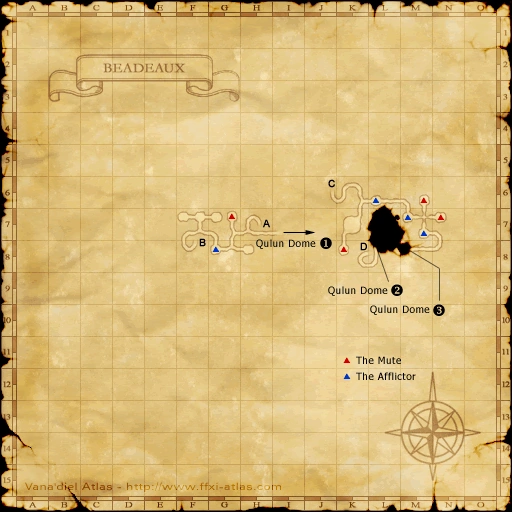
- TIP: Casters should bring Echo Drops to remove silence. The Afflictor machines you must pass will curse you, however you can avoid this by muting yourself with one of the Mute machines, and then using an echo drop to cure yourself once past the Afflictor. Alternatively, you can bring Silent Oil so you can sneak yourself without curing Mute.
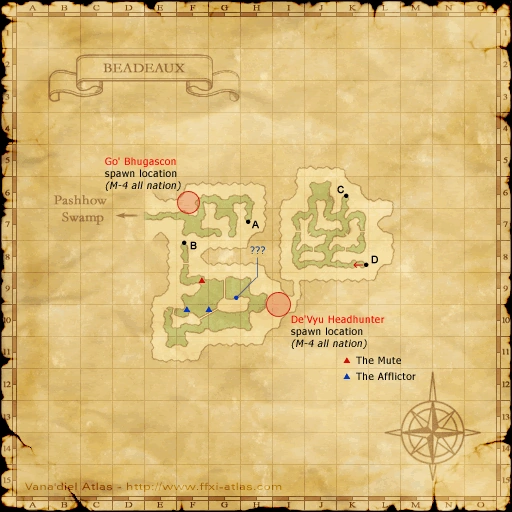
- Enter Beadeaux and follow the tunnel down at Beadeaux, Map 1 (H-7).
- Then proceed to the tunnel up at Beadeaux, Map 2 (F-8).
- Once above ground again, hug the right wall to the ramp at Beadeaux, Map 1 (E-10). (Please note there is one Afflictor on your way to the ramp.) and head to the north east section of the map without falling down until you get to Beadeaux, Map 1 (K-6). Then jump down and enter the tunnel. Make sure you have sneak on even if nothing aggroed you so far!
- Once underground again, follow the path to Beadeaux, Map 2 (M-8) and then zone into Qulun Dome. There are three Afflictors in a row here, so Mute yourself at Beadeaux, Map 2 (K-8) first.
- In the first room of Qulun Dome is most likely a Notorious Monster, the Ruby Quadav. This NM has True Hearing, which ignores Sneak. However, you will want to have Sneak up because there are many other Quadavs that do not have True Hearing.
- A party member that has all three key items (same key items required to enter Magicite Room) must open the door after turning right at the first room. This door opens for the entire party/alliance. It can also be opened from the inside.
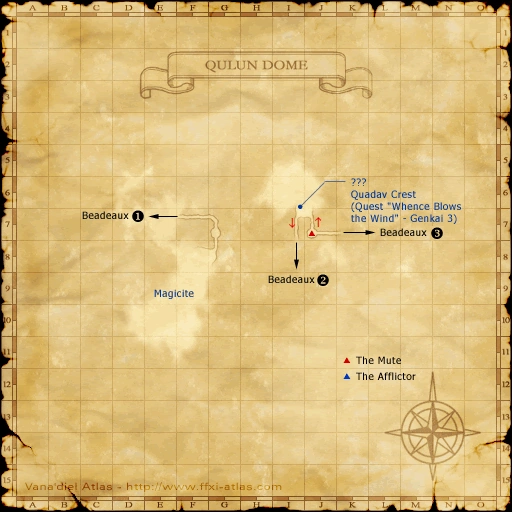
- Once you enter the second room, there will also be two to three different NMs with True Hearing, including Ruby Quadav and Adaman Quadav. Avoid them and find the ??? as quickly as possible, which is located on the western wall, at around Qulun Dome (I-6).
- As soon as you hit it and receive the
 Quadav Crest, warp away.
- As soon as you hit it and receive the
Yagudo Crest
- NOTE: On Horizon, you only need to light one torch on the top floor, and can walk to the door at normal movement speed.

- NOTE: You will only need Invisibility for this entire section. You might need Sneak around bats if you bring a low-level player.
- NOTE: It is recommended that you start this quest at the very beginning of a new Vana'diel day as the passwords will change each day.
- NOTE: This section is completely doable solo.
- NOTE: You may want a Thief with Hide in your party.
- NOTE: To light the torches you must have the Yagudo Torch from Mission 4-1.
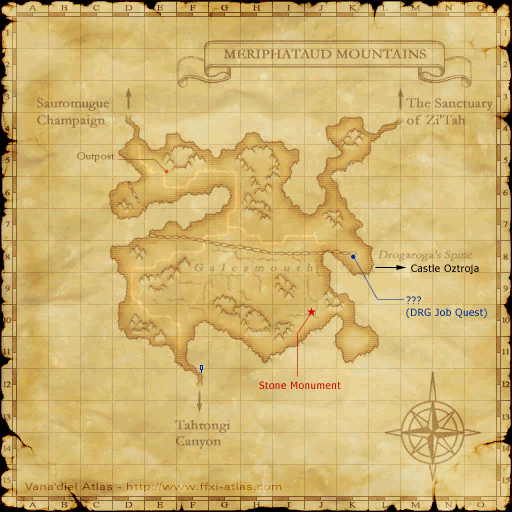
- Enter Castle Oztroja at Meriphataud Mountains (L-8).
- For the first part you will need to find out what the password of the day is, which requires collecting information from three different brass statues.
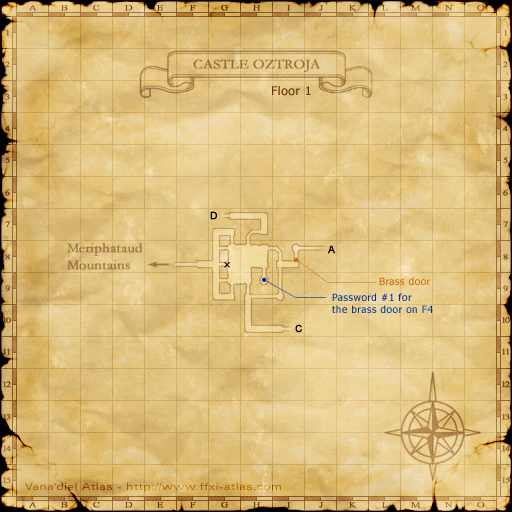
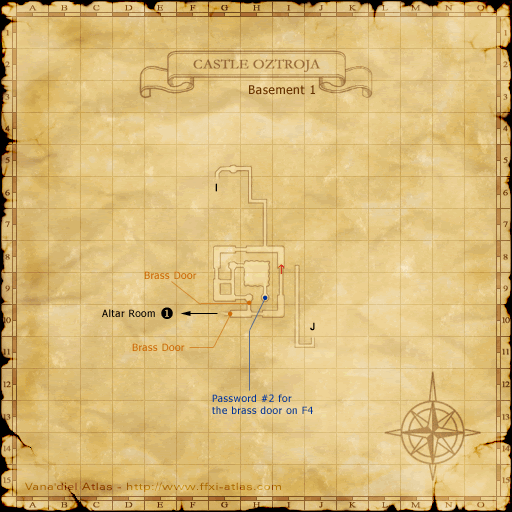
- First password: Head to the SE corner of Castle Oztroja, Map 1 (H-8) and open the brass door. Click on the statue inside to receive the 1st password.
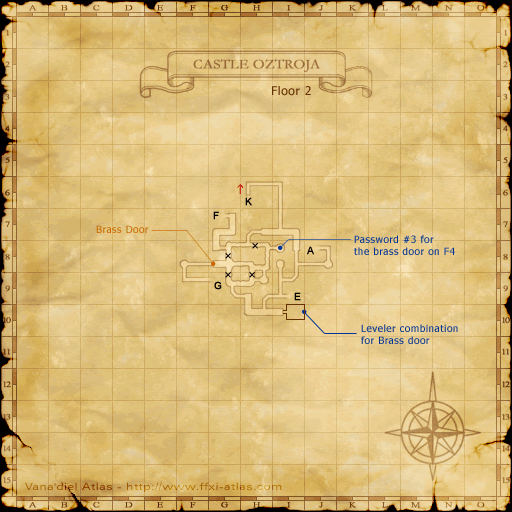
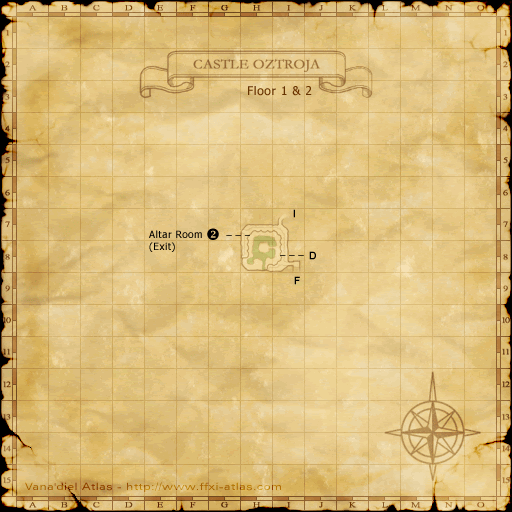
- Second password: Now head to the door at Castle Oztroja, Map 1 (I-8) and open it by selecting the correct lever. (If you select the wrong one, then it should take about five minutes to get back to this door.) Go up the stairs. Head to the exit at Castle Oztroja, Map 3 (G-7) and zone over onto the next map. Head north to Castle Oztroja, Map 7 (I-7) and zone over to yet another map. Now head to the SE corner of Castle Oztroja, Map 2 (H-9) and open the brass door and receive the 2nd password from the statue.
- Third password: Proceed back along the same path until you reach Castle Oztroja, Map 3. The 3rd statue is located on the NW corner of Castle Oztroja, Map 3 (I-8). If you've never been to this section of the map before, there are blocker points preventing most of the "obvious" paths and forcing you to walk around the outside.
- NOTE: It does not actually matter which order you visit the statues, but visiting the statues in the order listed in this walkthrough is the most convenient as it requires the least backtracking.
- Now that you have visited all three statues, you should have 3 passwords, which will be used near the end of this section of the quest.
- The possible passwords are: Domi, Puqu, Gadu, Deggi, Mjuu, Xalmo, Haqa, Mong, Ouzi, Duzu, Buxu, Quu, Misu, Xicu, Ovzi, Duxo and Zhuu.
- Use these if the day changes and you are forced to "guess" later on in the quest.
- The passwords are also case sensitive.
- From the 3rd statue point head to the 4 lever door at the SW corner of Castle Oztroja, Map 3 (G-8). You can find the combination to the door at the room at Castle Oztroja, Map 3 (I-10). It is a sequence of four directions, either up or down. For example, (Up, Down, Up, Up).
- Note: The combination also resets every Vana'diel day.
- Be wary of aggro once you pass through this door, the enemies beyond this door are at a higher level!
- Once you pass through the door, head up the stairs and zone through Castle Oztroja, Map 3 (G-9) onto a new map.
- The next map is pretty straightforward, just remain invis and stay clear of the Yagudo Parasites (leeches), which aggro by hearing. Proceed to the next map at Castle Oztroja, Map 4 (H-11).
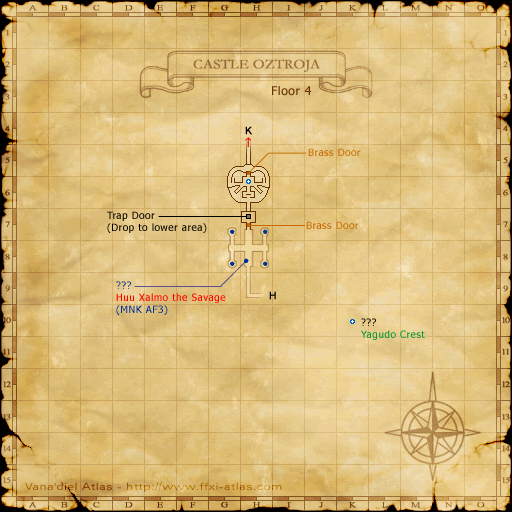
- You want to proceed through the Brass Door at Castle Oztroja, Map 5 (H-7) from here. To open the Brass Door, someone must light one of the four torches at G-7, G-8, H-7, or H-8 (which requires the
 Yagudo Torch), while the other players remain in front of the Brass Door. Once the torch is lit, the Brass Door will open, allowing the players to pass through.
- If you've brought a Thief, they should be the one to light the torch. Put Invisible on the Thief first so they can safely arrive at the torch. Once they de-invis and light the torch, they can use Flee then Hide to make it back to the Brass Door. Even if they are spotted by a Yagudo before using Hide, Hide removes aggro from all enemies that detect by sight, so the Yagudo will stop chasing them.
- If the torch player cannot make it through the door in time, there is a lever behind the door that will briefly open it.
- Once through the Brass Door, there will be a wooden plank with a red circle (trap door) in front of a Brass Statue. Have everyone stand on the plank. Click on the statue and input the passwords in the order that you received them (again, being mindful of case sensitivity). The trap door will open and everyone will fall through to the bottom. Don't worry about invisibility as the bottom of the trap door is safe.
- NOTE: Before continuing, if players are planning to warp out of the dungeon using Warp Cudgel, it is recommended to equip it now so they don't have to wait 30 seconds to ready the item.
- Once everyone has dropped down through the trap door, recast Invisible, and run down the long corridor leading to a large room with a series of ramps up to the center platform. The ??? to get the Yagudo Crest is located on the platform at Castle Oztroja, Map 5 (H-6), right besides the Yagudo High Priest, a Yagudo NM that has True Sight (aggroes by sight, but ignores Invisible).
- Invisible will also be ineffective against the following Yagudo Notorious Monsters: Tzee Xicu the Manifest, Yagudo Avatar, and Yagudo Templar. They are further away from the ??? than the Yagudo High Priest, but exercise caution all the same.
- Wait for the Yagudo NM to be sufficiently far away from the center platform, then travel up the ramps to the center platform, standing "behind" any regular Yagudo which may be on that platform. As soon as you find a safe opportunity, remove invis, click the ???, then immediately re-invis.
- If you do get aggroed by the Yagudo High Priest, it is susceptible to Sleep.
- After obtaining the Key Item, warp out as quickly as possible.
Once you have the three crests, return to Maat.
