Category:Conquest Overseers: Difference between revisions
(Created page with "{{tocright}} Conquest Overseers are NPCs who oversee a nation's participation in Conquest. A character can make use of the Conquest Overseers belonging to their own nation of allegiance. These are the Windustian War Warlocks (W.W.), the Bastokan Iron Musketeers (I.M.), and (due to the division of powers within San d'Oria) the San d'Orian Temple Knights (T.K.) in cities and San d'Orian Royal Knights (R.K.) in outlying areas. The Grand Duchy of Jeuno provides neutr...") |
|||
| (8 intermediate revisions by the same user not shown) | |||
| Line 27: | Line 27: | ||
For players allied with a different nation, you will only be able to purchase items with [[Conquest Points]] (and at an inflated price, see table below). | For players allied with a different nation, you will only be able to purchase items with [[Conquest Points]] (and at an inflated price, see table below). | ||
{| | {| class="horizon-table table-grey table-sm" | ||
|- | |- | ||
!Rank: | !Rank: | ||
|1 | |1 | ||
| Line 40: | Line 40: | ||
|9 | |9 | ||
|10 | |10 | ||
|- | |- | ||
!Own Nation: | !Own Nation: | ||
|1,000 | |1,000 | ||
| Line 52: | Line 52: | ||
|48,000 | |48,000 | ||
|56,000 | |56,000 | ||
|- | |- | ||
!Foreign Nation: | !Foreign Nation: | ||
|2,000 | |2,000 | ||
| Line 84: | Line 84: | ||
Border Conquest Guards spawn under the same conditions as the Outpost Guards do and perform all of the same services, except for accepting [[Garrison]] items. | Border Conquest Guards spawn under the same conditions as the Outpost Guards do and perform all of the same services, except for accepting [[Garrison]] items. | ||
== | ==Bastok Conquest Overseers== | ||
===City Conquest Overseers=== | ===City Conquest Overseers=== | ||
{| | {| class="horizon-table bastokmissions table-sm" | ||
|- | |- | ||
! colspan="2"| National Conquest Guard | |||
! colspan="2"| Foreign Conquest Guard | |||
| | |- class="bastokmissions-alt" | ||
!NPC | |||
!Location | |||
!NPC | |||
!Location | |||
|- | |- | ||
|[[Flying Axe, I.M.]] | |||
|{{Location|Port Bastok|L-7}} | |||
|[[Yevgeny, I.M.]] | |||
|{{Location|Northern San d'Oria|K-10}} | |||
|- | |- | ||
|[[Rabid Wolf, I.M.]] | |||
|{{Location|Bastok Markets|E-11}} | |||
|[[Sachetan, I.M.]] | |||
|{{Location|Port Windurst|E-5}} | |||
|- | |- | ||
|[[Crying Wind, I.M.]] | |||
|{{Location|Bastok Mines|H-10}} | |||
|colspan="2"| | |colspan="2"| | ||
|} | |||
===Regional Conquest Overseers=== | |||
{| class="horizon-table bastokmissions" | |||
|- | |- | ||
! | |||
! colspan="2"| Outpost Conquest Guard | |||
| | ! colspan="2"| Border Conquest Guard | ||
|- class="bastokmissions-alt" | |||
!Region | |||
!NPC | |||
!Location | |||
!NPC | |||
!Location | |||
|- | |- | ||
| | |[[Aragoneu]] | ||
|[[Akane, I.M. (Meriphataud Mountains)|Akane, I.M.]] | |||
|{{Location|Meriphataud Mountains|E-5}} | |||
|[[Three Steps, I.M.]] | |||
|{{Location|Meriphataud Mountains|F-12}} | |||
|- | |- | ||
| | |[[Derfland]] | ||
|[[Souun, I.M.]] | |||
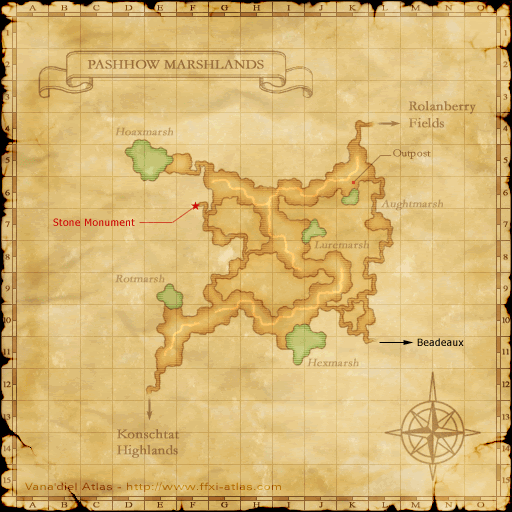
| | |{{Location|Pashhow Marshlands|K-6}} | ||
|[[Sharp Tooth, I.M.]] | |||
|{{Location|Pashhow Marshlands|K-4}} | |||
|- | |- | ||
| | |[[Elshimo Lowlands]] | ||
|[[Mahol, I.M.]] | |||
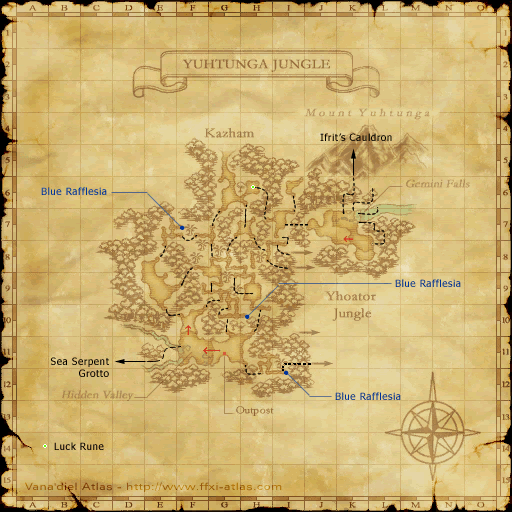
|{{Location|Yuhtunga Jungle|G-11}} | |||
|[[Bammiro, I.M.]] | |||
|{{Location|Yuhtunga Jungle|G-6}} | |||
|- | |- | ||
| | |[[Elshimo Uplands]] | ||
|[[Mintoo, I.M.]] | |||
|{{Location|Yhoator Jungle|I-8}} | |||
|[[Guddal, I.M.]] | |||
|{{Location|Yhoator Jungle|H-6}} | |||
|- | |- | ||
| | |[[Fauregandi]] | ||
|[[Akane, I.M. (Beaucedine Glacier)|Akane, I.M.]] | |||
| | |{{Location|Beaucedine Glacier|H-9}} | ||
| | |[[Rattling Rain, I.M.]] | ||
|{{Location|Beaucedine Glacier|G-6}} | |||
{| | |||
|- | |- | ||
| | |[[Gustaberg]] | ||
|[[Shigezane, I.M.]] | |||
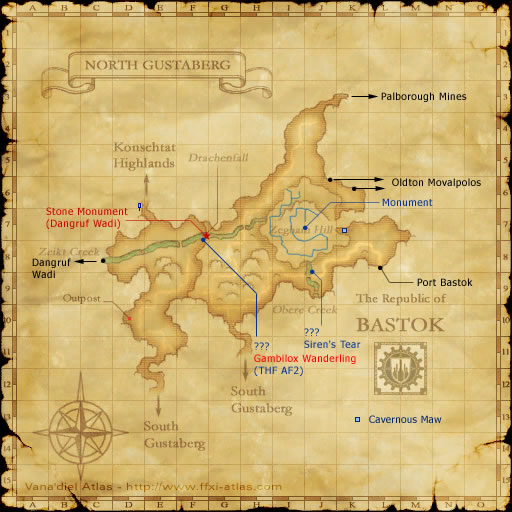
|{{Location|North Gustaberg|D-10}} | |||
|[[Heavy Fog, I.M.]] | |||
|{{Location|North Gustaberg|E-7}} | |||
|- | |- | ||
| | |[[Kolshushu]] | ||
| | |[[Ishin, I.M.]] | ||
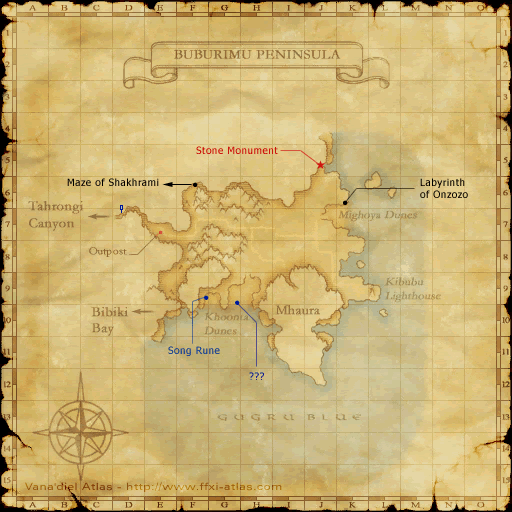
| | |{{Location|Buburimu Peninsula|E-7}} | ||
| | |[[Wise Turtle, I.M.]] | ||
| | |{{Location|Buburimu Peninsula|D-6}} | ||
|- | |- | ||
|[[Kuzotz]] | |||
|[[Lindgard, I.M.]] | |||
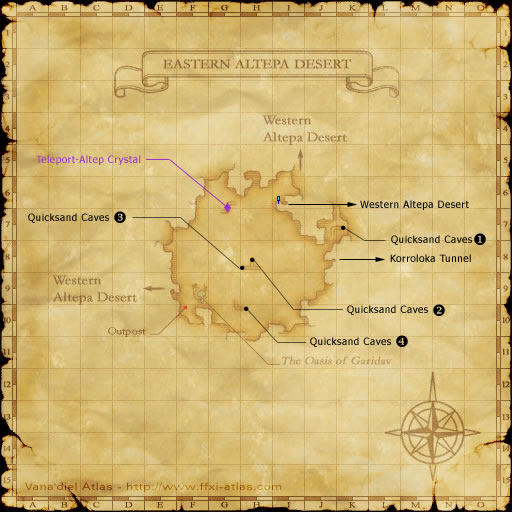
|{{Location|Eastern Altepa Desert|F-10}} | |||
|[[Daborn, I.M.]] | |||
|{{Location|Eastern Altepa Desert|I-6}} | |||
|- | |- | ||
|[[Li'Telor]] | |||
|[[Calliope, I.M.]] | |||
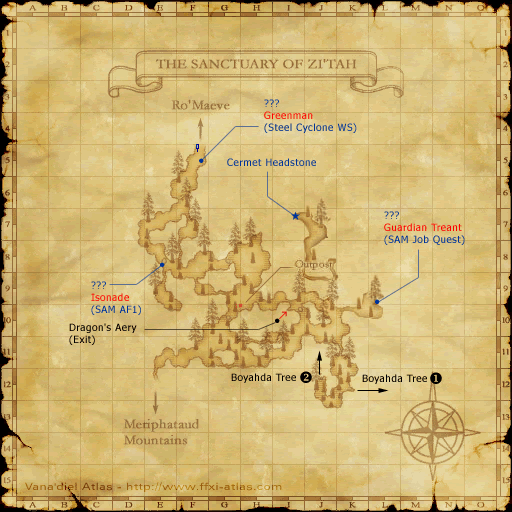
|{{Location|The Sanctuary of Zi'Tah|H-9}} | |||
|[[Dedden, I.M.]] | |||
|{{Location|The Sanctuary of Zi'Tah|F-5}} | |||
|- | |- | ||
|[[Norvallen]] | |||
|[[Takamoto, I.M.]] | |||
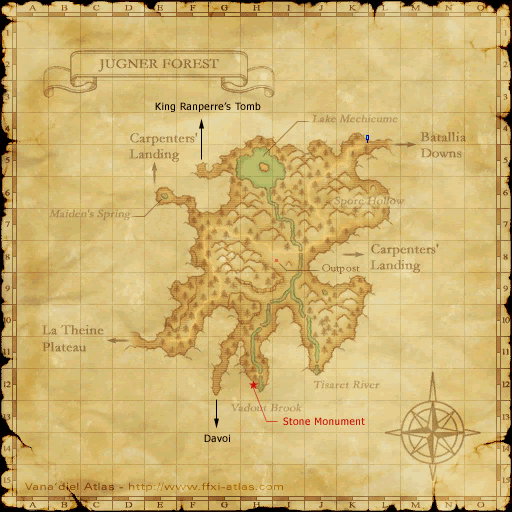
|{{Location|Jugner Forest|I-8}} | |||
|[[Pure Heart, I.M.]] | |||
|{{Location|Jugner Forest|L-5}} | |||
|- | |- | ||
|[[Qufim]] | |||
|[[Sasa, I.M.]] | |||
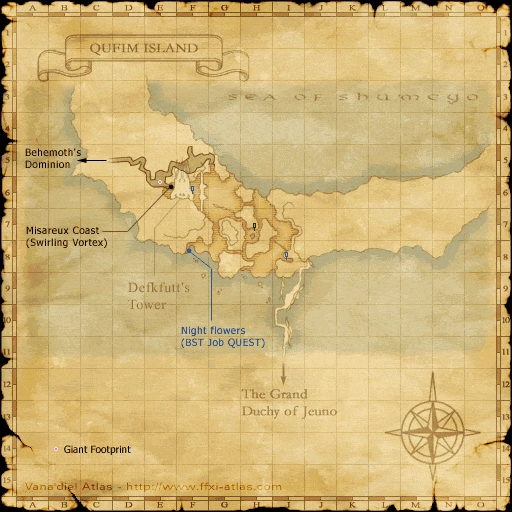
|{{Location|Qufim Island|F-6}} | |||
|[[Singing Blade, I.M.]] | |||
|{{Location|Qufim Island|I-8}} | |||
|- | |- | ||
|[[Ronfaure]] | |||
|[[Yoshihiro, I.M.]] | |||
|{{Location|West Ronfaure|G-9}} | |||
|[[Molting Moth, I.M.]] | |||
|{{Location|West Ronfaure|F-12}} | |||
|- | |- | ||
|[[Sarutabaruta]] | |||
|[[Ryokei, I.M.]] | |||
|{{Location|West Sarutabaruta|H-6}} | |||
|[[Slow Axe, I.M.]] | |||
|{{Location|West Sarutabaruta|K-4}} | |||
|- | |- | ||
|[[Tavnazian Archipelago]] | |||
|[[Yoram, I.M.]] | |||
|{{Location|Lufaise Meadows|E-8}} | |||
|[[Ghost Talker, I.M.]] | |||
|{{Location|Lufaise Meadows|K-8}} | |||
|- | |- | ||
|[[Valdeaunia]] | |||
|[[Kaya, I.M.]] | |||
|{{Location|Xarcabard|H-8}} | |||
|[[Heavy Bear, I.M.]] | |||
|{{Location|Xarcabard|F-7}} | |||
|- | |- | ||
|[[Vollbow]] | |||
|[[Sarmistha, I.M.]] | |||
|{{Location|Cape Teriggan|G-8}} | |||
|[[Dultwa, I.M.]] | |||
|{{Location|Cape Teriggan|I-6}} | |||
|- | |- | ||
|[[Zulkheim]] | |||
|[[Tsunashige, I.M.]] | |||
|{{Location|Valkurm Dunes|H-7}} | |||
|[[Fighting Ant, I.M.]] | |||
|{{Location|Valkurm Dunes|L-10}} | |||
|} | |||
==San d'Oria Conquest Overseers== | |||
===City Conquest Overseers=== | |||
{| class="horizon-table sandoriamissions table-sm" | |||
|- | |- | ||
! colspan="2"| National Conquest Guard | |||
! colspan="2"| Foreign Conquest Guard | |||
| | |- class="sandoriamissions-alt" | ||
!NPC | |||
!Location | |||
!NPC | |||
!Location | |||
|- | |- | ||
|[[Arpevion, T.K.]] | |||
|{{Location|Southern San d'Oria|L-10}} | |||
|[[Panoquieur, T.K.]] | |||
|{{Location|Windurst Woods|G-10}} | |||
|- | |- | ||
|[[Aravoge, T.K.]] | |||
|{{Location|Southern San d'Oria|F-10}} | |||
|[[Glarociquet, T.K.]] | |||
|{{Location|Metalworks|H-9}} | |||
|- | |- | ||
|[[Achantere, T.K.]] | |||
|{{Location|Northern San d'Oria|C-8}} | |||
|colspan="2"| | |||
| | |} | ||
| | |||
===Regional Conquest Overseers=== | |||
{| class="horizon-table sandoriamissions" | |||
|- | |- | ||
! | |||
! colspan="2"| Outpost Conquest Guard | |||
| | ! colspan="2"| Border Conquest Guard | ||
|- class="sandoriamissions-alt" | |||
!Region | |||
!NPC | |||
!Location | |||
!NPC | |||
!Location | |||
|- | |- | ||
|[[Aragoneu]] | |||
|[[Chegourt, R.K.]] | |||
|{{Location|Meriphataud Mountains|E-5}} | |||
|[[Buliame, R.K.]] | |||
|{{Location|Meriphataud Mountains|F-12}} | |||
|- | |- | ||
|[[Derfland]] | |||
|[[Mesachedeau, R.K.]] | |||
|{{Location|Pashhow Marshlands|K-6}} | |||
|[[Ioupie, R.K.]] | |||
|{{Location|Pashhow Marshlands|K-4}} | |||
|- | |- | ||
|[[Elshimo Lowlands]] | |||
|[[Zorchorevi, R.K.]] | |||
|{{Location|Yuhtunga Jungle|G-11}} | |||
|[[Mupia, R.K.]] | |||
|{{Location|Yuhtunga Jungle|G-6}} | |||
|- | |- | ||
|[[Elshimo Uplands]] | |||
|[[Ilieumort, R.K.]] | |||
|{{Location|Yhoator Jungle|I-8}} | |||
|[[Emila, R.K.]] | |||
|{{Location|Yhoator Jungle|H-6}} | |||
|- | |- | ||
|[[Fauregandi]] | |||
|[[Parledaire, R.K.]] | |||
|{{Location|Beaucedine Glacier|H-9}} | |||
|[[Leaufetie, R.K.]] | |||
|{{Location|Beaucedine Glacier|G-6}} | |||
|- | |- | ||
|[[Gustaberg]] | |||
|[[Ennigreaud, R.K.]] | |||
|{{Location|North Gustaberg|D-10}} | |||
|[[Quellebie, R.K.]] | |||
|{{Location|North Gustaberg|E-7}} | |||
|- | |- | ||
|[[Kolshushu]] | |||
|[[Bonbavour, R.K.]] | |||
|{{Location|Buburimu Peninsula|E-7}} | |||
|[[Craigine, R.K.]] | |||
|{{Location|Buburimu Peninsula|D-6}} | |||
|- | |- | ||
|[[Kuzotz]] | |||
|[[Eaulevisat, R.K.]] | |||
|{{Location|Eastern Altepa Desert|F-10}} | |||
|[[Laimeve, R.K.]] | |||
|{{Location|Eastern Altepa Desert|I-6}} | |||
|- | |- | ||
|[[Li'Telor]] | |||
|[[Credaurion, R.K.]] | |||
|{{Location|The Sanctuary of Zi'Tah|H-9}} | |||
|[[Limion, R.K.]] | |||
|{{Location|The Sanctuary of Zi'Tah|F-5}} | |||
|- | |- | ||
|[[Norvallen]] | |||
|[[Chaplion, R.K.]] | |||
|{{Location|Jugner Forest|I-8}} | |||
|[[Taumiale, R.K.]] | |||
|{{Location|Jugner Forest|L-5}} | |||
|- | |- | ||
|[[Qufim]] | |||
|[[Pitoire, R.K.]] | |||
|{{Location|Qufim Island|F-6}} | |||
|[[Matica, R.K.]] | |||
|{{Location|Qufim Island|I-8}} | |||
|- | |- | ||
|[[Ronfaure]] | |||
|[[Doladepaiton, R.K.]] | |||
|{{Location|West Ronfaure|G-9}} | |||
|[[Ballie, R.K.]] | |||
|{{Location|West Ronfaure|F-12}} | |||
|- | |- | ||
|[[Sarutabaruta]] | |||
|[[Naguipeillont, R.K.]] | |||
|{{Location|West Sarutabaruta|H-6}} | |||
|[[Banege, R.K.]] | |||
|{{Location|West Sarutabaruta|K-4}} | |||
|- | |- | ||
|[[Tavnazian Archipelago]] | |||
|[[Jemmoquel, R.K.]] | |||
|{{Location|Lufaise Meadows|E-8}} | |||
|[[Chilaumme, R.K.]] | |||
|{{Location|Lufaise Meadows|K-8}} | |||
|- | |- | ||
|[[Valdeaunia]] | |||
|[[Jeantelas, R.K.]] | |||
|{{Location|Xarcabard|H-8}} | |||
|[[Pilcha, R.K.]] | |||
|{{Location|Xarcabard|F-7}} | |||
|- | |- | ||
|[[Vollbow]] | |||
|[[Salimardi, R.K.]] | |||
|{{Location|Cape Teriggan|G-8}} | |||
|[[Paise, R.K.]] | |||
|{{Location|Cape Teriggan|I-6}} | |||
|- | |- | ||
|[[Zulkheim]] | |||
|[[Quanteilleron, R.K.]] | |||
|{{Location|Valkurm Dunes|H-7}} | |||
|[[Prunilla, R.K.]] | |||
|{{Location|Valkurm Dunes|L-10}} | |||
|} | |||
==Windurst Conquest Overseers== | |||
===City Conquest Overseers=== | |||
{| class="horizon-table windurstmissions table-sm" | |||
|- | |- | ||
! colspan="2"| National Conquest Guard | |||
! colspan="2"| Foreign Conquest Guard | |||
| | |- class="windurstmissions-alt" | ||
!NPC | |||
!Location | |||
!NPC | |||
!Location | |||
|- | |- | ||
|[[Milma-Hapilma, W.W.]] | |||
|{{Location|Port Windurst|B-4}} | |||
|[[Chapal-Afal, W.W.]] | |||
|{{Location|Northern San d'Oria|H-9}} | |||
|- | |- | ||
|[[Puroiko-Maiko, W.W.]] | |||
|{{Location|Windurst Waters|G-5}} | |||
|[[Lexun-Marixun, W.W.]] | |||
|{{Location|Metalworks|I-7}} | |||
|- | |- | ||
|[[Harara, W.W.]] | |||
|{{Location|Windurst Woods|K-10}} | |||
|colspan="2"| | |||
| | |} | ||
| | |||
===Regional Conquest Overseers=== | |||
{| class="horizon-table windurstmissions" | |||
|- | |- | ||
! | |||
! colspan="2"| Outpost Conquest Guard | |||
| | ! colspan="2"| Border Conquest Guard | ||
|- class="windurstmissions-alt" | |||
!Region | |||
!NPC | |||
!Location | |||
!NPC | |||
!Location | |||
|- | |- | ||
|[[Aragoneu]] | |||
|[[Donmo-Boronmo, W.W.]] | |||
|{{Location|Meriphataud Mountains|E-5}} | |||
|[[Daruru, W.W.]] | |||
|{{Location|Meriphataud Mountains|F-12}} | |||
|- | |- | ||
|[[Derfland]] | |||
|[[Mokto-Lankto, W.W.]] | |||
|{{Location|Pashhow Marshlands|K-6}} | |||
|[[Shikoko, W.W.]] | |||
|{{Location|Pashhow Marshlands|K-4}} | |||
|- | |- | ||
|[[Elshimo Lowlands]] | |||
|[[Uphra-Kophra, W.W.]] | |||
|{{Location|Yuhtunga Jungle|G-11}} | |||
|[[Richacha, W.W.]] | |||
|{{Location|Yuhtunga Jungle|G-6}} | |||
|- | |- | ||
|[[Elshimo Uplands]] | |||
|[[Etaj-Pohtaj, W.W.]] | |||
|{{Location|Yhoator Jungle|I-8}} | |||
|[[Ghantata, W.W.]] | |||
|{{Location|Yhoator Jungle|H-6}} | |||
|- | |- | ||
|[[Fauregandi]] | |||
|[[Ryunchi-Pauchi, W.W.]] | |||
|{{Location|Beaucedine Glacier|H-9}} | |||
|[[Chopapa, W.W.]] | |||
|{{Location|Beaucedine Glacier|G-6}} | |||
|- | |- | ||
|[[Gustaberg]] | |||
|[[Kuuwari-Aori, W.W.]] | |||
|{{Location|North Gustaberg|D-10}} | |||
|[[Butsutsu, W.W.]] | |||
|{{Location|North Gustaberg|E-7}} | |||
|- | |- | ||
|[[Kolshushu]] | |||
|[[Ganemu-Punnemu, W.W.]] | |||
|{{Location|Buburimu Peninsula|E-7}} | |||
|[[Mashasha, W.W.]] | |||
|{{Location|Buburimu Peninsula|D-6}} | |||
|- | |- | ||
|[[Kuzotz]] | |||
|[[Variko-Njariko, W.W.]] | |||
|{{Location|Eastern Altepa Desert|F-10}} | |||
|[[Sahgygy, W.W.]] | |||
|{{Location|Eastern Altepa Desert|I-6}} | |||
|- | |- | ||
|[[Li'Telor]] | |||
|[[Ajimo-Majimo, W.W.]] | |||
|{{Location|The Sanctuary of Zi'Tah|H-9}} | |||
|[[Ochocho, W.W.]] | |||
|{{Location|The Sanctuary of Zi'Tah|F-5}} | |||
|- | |- | ||
|[[Norvallen]] | |||
|[[Bubchu-Bibinchu, W.W.]] | |||
|{{Location|Jugner Forest|I-8}} | |||
|[[Geruru, W.W.]] | |||
|{{Location|Jugner Forest|L-5}} | |||
|- | |- | ||
|[[Qufim]] | |||
|[[Tsonga-Hoponga, W.W.]] | |||
|{{Location|Qufim Island|F-6}} | |||
|[[Numumu, W.W.]] | |||
|{{Location|Qufim Island|I-8}} | |||
|- | |- | ||
|[[Ronfaure]] | |||
|[[Kyanta-Pakyanta, W.W.]] | |||
|{{Location|West Ronfaure|G-9}} | |||
|[[Tottoto, W.W.]] | |||
|{{Location|West Ronfaure|F-12}} | |||
|- | |- | ||
|[[Sarutabaruta]] | |||
|[[Roshina-Kuleshuna, W.W.]] | |||
|{{Location|West Sarutabaruta|H-6}} | |||
|[[Darumomo, W.W.]] | |||
|{{Location|West Sarutabaruta|K-4}} | |||
|- | |- | ||
| | |[[Tavnazian Archipelago]] | ||
|[[Teldo-Moroldo, W.W.]] | |||
|{{Location|Lufaise Meadows|E-8}} | |||
|[[Cotete, W.W.]] | |||
|{{Location|Lufaise Meadows|K-8}} | |||
|- | |||
|[[Valdeaunia]] | |||
|[[Magumo-Yagimo, W.W.]] | |||
|{{Location|Xarcabard|H-8}} | |||
|[[Tememe, W.W.]] | |||
|{{Location|Xarcabard|F-7}} | |||
|- | |||
|[[Vollbow]] | |||
|[[Voranbo-Natanbo, W.W.]] | |||
|{{Location|Cape Teriggan|G-8}} | |||
|[[Orukeke, W.W.]] | |||
|{{Location|Cape Teriggan|I-6}} | |||
|- | |||
|[[Zulkheim]] | |||
|[[Nyata-Mobuta, W.W.]] | |||
|{{Location|Valkurm Dunes|H-7}} | |||
|[[Tebubu, W.W.]] | |||
|{{Location|Valkurm Dunes|L-10}} | |||
|} | |} | ||
==Jeuno Conquest Overseers== | |||
{| | {| class="horizon-table rotzmissions table-sm" | ||
|- | |- | ||
! colspan="2" | Jeuno Conquest Guard | |||
| | |- class="rotzmissions-alt" | ||
!NPC | |||
!Location | |||
|- | |- | ||
|[[Kochahy-Muwachahy]] | |||
|{{Location|Port Jeuno|K-8}} | |||
|- | |- | ||
|[[Alrauverat]] | |||
|{{Location|Lower Jeuno|F-11}} | |||
|- | |- | ||
|[[Emitt]] | |||
|{{Location|Upper Jeuno|F-5}} | |||
|- | |- | ||
|[[Morlepiche]] | |||
|{{Location|Ru'Lude Gardens|H-10}} | |||
|} | |} | ||
Latest revision as of 22:08, 9 November 2023
Conquest Overseers are NPCs who oversee a nation's participation in Conquest. A character can make use of the Conquest Overseers belonging to their own nation of allegiance. These are the Windustian War Warlocks (W.W.), the Bastokan Iron Musketeers (I.M.), and (due to the division of powers within San d'Oria) the San d'Orian Temple Knights (T.K.) in cities and San d'Orian Royal Knights (R.K.) in outlying areas. The Grand Duchy of Jeuno provides neutral guards for all players.
Overseers may be classified into several groups:
- City, Jeuno and Regional Conquest Guards
- Foreign and National Guards
- Regional Conquest Overseers
- Outpost and Border Guards.
Conquest overseers may be referred to by many other names, such as "Conquest Guards", "Gate Guards", "City Guards", or similar.
National Conquest Guards
National Conquest Guards are affiliated with a particular nation and may serve players allied with the same nation in the following ways:
- Grant Signet.
- Recharge Emperor Band, Empress Band, or Chariot Band.
- Accept traded Crystals to fill up the Rank Bar to open new Missions.
- Sell items in exchange for Conquest Points.
- Start Supply Run Missions by offering a list of outposts your nation controls from which to choose, and whether or not you already delivered supplies to each.
- Start an Expeditionary Force by giving an E.F. region insignia to you.
For players allied with a different nation, you will only be able to purchase items with Conquest Points (and at an inflated price, see table below).
Foreign Conquest Guards
Foreign Conquest Guards are limited National Conquest Guards and only offer some of their functions. They are located in the consulates of each city and may serve players allied with the same nation in the following ways:
- Grant Signet
- Recharge Emperor Band, Empress Band, or Chariot Band
- Accepts traded Crystals to fill up the Rank bar to open new Missions.
- Sells items in exchange for Conquest Points
For players allied with a different nation, you will only be able to purchase items with Conquest Points (and at an inflated price, see table below).
| Rank: | 1 | 2 | 3 | 4 | 5 | 6 | 7 | 8 | 9 | 10 |
|---|---|---|---|---|---|---|---|---|---|---|
| Own Nation: | 1,000 | 2,000 | 4,000 | 8,000 | 16,000 | 24,000 | 32,000 | 40,000 | 48,000 | 56,000 |
| Foreign Nation: | 2,000 | 4,000 | 8,000 | 16,000 | 24,000 | 32,000 | 40,000 | 48,000 | 56,000 | n/a |
Jeuno Conquest Guards
Jeuno Conquest Guards are neutral Foreign Conquest guards and offer their functions to all players regardless of the nation:
- Grant Signet
- Recharge Emperor Band, Empress Band, or Chariot Band
- Accepts traded Crystals to fill up the Rank bar to open new Missions.
- Sells items in exchange for Conquest Points from the player's home nation.
Outpost Conquest Guards
Outpost Conquest Guards only spawn at their locations, when their nation has conquered the regionand may serve players allied with the same nation in the following ways:
- Grant Signet
- Recharge Emperor Band, Empress Band, or Chariot Band
- Sets the player's Home Point to their location for free
- Accepts supplies for the region in which the guard is located, for finishing Supply Quest
- Accepts Garrison starting item of the region, in which the guard is located
For players allied with a different nation, you will only be able to set your Home Point for a fee (depending on your Rank).
Border Conquest Guards
Border Conquest Guards spawn under the same conditions as the Outpost Guards do and perform all of the same services, except for accepting Garrison items.
Bastok Conquest Overseers
City Conquest Overseers
| National Conquest Guard | Foreign Conquest Guard | ||
|---|---|---|---|
| NPC | Location | NPC | Location |
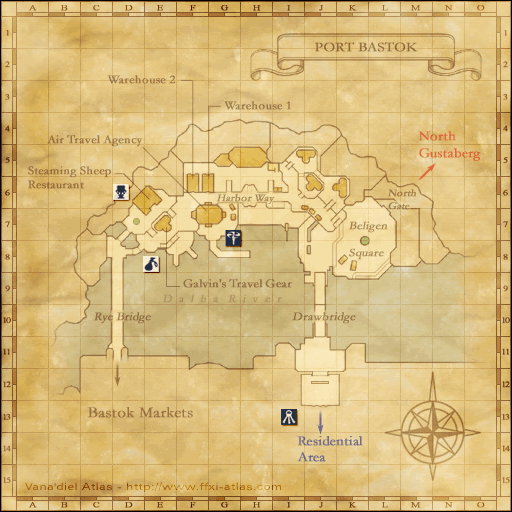
| Flying Axe, I.M. | Port Bastok (L-7) | Yevgeny, I.M. | Northern San d'Oria (K-10) |
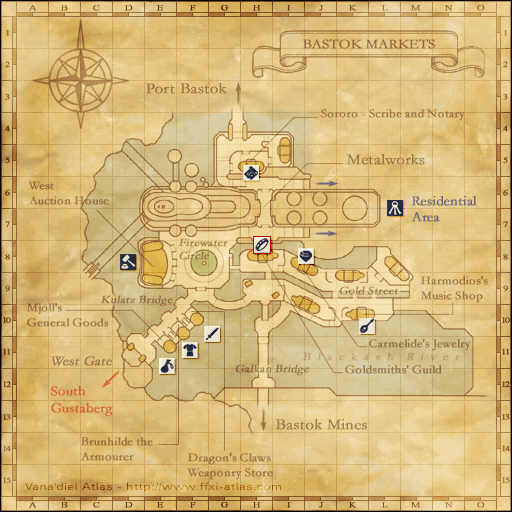
| Rabid Wolf, I.M. | Bastok Markets (E-11) | Sachetan, I.M. | Port Windurst (E-5) |
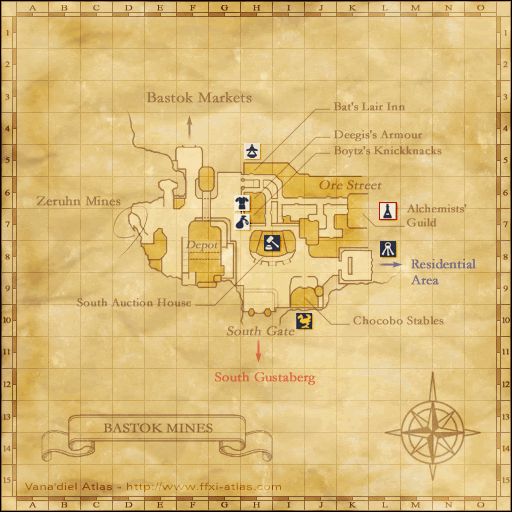
| Crying Wind, I.M. | Bastok Mines (H-10) | ||
Regional Conquest Overseers
San d'Oria Conquest Overseers
City Conquest Overseers
| National Conquest Guard | Foreign Conquest Guard | ||
|---|---|---|---|
| NPC | Location | NPC | Location |
| Arpevion, T.K. | Southern San d'Oria (L-10) | Panoquieur, T.K. | Windurst Woods (G-10) |
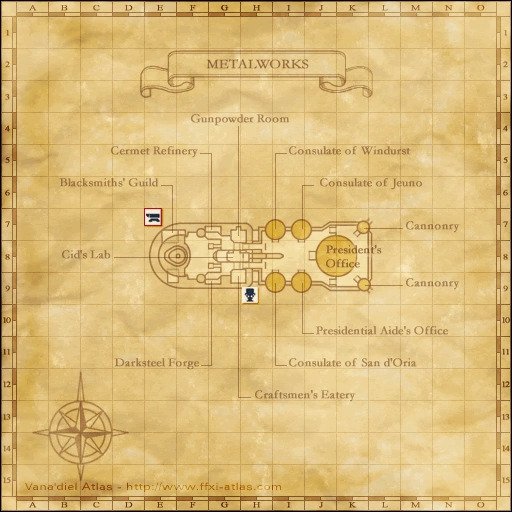
| Aravoge, T.K. | Southern San d'Oria (F-10) | Glarociquet, T.K. | Metalworks (H-9) |
| Achantere, T.K. | Northern San d'Oria (C-8) | ||
Regional Conquest Overseers
Windurst Conquest Overseers
City Conquest Overseers
| National Conquest Guard | Foreign Conquest Guard | ||
|---|---|---|---|
| NPC | Location | NPC | Location |
| Milma-Hapilma, W.W. | Port Windurst (B-4) | Chapal-Afal, W.W. | Northern San d'Oria (H-9) |
| Puroiko-Maiko, W.W. | Windurst Waters (G-5) | Lexun-Marixun, W.W. | Metalworks (I-7) |
| Harara, W.W. | Windurst Woods (K-10) | ||
Regional Conquest Overseers
Jeuno Conquest Overseers
| Jeuno Conquest Guard | |
|---|---|
| NPC | Location |
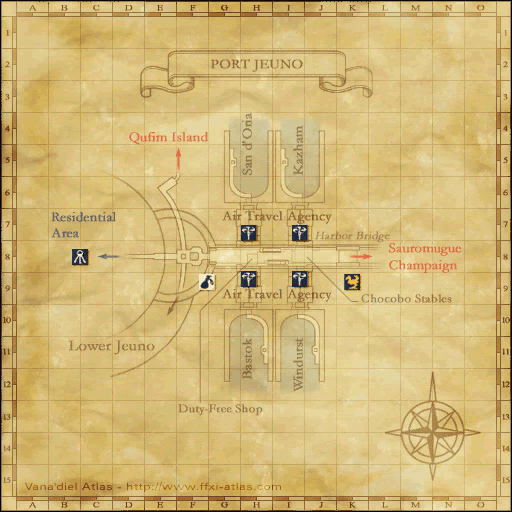
| Kochahy-Muwachahy | Port Jeuno (K-8) |
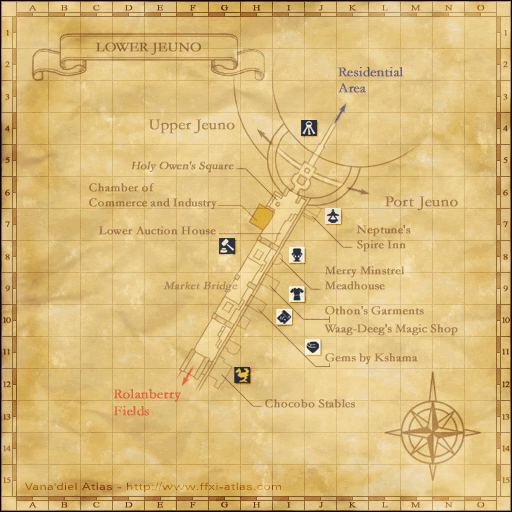
| Alrauverat | Lower Jeuno (F-11) |
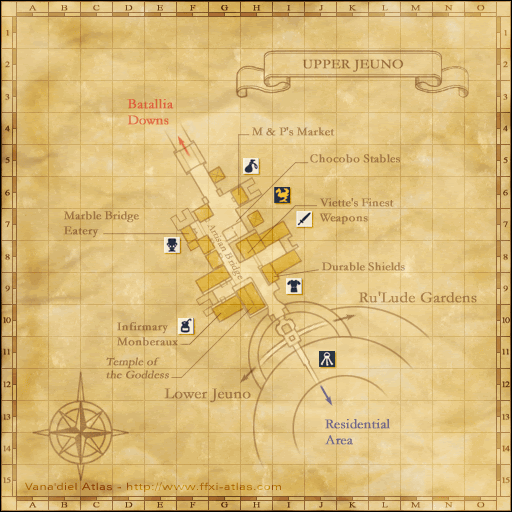
| Emitt | Upper Jeuno (F-5) |
| Morlepiche | Ru'Lude Gardens (H-10) |
Related Articles
Pages in category "Conquest Overseers"
The following 43 pages are in this category, out of 43 total.
