Promathia Mission 5-3/Louverance's Path: Difference between revisions
From HorizonXI Wiki
No edit summary Tag: Manual revert |
(updated tooltips, minor edits to remove OOE items,) |
||
| (4 intermediate revisions by 2 users not shown) | |||
| Line 1: | Line 1: | ||
{{Mission Header | {{Mission Header | ||
|Mission Name=Past Sins (Louverance's Path) | |Mission Name=Past Sins (Louverance's Path) | ||
|Expansion=Chains of Promathia | |Expansion=Chains of Promathia | ||
|Start=[[Cid]] | |Start = [[Cid]]<br> | ||
|Start Location = {{Location|Metalworks|H-8}} | |||
|Description=Louverance has set off on his investigation into the celestial capital of Al'Taieu. | |Description=Louverance has set off on his investigation into the celestial capital of Al'Taieu. | ||
|Level=60 Cap ([[BCNM]]) | |Level=60 Cap ([[BCNM]]) | ||
|Item Needed=[[Gold Key]], [[Snow Lily]] (optional) | |Item Needed=[[Gold Key]], [[Snow Lily]] (optional) | ||
|Repeatable= | |Repeatable= | ||
|HAAP=2 points | |||
|Previous=Desires of Emptiness | |Previous=Desires of Emptiness | ||
|Next=For Whom the Verse is Sung | |Next=For Whom the Verse is Sung | ||
| Line 17: | Line 17: | ||
==Walkthrough== | ==Walkthrough== | ||
*Talk to [[Despachiaire]] in | *Talk to [[Despachiaire]] in {{Location|Tavnazian Safehold|map= Map 2|K-10}}, top level, behind Walnut Door). | ||
:There is a 2nd cutscene from this NPC that seems to relate to Ulmia's path. If you do not get it, you will not be able to continue Ulmia's path beyond the San d'Oria cutscenes. | :There is a 2nd cutscene from this NPC that seems to relate to Ulmia's path. If you do not get it, you will not be able to continue Ulmia's path beyond the San d'Oria cutscenes. | ||
=== 5-3L1: Southern Legend === | === 5-3L1: Southern Legend === | ||
*Talk to [[Perih Vashai]] in | *Talk to [[Perih Vashai]] in {{Location|Windurst Woods|K-7}}. | ||
=== 5-3L2: Partners Without Fame === | === 5-3L2: Partners Without Fame === | ||
*Go to | *Go to {{Location|Bibiki Bay|H-7}}, buy a ticket from [[Tswe Panipahr]] and take the [[Manaclipper]] to {{Location|Bibiki Bay - Purgonorgo Isle|H-11}}, and examine the [[??? Warmachine]]. | ||
**Talk to [[Fheli Lapatzuo]] (H-7) at the docks to find out where the next ferry is headed since there are different destinations for the ferries. | **Talk to [[Fheli Lapatzuo]] (H-7) at the docks to find out where the next ferry is headed since there are different destinations for the ferries. | ||
*Talk to [[Yoran-Oran]] in | *You may also you a Summer Swimsuit such as the [[Custom Gilet +1]] to get to [[Bibiki Bay - Purgonorgo Isle]] | ||
*Talk to [[Yoran-Oran]] in {{Location|Windurst Walls|E-5}} (No Cut-scene, optional dialog) | |||
=== 5-3L3: A Century of Hardship === | === 5-3L3: A Century of Hardship === | ||
| Line 33: | Line 34: | ||
*There are several ways to get to the battlefield. | *There are several ways to get to the battlefield. | ||
:1. Trade a [[Snow Lily]] (AH: Materials/Alchemy) to [[Tarnotik]] in | :1. Trade a [[Snow Lily]] (AH: Materials/Alchemy) to [[Tarnotik]] in {{Location|Oldton Movalpolos|K-10}} and he will teleport you to [[Mine Shaft|Mine Shaft #2716]]. | ||
::*If you have the [[Pungent Providence Pot]] key item from the [[Return to the Depths]] quest, you can trade him a (cheaper and stackable) bottle of [[Ahriman Tears]] instead. Also works if you sold the Pungent Providence Pot afterwards. | ::*If you have the [[Pungent Providence Pot]] key item from the [[Return to the Depths]] quest, you can trade him a (cheaper and stackable) bottle of [[Ahriman Tears]] instead. Also works if you sold the Pungent Providence Pot afterwards. | ||
:2. The ENM60 shortcut: talk to [[Twinkbrix]] in | :2. The ENM60 shortcut: talk to [[Twinkbrix]] in {{Location|Oldton Movalpolos|E-13}}. | ||
::*Give [[Twinkbrix]] an amount between 1-10,000 gil, to have a chance at getting the key item required to go into the ENM60s. When given gil, he will roll two 50-sided dice, and you must beat him by rolling between 2 and X. X is based on how much you trade him; trading 2,000g will roll between 2 and 10; trading him 10,000g will roll between 2-50. If you do not get the key item the first time, you will have to keep paying him gil until you win. | ::*Give [[Twinkbrix]] an amount between 1-10,000 gil, to have a chance at getting the key item required to go into the ENM60s. When given gil, he will roll two 50-sided dice, and you must beat him by rolling between 2 and X. X is based on how much you trade him; trading 2,000g will roll between 2 and 10; trading him 10,000g will roll between 2-50. If you do not get the key item the first time, you will have to keep paying him gil until you win. | ||
::*Once you have the Key Item, you can pay him another 2000 gil for him to teleport you directly to the battlefield. | ::*Once you have the Key Item, you can pay him another 2000 gil for him to teleport you directly to the battlefield. | ||
| Line 54: | Line 55: | ||
*All mobs in this BC are highly resistant to [[Sleep]]/[[Sleepga]], though [[Elemental Seal]] has been known to assist in making it stick for a few seconds. | *All mobs in this BC are highly resistant to [[Sleep]]/[[Sleepga]], though [[Elemental Seal]] has been known to assist in making it stick for a few seconds. | ||
*1000 Experience Points awarded to each member, even on first win. | *1000 Experience Points awarded to each member, even on first win. | ||
* | *No experience points loss on death. | ||
;Strategy tips: | ;Strategy tips: | ||
:* [[Kiting]] the Moblins can make this fight much easier. Ensure your party is capable of kiting one Moblin each) (melees with higher HP are recommended) while your main tank kites Bugbby in the meantime. [[Gravity]] will help. Bugbby is not completely resistant to bind on Horizon, it can be landed. (Confirmed 17th July 2023). | :* [[Kiting]] the Moblins can make this fight much easier. Ensure your party is capable of kiting one Moblin each) (melees with higher HP are recommended) while your main tank kites Bugbby in the meantime. [[Gravity]] will help. Bugbby is not completely resistant to bind on Horizon, it can be landed. (Confirmed 17th July 2023). | ||
:* Assist your highest-damaging | :* Assist your highest-damaging DD (Damage Dealer) in killing the moblin that he or she is tanking, first, then assist your main healer on any Moblin(s) that he or she might have pulled in the meantime. | ||
:* Remember to [[Silence]] Chekochuk, Movamuq and Trikotrak early, in that order. Chekochuk takes priority from the very beginning for Silence order, as his magic is highly damaging, in addition to his potential use of [[Sleepga]]. | :* Remember to [[Silence]] Chekochuk, Movamuq and Trikotrak early, in that order. Chekochuk takes priority from the very beginning for Silence order, as his magic is highly damaging, in addition to his potential use of [[Sleepga]]. | ||
:* With all of the Moblins dead, there will be no reason to rush when fighting Bugbby. Take him down slowly, recover your MP, and stay alive. | :* With all of the Moblins dead, there will be no reason to rush when fighting Bugbby. Take him down slowly, recover your MP, and stay alive. | ||
:*Different parties have different strategies as to which Moblins to kite and which to tank. (Some have even successfully taken Bugbby before the Moblins.) Adjust your strategy as needed to suit your party. Many claim this to be the easiest of the three BC battles in this mission. | :*Different parties have different strategies as to which Moblins to kite and which to tank. (Some have even successfully taken Bugbby before the Moblins.) Adjust your strategy as needed to suit your party. Many claim this to be the easiest of the three BC battles in this mission. | ||
:*Bugbby is immune to [[Charm]]-bind, but the Moblins can't call him if he's all the way back at the entrance of the BC. A [[BST]] can pull him to the entrance and use a jug pet to keep him occupied while the rest of the party deals with the Moblins. | :*Bugbby is immune to [[Charm]]-bind, but the Moblins can't call him if he's all the way back at the entrance of the BC. A [[BST]] can pull him to the entrance and use a jug pet to keep him occupied while the rest of the party deals with the Moblins. | ||
:*The "Super-Kite" strategy works here like it does for the | :*The "Super-Kite" strategy works here like it does for the Mammets. One party member runs in, gets aggro from all the mobs, and kites them around while the rest of the party pulls off one at a time. The moblins will all keep following the kiter, though Buggby will break off when he is called unless he's back at the entrance at the time. NIN is good for this at night with Ninja AF, and provoke for if Buggby gets called away. | ||
::*A variant is the "Super-Paladin" strategy, where your main [[Paladin]] tank gets initial aggro and just lets everything beat on him while the party kills one at a time. | ::'''Note''': ''You need to stay within 10' of the mobs while kiting, if any get out of range they will catch up/teleport to you. This is more advanced for those who have done kiting as the arena is quite narrow causing you to more easily get cornered if they catch up.'' | ||
:: | ::''With this strategy, anyone resting or releasing a pet will get aggro from the kited mobs.'' | ||
:: | :*A variant is the "Super-Paladin" strategy, where your main [[Paladin]] tank gets initial aggro and just lets everything beat on him while the party kills one at a time. | ||
::'''Note''': ''If someone other than the [[Paladin]] gets hate from the Moblin you're killing, they can send Buggby after them. So either the [[Paladin]] needs to provoke Buggby, or the party needs to avoid pulling hate from him on the Moblins.'' | |||
::''As usual with this strategy, anyone resting or releasing a pet will get aggro from the kited mobs.'' | |||
=== 5-3L4: Departures === | === 5-3L4: Departures === | ||
*Head back to the | *Head back to the {{Location|Metalworks|H-8}}, and speak with [[Cid]]. | ||
*Farm one [[Gold Key]] per person from the lower level Moblins in [[Newton Movalpolos]]. | *Farm one [[Gold Key]] per person from the lower level Moblins in [[Newton Movalpolos]]. | ||
*Head back to [[Mine Shaft|Mine Shaft #2716]] and trade the [[Gold Key]] to the BC entrance for another cutscene. '''NB''': You will need another Snow Lilly if you used this method of transportation before. Or you can gamble. Snow Lilly's are usually cheaper. | *Head back to [[Mine Shaft|Mine Shaft #2716]] and trade the [[Gold Key]] to the BC entrance for another cutscene. '''NB''': You will need another Snow Lilly if you used this method of transportation before. Or you can gamble. Snow Lilly's are usually cheaper. | ||
Latest revision as of 00:55, 18 September 2024
| Past Sins (Louverance's Path) | |
|---|---|
| Series | Chains of Promathia Missions |
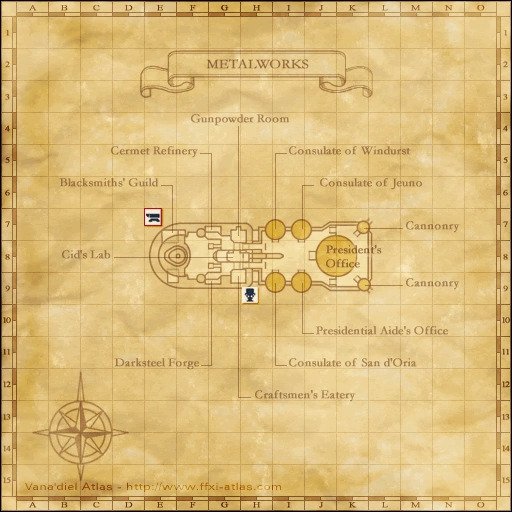
| Starting NPC | Cid Metalworks (H-8) |
| Level Restriction: | Level 60 Cap (BCNM) |
| Items Needed | Gold Key, Snow Lily (optional) |
| Title | Companion of Louverance |
| Repeatable | No |
| HAAP | 2 points |
| Description | Louverance has set off on his investigation into the celestial capital of Al'Taieu. |
| Rewards | |
| 1000 Experience Points | |
| ← Previous Mission | Next Mission → |
|---|---|
| Desires of Emptiness | For Whom the Verse is Sung |
Walkthrough
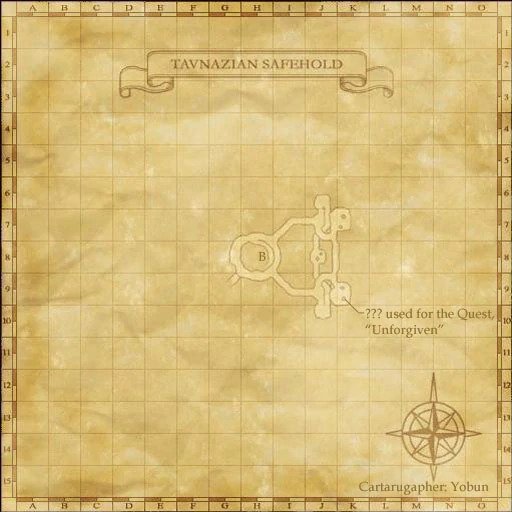
- Talk to Despachiaire in Tavnazian Safehold, Map 2 (K-10), top level, behind Walnut Door).
- There is a 2nd cutscene from this NPC that seems to relate to Ulmia's path. If you do not get it, you will not be able to continue Ulmia's path beyond the San d'Oria cutscenes.
5-3L1: Southern Legend
- Talk to Perih Vashai in Windurst Woods (K-7).
5-3L2: Partners Without Fame
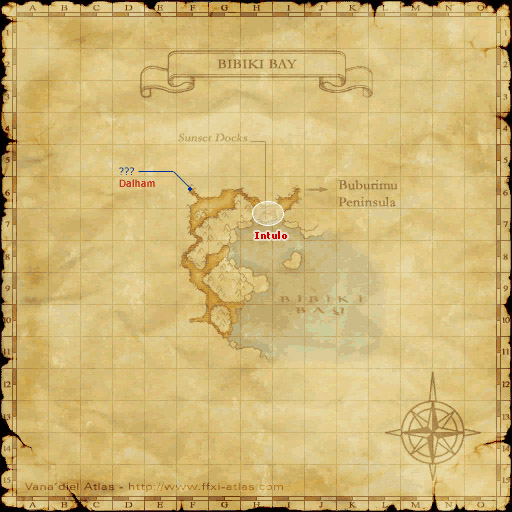
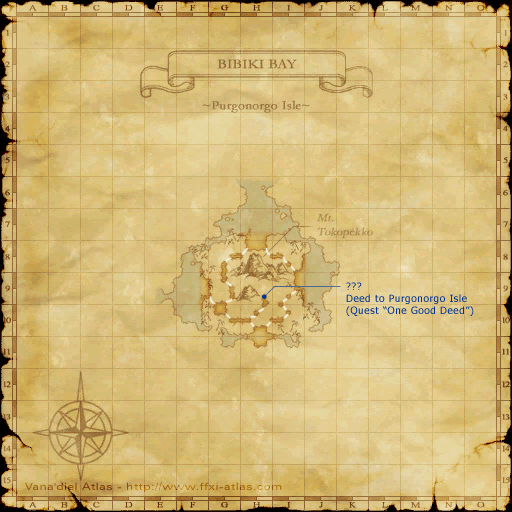
- Go to Bibiki Bay (H-7), buy a ticket from Tswe Panipahr and take the Manaclipper to Bibiki Bay - Purgonorgo Isle (H-11), and examine the ??? Warmachine.
- Talk to Fheli Lapatzuo (H-7) at the docks to find out where the next ferry is headed since there are different destinations for the ferries.
- You may also you a Summer Swimsuit such as the Custom Gilet +1 to get to Bibiki Bay - Purgonorgo Isle
- Talk to Yoran-Oran in Windurst Walls (E-5) (No Cut-scene, optional dialog)
5-3L3: A Century of Hardship
Mine Shaft #2716 - Level 60 Cap BCNM
- Zone into Oldton Movalpolos for a cutscene with Louverance.
- Travel to Mine Shaft #2716 for BCNM fight (A Century of Hardship).
- There are several ways to get to the battlefield.
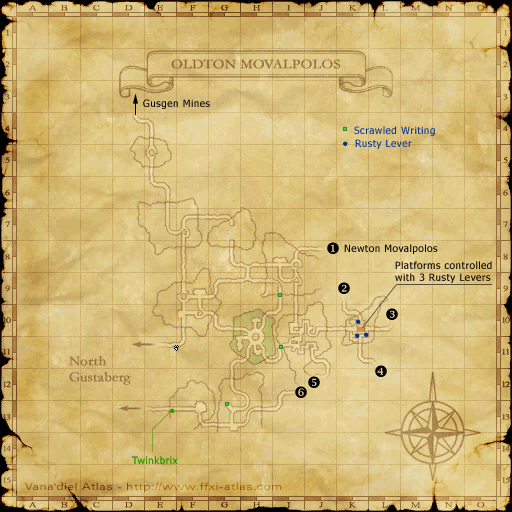
- 1. Trade a Snow Lily (AH: Materials/Alchemy) to Tarnotik in Oldton Movalpolos (K-10) and he will teleport you to Mine Shaft #2716.
- If you have the Pungent Providence Pot key item from the Return to the Depths quest, you can trade him a (cheaper and stackable) bottle of Ahriman Tears instead. Also works if you sold the Pungent Providence Pot afterwards.
- 2. The ENM60 shortcut: talk to Twinkbrix in Oldton Movalpolos (E-13).
- Give Twinkbrix an amount between 1-10,000 gil, to have a chance at getting the key item required to go into the ENM60s. When given gil, he will roll two 50-sided dice, and you must beat him by rolling between 2 and X. X is based on how much you trade him; trading 2,000g will roll between 2 and 10; trading him 10,000g will roll between 2-50. If you do not get the key item the first time, you will have to keep paying him gil until you win.
- Once you have the Key Item, you can pay him another 2000 gil for him to teleport you directly to the battlefield.
- Note: Do not attempt an ENM60 while you are here. You will need to return to Mine Shaft #2716 after you beat the BC, and if you use up the key item, the Moblin won’t teleport you again until five days have passed.
- 3. Go the long way through Newton Movalpolos that you need to use for the Bionic Bug ENM.
- Moblins:
- Bugbear:
- Bugbby uses the Warrior two-hour ability Mighty Strikes, and attacks twice each round like a Monk.
- Bugby is extremely susceptible to Stun.
- All Moblins possess two-hour abilities for their job and all have the ability to call Bugbby to the center of the Battlefield, ignoring any kiting in progress and resetting hate. Whoever is kiting Bugbby should make sure to reclaim hate when this happens.
- All mobs in this BC are highly resistant to Sleep/Sleepga, though Elemental Seal has been known to assist in making it stick for a few seconds.
- 1000 Experience Points awarded to each member, even on first win.
- No experience points loss on death.
- Strategy tips
-
- Kiting the Moblins can make this fight much easier. Ensure your party is capable of kiting one Moblin each) (melees with higher HP are recommended) while your main tank kites Bugbby in the meantime. Gravity will help. Bugbby is not completely resistant to bind on Horizon, it can be landed. (Confirmed 17th July 2023).
- Assist your highest-damaging DD (Damage Dealer) in killing the moblin that he or she is tanking, first, then assist your main healer on any Moblin(s) that he or she might have pulled in the meantime.
- Remember to Silence Chekochuk, Movamuq and Trikotrak early, in that order. Chekochuk takes priority from the very beginning for Silence order, as his magic is highly damaging, in addition to his potential use of Sleepga.
- With all of the Moblins dead, there will be no reason to rush when fighting Bugbby. Take him down slowly, recover your MP, and stay alive.
- Different parties have different strategies as to which Moblins to kite and which to tank. (Some have even successfully taken Bugbby before the Moblins.) Adjust your strategy as needed to suit your party. Many claim this to be the easiest of the three BC battles in this mission.
- Bugbby is immune to Charm-bind, but the Moblins can't call him if he's all the way back at the entrance of the BC. A BST can pull him to the entrance and use a jug pet to keep him occupied while the rest of the party deals with the Moblins.
- The "Super-Kite" strategy works here like it does for the Mammets. One party member runs in, gets aggro from all the mobs, and kites them around while the rest of the party pulls off one at a time. The moblins will all keep following the kiter, though Buggby will break off when he is called unless he's back at the entrance at the time. NIN is good for this at night with Ninja AF, and provoke for if Buggby gets called away.
- Note: You need to stay within 10' of the mobs while kiting, if any get out of range they will catch up/teleport to you. This is more advanced for those who have done kiting as the arena is quite narrow causing you to more easily get cornered if they catch up.
- With this strategy, anyone resting or releasing a pet will get aggro from the kited mobs.
- A variant is the "Super-Paladin" strategy, where your main Paladin tank gets initial aggro and just lets everything beat on him while the party kills one at a time.
- Note: If someone other than the Paladin gets hate from the Moblin you're killing, they can send Buggby after them. So either the Paladin needs to provoke Buggby, or the party needs to avoid pulling hate from him on the Moblins.
- As usual with this strategy, anyone resting or releasing a pet will get aggro from the kited mobs.
5-3L4: Departures
- Head back to the Metalworks (H-8), and speak with Cid.
- Farm one Gold Key per person from the lower level Moblins in Newton Movalpolos.
- Head back to Mine Shaft #2716 and trade the Gold Key to the BC entrance for another cutscene. NB: You will need another Snow Lilly if you used this method of transportation before. Or you can gamble. Snow Lilly's are usually cheaper.
- Logistical Note: If you are in a party (CoP static, for example) and helping with the moblin/bugbear fight from the previous phase of the mission, do not trigger this cutscene before you enter the battlefield. The cutscene spits you out at the battlefield exit in Newton Movalpolos, and you will not be able to Escape and teleport back to Mine Shaft #2716 if you have just used Twinkbrix to get there. But you can use the Moblin just outside the exit and pay him 800 Gil and choose to warp back to the mine shaft entrance. That will bring you right back to the BCNM.
- Return to the Metalworks and talk to Cid again for a cutscene, ending this fork.
- If Louverance's Path is your final path to complete on Mission 5-3, you will get an additional cutscene at Cid that leads into the next mission; If not, you may head to another fork.
| Fork 1 | Fork 2 | Fork 3 |
|---|---|---|
| Tenzen Path | Ulmia Path | Louverance Path |
