Toraimarai Canal: Difference between revisions
From HorizonXI Wiki
No edit summary |
m →Regular Monsters Found Here: typos |
||
| (3 intermediate revisions by 3 users not shown) | |||
| Line 7: | Line 7: | ||
| Monstrosity = {{Medium}} | | Monstrosity = {{Medium}} | ||
| Connections = | | Connections = | ||
[[East Sarutabaruta]] at ({{Location Tooltip|area=East Sarutabaruta|pos=J-7}}): [[Escape]] | |||
<br>[[Full Moon Fountain]] at ({{Location Tooltip|area=Toraimarai Canal|map=Map 1|pos=G-7}}) | |||
<br>[[Inner Horutoto Ruins]] at ({{Location Tooltip|area=Toraimarai Canal|map=Map 1|pos=F-5}}) | |||
<br>[[Windurst Walls]] at ({{Location Tooltip|area=Toraimarai Canal|map=Map 2|pos=H-6}}) | |||
<br>[[Heavens Tower]] at ({{Location Tooltip|area=Toraimarai Canal|map=Map 2|pos=H-8}}) (Animastery teleporter) | |||
<!-- | <!-- | ||
*[[Survival Guide]]: ({{Location Tooltip|area=Toraimarai Canal|map=Map 1|pos=F-5}}) | *[[Survival Guide]]: ({{Location Tooltip|area=Toraimarai Canal|map=Map 1|pos=F-5}}) | ||
*[[Home Point]] #1: ({{Location Tooltip|area=Toraimarai Canal|map=Map 1|pos=G-7}}) | *[[Home Point]] #1: ({{Location Tooltip|area=Toraimarai Canal|map=Map 1|pos=G-7}}) | ||
--> | --> | ||
| Stats = {{Escape | | Stats = {{Escape}} {{Tractor}} | ||
| Region = Sarutabaruta | | Region = Sarutabaruta | ||
| Type = Dungeon | | Type = Dungeon | ||
| Line 26: | Line 26: | ||
| Restrictions = None | | Restrictions = None | ||
| Requirements = None | | Requirements = None | ||
| Expansion = | | Expansion = Final Fantasy XI | ||
| BGM = None | | BGM = None | ||
| Notes = [[:File:Toraimarai Composite.PNG|Composite Map]] | | Notes = [[:File:Toraimarai Composite.PNG|Composite Map]] | ||
| Line 35: | Line 35: | ||
{{TableQuestLine |Name= Borghertz's Calling Hands| Type= [[SMN]] [[:Category:Artifact Armor|AF]]| Starter= [[Guslam]]| Zone= [[Upper Jeuno]]| Coordinates= H-8}} | {{TableQuestLine |Name= Borghertz's Calling Hands| Type= [[SMN]] [[:Category:Artifact Armor|AF]]| Starter= [[Guslam]]| Zone= [[Upper Jeuno]]| Coordinates= H-8}} | ||
<!-- | |||
{{TableQuestLine |Name=Now Recording...| Type=General| Starter= [[Darcia]]| Zone= [[Lower Jeuno]]| Coordinates= {{Location Tooltip|area=Lower Jeuno|pos=H-7}}}} | {{TableQuestLine |Name=Now Recording...| Type=General| Starter= [[Darcia]]| Zone= [[Lower Jeuno]]| Coordinates= {{Location Tooltip|area=Lower Jeuno|pos=H-7}}}} | ||
--> | |||
{{TableQuestLine |Name= The Root of the Problem| Type= [[Black Mage|BLM]] [[:Category:Artifact Armor|AF]] 3| Starter= [[Chumimi]]| Zone= [[Heavens Tower]]| Coordinates= }} | {{TableQuestLine |Name= The Root of the Problem| Type= [[Black Mage|BLM]] [[:Category:Artifact Armor|AF]] 3| Starter= [[Chumimi]]| Zone= [[Heavens Tower]]| Coordinates= }} | ||
| Line 49: | Line 49: | ||
{{TableMissionLine |Name = The Sixth Ministry|Mission 7-1: The Sixth Ministry| Nation= [[Windurst Missions|Windurst]]| Starter= [[Windurst Gate Guard]]| Zone= [[Windurst]]| Coordinates= }} | {{TableMissionLine |Name = The Sixth Ministry|Mission 7-1: The Sixth Ministry| Nation= [[Windurst Missions|Windurst]]| Starter= [[Windurst Gate Guard]]| Zone= [[Windurst]]| Coordinates= }} | ||
<!-- | |||
{{TableMissionLine |Name = Fountain of Trouble| Nation= [[A Shantotto Ascension]]| Starter= Ensorcelled Door| Zone= [[Ro'Maeve]]| Coordinates= B-10}} | {{TableMissionLine |Name = Fountain of Trouble| Nation= [[A Shantotto Ascension]]| Starter= Ensorcelled Door| Zone= [[Ro'Maeve]]| Coordinates= B-10}} | ||
{{TableMissionLine |Name= The Geomagnetron| Nation= [[Seekers of Adoulin Missions|Adoulin 1-2]]| Starter= [[Darcia]]| Zone= [[Lower Jeuno]]| Coordinates= {{Location Tooltip|area=Lower Jeuno|pos=H-7}}}} | {{TableMissionLine |Name= The Geomagnetron| Nation= [[Seekers of Adoulin Missions|Adoulin 1-2]]| Starter= [[Darcia]]| Zone= [[Lower Jeuno]]| Coordinates= {{Location Tooltip|area=Lower Jeuno|pos=H-7}}}} | ||
--> | |||
{{TableQuestFooter}} | {{TableQuestFooter}} | ||
| Line 295: | Line 295: | ||
{{TableMobLine-Regular | Name= Mindcraver| Spawn= | Lvl= 60-62| Drop= [[Bone Chip]]<br>[[Revival Tree Root]]<br>[[Blizzard III|Scroll of Blizzard III]]<br>[[Toraimarai Coffer Key]]| Steal= [[Bone Chip]]| Family= Skeletons| NumSpawns= 12| Note= A, H, HP}} | {{TableMobLine-Regular | Name= Mindcraver| Spawn= | Lvl= 60-62| Drop= [[Bone Chip]]<br>[[Revival Tree Root]]<br>[[Blizzard III|Scroll of Blizzard III]]<br>[[Toraimarai Coffer Key]]| Steal= [[Bone Chip]]| Family= Skeletons| NumSpawns= 12| Note= A, H, HP}} | ||
{{TableMobLine-Regular | Name= Scavenger Crab| Spawn= | Lvl= 60-62| Drop= [[Crab Shell]]<br>[[High Quality Crab Shell]]<br>[[Land Crab Meat]]<br>[[Rock Salt]]<br>[[Toraimarai Coffer Key]]| Steal= [[Rock Salt]]| Family= Crabs| NumSpawns= 15| Note= A, H}} | {{TableMobLine-Regular | Name= Scavenger Crab| Spawn= | Lvl= 60-62| Drop= [[Crab Shell]]<br>[[High-Quality Crab Shell]]<br>[[Land Crab Meat]]<br>[[Rock Salt]]<br>[[Toraimarai Coffer Key]]| Steal= [[Rock Salt]]| Family= Crabs| NumSpawns= 15| Note= A, H}} | ||
{{TableMobLine-Regular | Name= Dire Bat| Spawn= | Lvl= 62-64| Drop= [[Bat Wing]]<br>[[Toraimarai Coffer Key]]| Steal= | Family= Giant Bats| NumSpawns= 6| Note= A, L, H}} | {{TableMobLine-Regular | Name= Dire Bat| Spawn= | Lvl= 62-64| Drop= [[Bat Wing]]<br>[[Toraimarai Coffer Key]]| Steal= | Family= Giant Bats| NumSpawns= 6| Note= A, L, H}} | ||
| Line 301: | Line 301: | ||
{{TableMobLine-Regular | Name= Mousse| Spawn= | Lvl= 63-65| Drop= [[Slime Oil]]<br>[[Toraimarai Coffer Key]]| Steal= | Family= Slimes| NumSpawns= 6| Note= A, H, Sc}} | {{TableMobLine-Regular | Name= Mousse| Spawn= | Lvl= 63-65| Drop= [[Slime Oil]]<br>[[Toraimarai Coffer Key]]| Steal= | Family= Slimes| NumSpawns= 6| Note= A, H, Sc}} | ||
{{TableMobLine-Regular | Name= Cutlass Scorpion| Spawn= | Lvl= 64-66| Drop= [[Toraimarai Coffer Key]]<br>[[High Quality Scorpion Shell]]<br>[[Scorpion Claw]]<br>[[Scorpion Shell]]| Steal= | Family= Scorpions| NumSpawns= 6| Note= A, H, Sc}} | {{TableMobLine-Regular | Name= Cutlass Scorpion| Spawn= | Lvl= 64-66| Drop= [[Toraimarai Coffer Key]]<br>[[High-Quality Scorpion Shell]]<br>[[Scorpion Claw]]<br>[[Scorpion Shell]]| Steal= | Family= Scorpions| NumSpawns= 6| Note= A, H, Sc}} | ||
{{TableMobLine-Regular | Name= Bouncing Ball| Spawn= | Lvl= 64-67| Drop= [[Carbuncle's Ruby]]<br>[[Toraimarai Coffer Key]]| Steal= | Family= Leeches| NumSpawns= 10| Note= A, L, H, Sc}} | {{TableMobLine-Regular | Name= Bouncing Ball| Spawn= | Lvl= 64-67| Drop= [[Carbuncle's Ruby]]<br>[[Toraimarai Coffer Key]]| Steal= | Family= Leeches| NumSpawns= 10| Note= A, L, H, Sc}} | ||
Latest revision as of 14:45, 21 May 2025
Description
Named after the famed explorer and mage Torai-Marai, this series of canals underneath Windurst provides water to the massive roots of the Great Star Tree and is also home to a wide variety of creatures. With multiple levels and a number of dead-ends, venturing in this frightful labyrinth often leads to certain death.
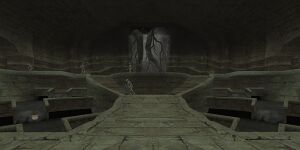

Table of Contents
Connections
East Sarutabaruta at (J-7): Escape
Full Moon Fountain at (G-7)
Inner Horutoto Ruins at (F-5)
Windurst Walls at (H-6)


Heavens Tower at (H-8) (Animastery teleporter)
Interactive Map
| Zone Information | ||
|---|---|---|
| Area Name | Toraimarai Canal | |
| Type | Dungeon | |
| Maps | ||
| Map Acquisition | Quest or Purchase | |
| Miscellaneous | ||
| Hobbies |
| |
| Weather | None | |
| Region | Sarutabaruta | |
| Expansion | Final Fantasy XI | |
| Requirements | None | |
| Restrictions | None | |
| Background music | None | |
| Notes | Composite Map | |
Weather Forecast
| VanaDays from Today | Normal (50%) | Common (35%) | Rare (15%) |
|---|---|---|---|
Involved in Quests/Missions
| Quest | Type | Starter | Location |
|---|---|---|---|
| Borghertz's Calling Hands | SMN AF | Guslam | Upper Jeuno (H-8) |
| The Root of the Problem | BLM AF 3 | Chumimi | Heavens Tower |
| Toraimarai Turmoil | General | Ohbiru-Dohbiru | Windurst Waters (Windurst Waters/Maps) |
| Wild Card (Quest) | General | Honoi-Gomoi | Port Windurst (E-7) |
| Mission | Nation | Starter | Location |
| Full Moon Fountain (Mission) | Windurst | Windurst Gate Guard | Windurst |
| The Sixth Ministry | Windurst | Windurst Gate Guard | Windurst |


Other Information
| ||||||||||||||||||||||||||||


Notorious Monsters Found Here
| Name | Level | Drops | Steal | Family | Spawns | Notes | |||||||
|---|---|---|---|---|---|---|---|---|---|---|---|---|---|
Oni Carcass
|
68-70 | Onikiri Undead Skin |
Doomed | Oni Carcass Spawn Location |
A, H, HP
| ||||||||
| Canal Moocher
|
73-74 | Aptant: Pera | Leeches | Canal Moocher Spawn Location |
L, H, Sc
| ||||||||
| Brazen Bones
|
? | Laran's Pendant | Skeletons | Brazen Bones Spawn Location |
A, H, HP
| ||||||||
| Konjac
|
? | Aptant: Durus Aptant: Aecus |
Slimes | Konjac Spawn Location |
A, L, H
| ||||||||
|
HP = Detects Low HP; M = Detects Magic; Sc = Follows by Scent; T(S) = True-sight; T(H) = True-hearing JA = Detects job abilities; WS = Detects weaponskills; Z(D) = Asleep in Daytime; Z(N) = Asleep at Nighttime; A(R) = Aggressive to Reive participants | |||||||||||||
Regular Monsters Found Here
Event Monsters Found Here
| Name | Family | Spawns | Notes
|
|---|---|---|---|
Hinge Oil
|
Slimes | 4 Respawn: ~20 min |
A, H, Sc
|
Magic Sludge
|
Elementals | 1 | A, M
|
Mimic
|
Mimics | 1 | A
|
|
HP = Detects Low HP; M = Detects Magic; Sc = Follows by Scent; T(S) = True-sight; T(H) = True-hearing JA = Detects job abilities; WS = Detects weaponskills; Z(D) = Asleep in Daytime; Z(N) = Asleep at Nighttime; A(R) = Aggressive to Reive participants |