Getting Started Guide
| CAUTION! | ||
| This article is only a guide. Information expressed in a guide is usually more opinion than fact and should be taken as such. Guides are written by players, based upon their experiences, successes and mistakes, and are meant to aid other players. However, there may be differing opinions than those expressed in a guide. Strategies and information in guides may not work for everyone. | ||
Welcome to the Getting Started Guide For HorizonXI!
Welcome to this Getting Started Guide for HorizonXI!
Let's start by being completely honest: FF11 is a hard game. It doesn't hold your hand at all. Its core gameplay based on a time when Ultima Online and Everquest were THE online games to play back in 2002 (it launched in NA in 2003 and WoW wouldn't launch until 2004). This server is based on FF11's 2nd expansion Chains of Promathia (2006). It's very much old school in its design.
So why do people want to play this? To me, it's because if you are willing to put in the work and have patience, this game is one of the most rewarding games out there. The lack of hand-holding means exploration is front-and-center. Danger is lurking around every turn.
This isn't meant to replace the Beginner How-To Guide, but more of a distillation of the information there with a little more guidance thrown in and addressing common questions found in the Discord. If you can't find the answer to a question here, check that guide.
Lastly, there may be some terminology used in this guide you may not know. If you're ever curious as to what certain terms may mean, be sure to check the Terminology page.
Installation and Configuration
Installation/Uninstallation
Installation
Go to https://horizonxi.com/play-now and follow the steps there. After running the installer, login and click the install button on the bottom right of the launcher.
Where is the launcher's install folder? How do I load the game again?
The two common paths for the installer are:
C:\Users\yourUser\AppData\Local\HorizonXI_Launcher- You can load the launcher again from this location.
- This contains the launcher itself, including the executable that you can make a shortcut for.
- Alternatively you can run the installer again and it will simply load the launcher for you. However, note that if you do this, whenever the launcher is updated, this method will revert the launcher, so it's better to go to the install folder and create a shortcut.
C:\Users\yourUser\AppData\Roaming\HorizonXI-Launcher1- This contains a lot of the configuration and settings.
Backing Up Your Settings
In-Game Settings and Macros
Backing up your macros and in-game settings should be a fairly simple process, even though we can't use many of the tools Square-Enix have. The most common way is to go to \Game's install path\Game\SquareEnix\Final Fantasy XI\ and
copy/paste the Users folder into a new location. After you reinstall game, go back to that folder and overwrite the new Users folder with the one you backed up.
Launcher Configurations
Go to C:\Users\yourUser\AppData\Roaming\HorizonXI-Launcher1 and back up the file config.json. Replace the new config file with the backed up file after reinstalling.
Uninstalling the Launcher
To uninstall the launcher, delete the 2 folders mentioned in Where is the launcher's install folder? How do I load the game again?.
Uninstalling the Game
To uninstall the game:
- Delete the following folders:
\Game install path\Downloads\\Game install path\Game\ - Go to
C:\Users\yourUser\AppData\Roaming\HorizonXI-Launcher1 and delete the filestorage.json. This will force the launcher to notice the game needs to be reinstalled.
WARNING: Doing this will delete your macros and in-game settings for every character unless you back them up.
Uninstalling Both the Launcher and the Game
You can completely uninstall the game by deleting all of the game and launcher folders found in the sections above. You can also try using the clean uninstaller found here. Some people have reported that it can miss items though, so be sure to double check everything if something seems off.
Changing the Game's Install Location
You can change which folder the game itself is installed.
- Move the contents of the game's install folder (the one containing Downloads and Game) to the new location
- Go to
C:\Users\yourUser\AppData\Roaming\HorizonXI-Launcher1 and open the filestorage.jsonin a text editor like Notepad. - At the top of the file you should see
installPathanddownloadPath. In each one, update thepathlines to the new path. Make sure the edits are within the quotes and that for each\you have two instead of one (like how it is when you first open the file). Both keeping the path within the quotes and the double slashes are important as not doing so could cause errors.
1You can also get to this folder by opening the launcher and going to Settings > Misc. and clicking the button "Open launcher install folder".
Launcher Configuration
This section provides brief explanations about settings you can find in the HorizonXI launcher.
General
- Hardware Mouse: Forces the game to use the hardware mouse instead of a software-emulated mouse. I would enable this regardless of your setup.
- Play Opening Movie: Whether or not to play the intro movie when loading the game. If it's your first time, maybe enable this for your first login and then turn it off after that.
- Sound: Whether or not sound should be enabled.
- Always Play Sound: Whether or not to play sound even when the window is not in focus.
- Gamma: A setting that can adjust the brightness of intermediate tones (greys).
- Max # of Sounds: How many simultaneous sounds the game should allow.
- Launcher Music Volume: The volume level for the HorizonXI Launcher's music.
- Console Key: The key that will bring up Ashita's console where you can set temporary keybinds and the loader's main settings
- Window Resolution: The resolution size of the game window.
- Window Mode: Whether the game should run in fullscreen, a window, or in a borderless window.
Graphics
- Graphics Stabilization: I have not found specifics, but allegedly it helped fix some crashing for Nvidia cards. May not be a problem now, but don't think it'll hurt to enable just to be safe.
- Map Compression: Whether or not the graphic used for the maps should be compressed or not to conserve memory. Disable for the best quality, enable if you need the resources.
- Bump Mapping: Makes it so that the textures appear to have more depth. Enable for a slightly better graphical experience.
- Maintain Aspect Ratio: Unknown; appears to have no effect either on or off
- 3D LCD Mode: Enables a way to view the game in stereoscopic 3D with something like a Quest or Oculus LCD headset. Don't enable this unless you plan on playing with something like that.
- Environment/Textures/Fonts/Mip Mapping: Allows you to fine tune the graphics quality. This can vary greatly on your setup. If you're noticing FPS drops and the common fixes don't improve your FPS, try lowering these settings.
- Note: Some HD texture packs like Ashenbubs recommend disabling or setting Mip Mapping to 1 as it isn't really needed for higher resolution textures.
- Background Resolution: Resolution of the background image. 2x your window resolution is recommended.
- Ex: If your window resolution is 1920x1080, set this to 2160x2160.
- You can also lower this value to improve performance.
- Menu Resolution: The menu uses a different resolution than the game to determine how big to display the UI. If you want to make the UI bigger, lower these values.
- Note: It's a good idea to keep the same aspect ratio as your window resolution, otherwise the game may crash. You can usually find a list of resolutions for an aspect ratio with a quick search online.
Pivot
This section allows you to toggle asset packs (found in \Game\polplugins\DATs\)on or off. You will likely have 3: HorizonXI Music, Horizonoverrides, and XIView. It's highly recommend to keep Horizonoverrides and XiView enabled. You can disable HorizonXI Music if you prefer the game's original music.
- Tip: Check out the Jukebox pack over at https://horizonxi.info/jukebox. This pack has an option that keeps the game's original music for areas with music, but fills in areas that did not have music originally with the HorizonXI music to round things out.
Misc.
- Screenshot Location: Unknown
- Screenshot in Screen Resolution: Unknown
- Enable seeding installer: The launcher uses torrenting as its way of distributing the game. While this is enabled, and while the launcher is open, you act as a seed for other users to download the game.
- If you are noticing network connection instability or other oddities, try disabling this to see if the game runs better.
- Throttle installation upload speed: The max allowable upload speed the launcher can use to upload the game to other users who are installing the game.
- You may need to change this if you wish to keep seeding the game for other users but do not have a fast internet service.
- Troubleshooting Buttons: View Log File and Open Launcher Install Folder are shortcut buttons allowing you to quickly find the launcher's log file or its configuration folder. Re-apply last patch can sometimes fix installation issues after an update.
Addons/Plugins
This will not be an exhaustive list as there are a ton of approved addons and plugins that can be used with HorizonXI. I'll go over some common ones and a few of my favorites. Note that using an addon or plugin that is NOT in the approved list can get your account banned. You can find the full list of allowed addons/plugins here and their downloads here.
NOTE: If you're using a UI plugin and need to move it, sometimes simply clicking and dragging it will work. If that doesn't, hold down the SHIFT key and try dragging.
Addons
- allmaps: Some people swear by it, some people swear it off. In FF11 you need to either purchase a map or get the map as a quest reward. This addon removes that requirement and gives you all the maps in the game without any extra effort. You can either use it or not; it's up to you.
- aspect: Increases the number of supported aspect ratios.
- Checker: Updates the display of the check command to display colors based on difficulty and the level of the mob.
- distance: Shows the number of units (distance) between you and your target.
- drawdistance: Increases the draw distance beyond what the game's config allows. Note: can greatly impact performance.
- filterless: Forces the client to disable the profanity filter.
- fps: Displays the game's current FPS and allows the user to modify the framerate divisor (0 is uncapped, 1 = 57-58 FPS, 2 = 29 FPS, etc.).
- HXUI: A popular UI mod providing more information on screen than the default UI.
- instantah: The auction house has a forced delay between you bidding on an item and it telling you whether or not you purchased the item. This addon removes the delay.
- luashitacast: A powerful equipment swapping addon. You will be swapping equipment A LOT in this game. This addon will trigger equip swaps automatically based on criteria you set without needing a bunch of macros to do it.
- Logs: Everything that enters your logs in the game are exported into a text file. Useful if you want a record of gameplay, either for troubleshooting, history for GM requests, or any parsing you want to do.
- petinfo: Displays information (HP, TP, etc.) of your current pet.
- TargetLines: Adds healing, player action, and aggro lines to the game like those found in FF12 and FF14.
- timers: Displays the duration of abilities and spells you cast. Note: this may not be 100% accurate due to your own skill levels and other factors.
- tparty: Shows the TP of your party members, allowing you and your party members to more easily coordinate skillchains. This information has always been available in the game, but Square-Enix never provided a way to show it.
Plugins
- HardwareMouse': Also forces the game to use the hardware mouse instead of the software one. I'd use this to make sure your mouse cursor works correctly.
- Minimap: Adds a minimap to the game showing your location and nearby NPCs, mobs, and players.
- Nameplate: Adjusts the nameplate to display better on modern systems. Note: this plugin may not be supported soon, so it may not be usable for much longer.
Fixing Low FPS
FF11 is an old game and sometimes doesn't notice you have a GPU. Instead, it'll run on CPU or on the onboard GPU (usually happens with laptops). If that happens you can try atom0s's optimizations to see if you can get the game running on the proper hardware (and maybe even at 60 FPS).
Adjusting the Game's Startup
If you add plugins/addons that were not included in HorizonXI, but you want them to load when you launch the game, you'll need to manually adjust the script file that tells the game what to load and set as defaults. Here are the steps to do that:
- Open the folder
\Your Game Install Path\Game\scripts\. - Locate the section
Custom user plugins and addonsif you are loading additional addons/plugins.- Make sure that you are in the correct section. Add your commands under the line of #.
- If it's an addon, type
/addon load AddonName - If it's a plugin, type
/load PluginName
- If you're adding new keybinds, locate
Custom user keybinds and aliases- Like with plugins/addons, make sure you're in the right section and the keybinds are added under the line of #
- There are 3 symbols to correlate with the ALT, CTRL, and SHIFT keys:
- + : SHIFT
- ^ : CTRL
- ! : ALT
- The format for the keybind command is
/bind [key modifiers]keyToBind [up] commandkey modifiers: the +^! listed abovekeyToBind: which key you want to bindup: optional; whether the keybind should trigger when you release the key instead of when you press itcommand: the in-game command you want to bind (like /map)
- Ex: keybind opening the map to CTRL+SHIFT+M
/bind +^M /map
- To add commands you want to run as soon as your character loads (like changing the frame rate limiter to 0), locate the section
Custom user settings- Like with the others, make sure all commands are added below the line of #
- These can be any supported commands, addons/plugins or the game's commands
Don't Forget to Link Your Discord Account
It is highly recommended that you link your Discord account to HorizonXI. There are 3 major benefits to this:
- You gain access to the mog satchel, a 30 slot bag that's available to you anywhere in the game (there will be methods to expand that bag beyond 30 slots over time).
- You gain the ability to contact HorizonXI's support.
- You gain access to all features of the Discord, including Looking For Group channels, job channels, etc.
To link your Discord account, go to the #welcome channel in Discord and use the link there, or simply go here. After visiting the page you will be given a number to set in your search comment. To set a search comment:
- Open your in-game menu (default key: - ).
- Select Search.
- On the bottom of the list, select Edit Comment.
- Select any of the categories; it shouldn't matter which.
- A window will open in the bottom right, above your log windows. Input the number here.
- Back out of the windows.
If all goes well, it should fully link in a couple of minutes. If your account is linked but you don't see the benefits mentioned above, go to the #harlequin-help channel in Discord and type the command /refresh. Then check again. If it still doesn't work, check the Discord channels you do have access to for help.
Use the HorizonXI's Tools
The HorizonXI website has a list of tools you can use to make life a little easier. There is a player search (a great way to check if you're still considered online and have a stuck session), an automatically updating list of recent yells (a good way to check for parties forming that you may want to join while not in town), a bazaar search if you're looking for a certain item that isn't on the auction house, and the ability to check your own character for recent Auction House transactions or search your storage for an item. It's really useful, so be sure to check the tools list on the website.
Choosing Your Race/Job
Very broadly speaking, it doesn't matter what combination you choose to go with. While each race has their own benefits and disadvantages that can make certain combinations more difficult in the beginning, towards the end game the differences matter little except to those who are min/maxing. You can choose whatever combination appeals to you the most. That said, here's a quick overview and things to keep in mind when choosing.
The 5 Races
The following is each race and where their stats lean:
- Humes: Jack of all trades. Their stats are fairly balanced, with melee-focused stats being a touch higher.
- Elvaans: Excel in STR and MND, but lack in INT and AGI.
- Tarutarus: Excel in AGI and INT (high MP), but lack in HP and MND.
- Mithras: Excel in AGI and DEX, but lack in the mage-focused stats.
- Galkas: Excel in STR and VIT (high HP), but lack in the mage-focused stats (low MP).
The Starting Jobs
There are 2 categories of jobs: melee and mage.
- Melee jobs (WAR/MNK/THF): These tend to be the most approachable starting out.
- WAR: You will most likely need to tank at some point (which can get you parties a little more quickly than other classes), but can be the group's puller (the person who finds and brings mobs to the party), and off-tank (temporarily takes over tanking to allow the main tank to recover), or damage deal.
- MNK: A solid damage dealer and a good subjob for both WAR and THF
- THF: Starts off fairly weak in terms of damage, but makes up for it in later levels. They also gain the ability Treasure Hunter at level 15 which increases the drop rates of items slightly, allowing you to farm items a little more effectively to sell on the Auction House. You will often need to be your party's puller, so invest in a boomerang early.
- Mage jobs (WHM/BLM/RDM): These can be harder for new players. This is mostly due to the fact that in FF11 mages learn spells through scrolls that either drop off mobs or are purchased. This is on top of needing to buy new equipment, which is definitely a strain on the wallet. Still, these are powerful classes if you're willing to put in the time and effort.
- WHM: THE healer of this game. Can be difficult in pre-party leveling, so use a hammer at level 5 until you get into parties. Since you are a healer, parties will always have need of you, so you'll almost always find a party. Focus on the MND stat and learn MP efficiency to be most effective in this job.
- BLM: A glass cannon. If you like big damage numbers, then you will definitely find that here. Focus on the INT stat and become familiar with some basic healing as you can do some support healing to ease some of the pressure off your party's healer.
- RDM: The combination of BLM and WHM. It doesn't excel in either healing or elemental magic, but is still effective in either role if played well. They excel in enfeebling magic and be pretty self-sustaining later in the game. Focus on either MND or INT, depending on what role you're filling.
Signet: Never Leave Home Without It
Make it a habit to visit a gate guard (or your consulate if you're visiting a nation other than Jeuno or your own home nation) and have them apply signet. Some of the benefits it gives you are:
- Allows you to accumulate Conquest Points for each exp-rewarding mob you kill.
- Allows crystals to drop from exp-rewarding mobs you kill (except if the region is controlled by beastmen). At low levels, selling crystals is one of the primary ways you can make gil.
- Increased healing of HP/MP when resting.
- No TP loss when resting.
- Increased defense/evasion against your target's auto-attacks.
- Increased exp gain in certain scenarios (see the signet page for details).
What To Do and How To Make Gil
This kind of depends on how you want to approach the game. It's not a bad idea to run around the 3 sections of your home nation. This lets you get accustomed to the controls. You'll also become familiar with how the sections are interconnected and where the gates leading outside the nation are located.
If you want to jump into combat, run outside and start hitting things! The mobs immediately outside of your home nation are very easy to kill. The quickest way to engage a mob is to:
- Target them (Tab, SHIFT+Tab)
- Press Enter/Confirm to bring up a submenu
- Select Attack
This will begin auto-attacking once you're in range.
If you're interested in getting some gear, making some gil, and just generally doing quests, you can find a list of good, easy quests here.
Beyond this, you can make gil in a few ways. Initially you will primarily want to sell the items and crystals you get from killing monsters (don't forget to get signet!). You'll learn over time what the best drops are in your starting area, or you can ask around. You can also check the Item Lookup tool on the Horizon website to see what your items are currently going for on auction. Mining and Logging is an option, but only after you get the Field Tunica Set. Fishing is an option once you reach level 15 with any class (you can do it without the Fisherman's Tunica Set, but it's recommended to have it), Chocobo Digging at level 20 and after getting your ![]() Chocobo License, and Clamming once you're able to reach the Bibiki Bay area relatively safely. Fishing and farming (killing a specific set of mobs for specific items just to sell) tend to be the biggest money makers early in the game.
Chocobo License, and Clamming once you're able to reach the Bibiki Bay area relatively safely. Fishing and farming (killing a specific set of mobs for specific items just to sell) tend to be the biggest money makers early in the game.
Learn to Create Macros
Macros are the only way to bypass the menus to quickly use any of your skills, abilities, and spells in the game. They can also do many other things like use items or start fishing. Going into full details is a little out of scope for this guide, but you can check the Beginner How-To Guide for more information. Here are some basic examples to get you started:
/ja "Sneak Attack" <me>/ja : use the job ability in the ""<me> : target myself
/ma "Stone IV" <t>/ma : cast the magic spell in the "" (can be any kind of magic, like songs, ninjutsu, etc.)<t> : my current target
Storage and furniture
While in the Mog House of your home nation you have the ability to place furniture. Beyond adding some customization to the game, furniture expands the amount of items you can place in storage (specifically the one in Storage > Storage). Note that this is only accessible while in your home nation; you cannot take items in or out of this in other nations. Placing furniture in your Mog House also can give you a Moghancement, a passive buff with varying effects. Each piece of furniture will have an element and strength and which Moghancement you get is based on the dominant element between all your furniture. See the Moghancement page for more information.
Complete the Mog House Exit Quest
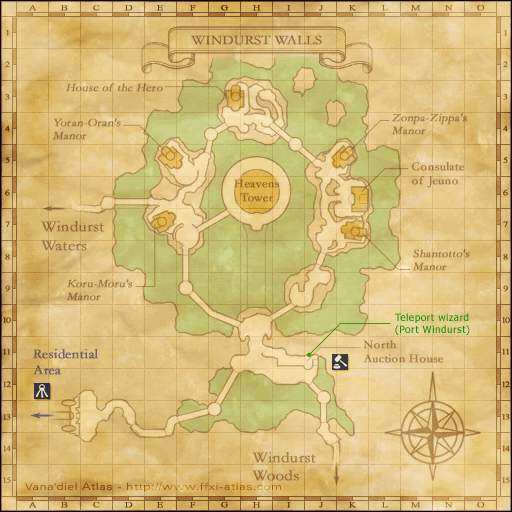
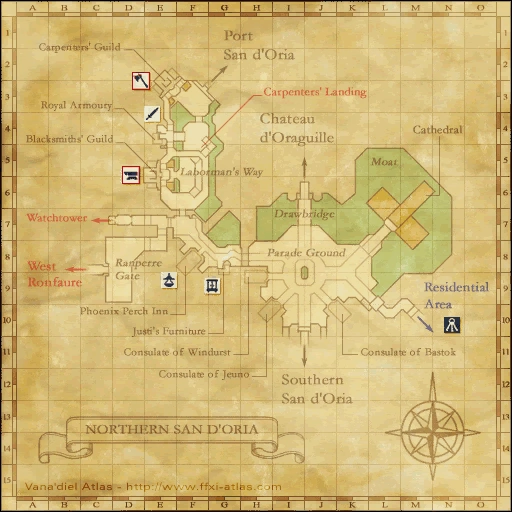
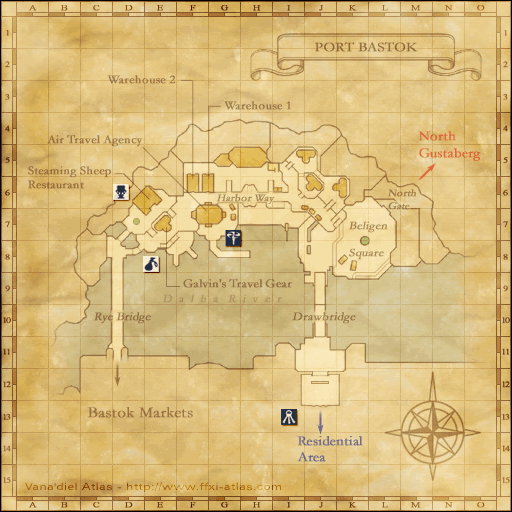
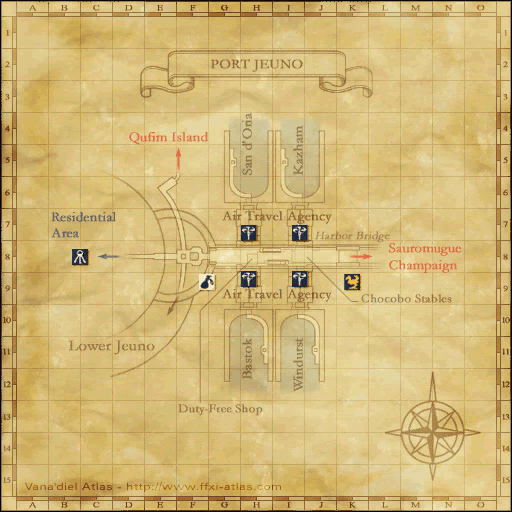
This quest is very straightforward: give the girl the right flower/item. What this gives you is the ability to exit from your Mog House into any of the nation's areas. It doesn't have to be your home nation either; you can do them all. This can be a huge timesaver since it can save you from walking the entire length of some zones. For example, going from Southern San d'Oria to the airship dock in Port San d'Oria requires walking roughly half of Southern San d'Oria, the entirety of Northern San d'Oria, and half of Port San d'Oria. With the Mog House exit, you can skip Northern San d'Oria entirely. Consult the table below to know what you need for your nation.
To complete the quest, simply trade the quest item(s) to the NPC (you don't have to talk to her first).
Do Your Supplies Quest
One thing that most new players don't know about is Outpost Teleporting (AKA OP warping). This is something that, if you invest in it early, you get the most benefit from it over time. I highly, HIGHLY, recommend doing your supplies quests as they become available and when you have the ability to travel to those locations.
What is the supplies quest?
In this game, the 3 major nations of San d'Oria, Bastok, and Windurst can control a region of the map. The specifics of this system can be found here.
How do I do one?
Supplies quests can be accepted by the gate guard that gives you signet (the text will read I want to go on a supplies quest). You will be given a list of each region your nation controls. If you've already completed a region, the text (Done) will be shown next to the region name. To do the quest:
- Accept a supplies quest for the region you're wanting to do
- Travel to the zone that the region's outpost is in
- You can tell which zone the outpost is in by checking the region map, highlighting the region you're planning to go to, and look for the icon of the controlling nation's flag. The icon is next to the zone that the outpost is in.
- When you're just starting out, these zones can get dangerous quickly. If you're willing to make the run, change to a level 1 job before setting out. This way you lose nothing if you die other than the time taken to get there.
- Also, outposts and border guards along the way can set your home point to their location, essentially giving you a checkpoint in case you die. If your nation controls the region the home point is free, but if not, then it will cost 200 gil.
- Speak with the border guard or travel to the outpost and talk to the guard there.
- Note: if you're traveling to a location that's dangerous for your level, the outpost may be the better option since you'll be able to teleport back to your nation from the outpost.
What are the benefits?
There are 2 major benefits to doing this: 1. You can teleport from your home nation or Jeuno to the outpost of any region you've done a supplies quest for. This can be done regardless of who controls the region. 2. If the region is not controlled by beastmen, you'll be able to teleport back to your home nation. The fee can be paid with either gil or conquest points Note for teleporting, the cost will vary depending on if your nation is in control of that region and the distance to that region.
You also gain a small amount of conquest points for doing the quest.
The amount of time this can save you in the long run is immeasurable, especially if you're able to get the starting zones outside of your own nation's. Do note that there are restrictions as to when you can use the teleport, detailed here. Even if you can't use it immediately, still do them so they are available as soon as you meet the requirements. It also helps you get to know the game world better.
Basic Roadmap
It can be hard to figure out what all you need to do when you're a new adventurer. Here I'll provide a simple roadmap from levels 1-50.
Level 1-10: Basic questing and leveling
The start of your adventure! Begin killing mobs that are immediately outside your city (the game has been modified to increase the amount of mobs available in these areas to make leveling smoother in those first few levels). As you level up you can start moving further from the nation since the further you move away from the nation, the higher level the mobs will be. As you get closer to level 10 you will likely have to start killing monsters that check as Easy Prey or Decent Challenges. There are a few easy quests in each nation that you can do, and while leveling (with signet on) you'll get crystals that you can sell, allowing you to upgrade your equipment or buy scrolls.
Level 10-20: Partying in the Sands
Once you're level 10, it's not uncommon to start gaining levels by joining experience points parties. You can find groups looking for this either through /yells in town or in the #experience-points channel in Discord.
The most common location for a party in this range is Valkurm Dunes, with Buburimu Peninsula being another viable option. The HorizonXI team even adjusted the mob locations in Buburimu Peninsula to allow for more party camps, but because of the reputation of the Dunes from years in the retail version, it is often overlooked. If the Dunes is crowded, consider going to the Peninsula.
Here is the zone path to the Dunes from each nation:
- San d'Oria: West Ronfaure >> La Theine Plateau >> Valkurm Dunes
- Bastok: South Gustaberg >> North Gustaberg >> Konschtat Highlands >> Valkurm Dunes
- Windurst: East Sarutabaruta >> Tahrongi Canyon >> Buburimu Peninsula >> Mhaura >> Ship bound for Selbina >> Valkurm Dunes
Getting to Buburimu Peninsula is nearly identical, with San D'orians and Bastokians needing to take the boat from Selbina (the Dunes's port town) to Mhaura. Windurstians can use the path to the Dunes, just stopping before (or in) Mhaura.
Ghelsba Outpost is also a common leveling spot for 10-12, but stops if the party hits level 13. Also, Ghelsba Outpost is next to San d'Oria, in the northwest corner of West Ronfaure. It's a long walk for those not from San d'Oria.
If you feel uneasy walking to these locations in fear of leveling down, change to a level 1 job and make the journey, setting your Home Point along the way. You can change your job back in Selbina or Mhaura.
Level 15: Fishing Becomes Available
Fishing becomes available once any job attains level 15. After that, you can be a job of any level to fish. This is arguably one of the most reliable sources of income in the lower levels, so it's worth checking out.
Some basic tips:
- Though it's not required to start, it is highly recommended you get the Fisherman's Tunica Set.
- Start with a cheap rod (like a Yew Fishing Rod) and Little Worms. You can change to other rods and baits later as you get more familiar with the system and have more gil on-hand.
- Only attempt to real in a fish when the following pattern shows up in the log:
Something…You have a good feeling…
If it doesn't say this combination, press ESC/Cancel to prevent yourself from breaking your line or rod.- You can also use the fishaid or ashitafishaid addons to help you more quickly determine a good catch.
- Once you deplete a fish's "health," press Enter/Confirm to reel it in.
- If you're looking for skill up, fishing outside of town is said to provide more skill ups than fishing in town.
Level 15-20: Nation Rank 2 Is Available
If you haven't started doing any of your nation's missions, this is a good range to start as you should be able to make it to rank 2 without much trouble. This will reward you with your nation's ring and unlocks new items that you can purchase with your conquest points. Note you don't have to do it now, but it is available to you.
Level 18: Unlocking Your Subjob
Having a subjob is pretty important; you gain all the abilities of your sub job along with your main job. It also increases your stats, so it's definitely worth doing whenever it becomes available. As an added bonus, you get 5 slots in your Mog Wardrobe for unlocking it.
You can start working on the quest before flagging it as all it requires are 3 drops. Which drops you need, and the zone the mobs are located in, depends on which subjob quest you're doing:
- Elder Memories can be found in Selbina with the mobs being found in Valkurm Dunes.
- The Old Lady can be found in Mhaura with the mobs being found in Buburimu Peninsula.
- Both quests require an item that is dropped from an undead mob that normally only appears at night in their respective zones. However, both mobs can also be found in Gusgen Mines on the east side of Konschtat Highlands.
You will probably get 2 of the items while partying in those zones, but if you need help with any of them, feel free to ask in the Discord or in your Linkshells.
The subjob will always be capped to half of your main job's level (rounded down). You will have all the skills and abilities of the subjob up to that level. For example, if your BLM is 31 and WHM is your subjob, then the level for WHM will be capped at 15 and your BLM will have access to Divine Seal (a level 15 WHM ability) and all the WHM spells from level 1 to 15.
I would recommend taking a break from leveling your main job and focus on your subjob of choice. Most of the time you can use your main job as your subjob's subjob. This makes the earlier levels much easier than the first time around. If you plan to make this your primary subjob, you will eventually want to level it to 37. For this roadmap, I would make levels 15-25 is a good goal until you're ready to take your main job to 75.
Level 20: The Journey to Jeuno
This is a pretty big milestone! The time has come for you to journey to the central nation of Jeuno.
Jeuno is THE hub of this game. A good portion of the main campaign is here, it's in the middle of the world so it has access to transportation to all of the nations and has the only transportation available to Kazham (more on this location later), and it's the home of many important quests. Horizon even updated this city so that you can OP warp, which has a lower level requirement for use than your home nation. After rank 3, and especially after rank 5, you will almost always keep your Home Point here; it's just that convenient.
The path to Jeuno depends on where you're starting from. NOTE: regardless of where you start, the path will become dangerous the closer you get to Jeuno. Having a map open in a browser (if you're not using the allmaps addon) and a list of the zone's mobs and what they aggro to (sight or sound; you can use the mobdb addon to help determine this) can help you travel a little safer. The safest way is to use both Silent Oils (which gives you Sneak) and Prism Powders (which gives you Invisible); just make sure to use the oil before the powder if you need to use both! Doing it the other way will remove Invisible and essentially wastes a Prism Powder. These items can be expensive, so if you want to try to make it there without using any items, switch to a level 1 job. While this does mean more enemies can aggro you, it also means you won't lost any exp from dying, just the time since the last Home Point. You can set your Home Point with border guards or at Outposts as you go in case you die as a form of checkpoint.
The paths to Jeuno are:
- San d'Oria: West Ronfaure >> La Theine Plateau >> Jugner Forest >> Batallia Downs >> Upper Jeuno
- Bastok: South Gustaberg >> North Gustaberg >> Konschtat Highlands >> Pashhow Marshlands >> Rolanberry Fields >> Lower Jeuno
- Windurst: East Sarutabaruta >> Tahrongi Canyon >> Meriphataud Mountains >> Sauromugue Champaign >> Port Jeuno
There are 2 major quests you should start once you make it to Jeuno:
| Quest Name | NPC/Location | Benefit |
|---|---|---|
| Chocobo's Wounds | Brutus Upper Jeuno (G-7) |
Finishing this quest will unlock the |
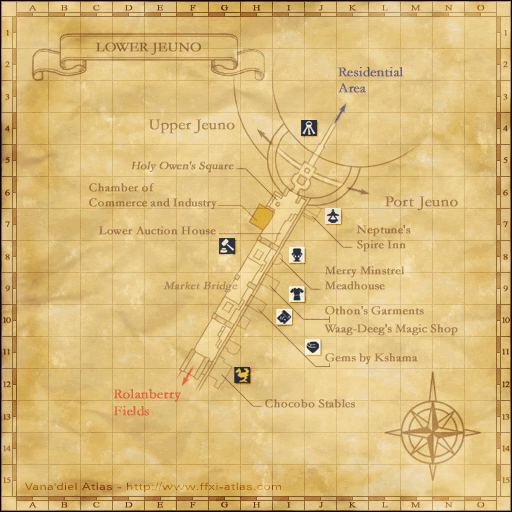
| The Gobbiebag Part I | Bluffnix Lower Jeuno (H-9) |
This is the first of a series of quests, each of which increases the size of your inventory by 5. |
Also, while you're in Jeuno, head to Port Jeuno and talk to Guddal located at (Port Jeuno (I-7)) to start the Kazham Airship Pass Quest. You don't have to do this immediately (and you can even gather the required items without the quest being flagged), but when you are level 25 you will want to have this done. It can be done solo by most jobs at level 25, but you'll need Sneak/Invisible to get to some areas. Don't be afraid to ask Discord or your Linkshells for help!
Level 20-25: Qufim Island
You can start working on your Rank 2 missions to prepare for level 25. Also, a common party leveling ground is Qufim Island, which you can find at the bottom of a long stairway near the Mog House entrance in Port Jeuno.
Level 25: The Kazham Airship and Rank 3
You can technically start the Kazham Airship Pass Quest at any time once you get to Jeuno, or by simply gathering the keys before flagging the quest, but this is the time you'll want to complete it. Kazham is a town in the Elshimo Lowlands and is your gateway to your next party leveling grounds Yuhtunga Jungle. There's also a telepoint in nearby Yhoator Jungle, so make sure to take a chocobo to it at some point. It's recommended to have the addon allmaps enabled, to purchase a map, or to have a map open in your browser when navigating through the jungles because it is very easy to get lost in them.
You will also want to achieve rank 3 with your nation at this level. Mission 2-3 will take you to the other nations and acts as one of the first major plot points that's shared across all 3 nations. There are a couple of major reasons you want to get this done:
- You can start OP warping from Jeuno only after achieving rank 3.
- You unlock 10 slots in your Mog Wardrobe.
Level 25-30: Yuhtunga/Yhoator Jungle
These are common leveling grounds until level 30. There are others if you haven't done your Kazham Airship Pass Quest yet, which you can find here.
Level 30: Advanced Jobs, Chains of Promathia, and BCNMs
If you're eager to unlock any of the game's advanced jobs, you now can! Each advanced job requires at least 1 job to be level 30. Beyond that, there can be a specific fame requirement in order for the quest to start. Be sure to check the job's Wiki page for more information. There are some really fun ones, and some are incredible sub jobs, so it's worth looking into.
Also, some early Chains of Promathia missions are now completable for you. While you can start Chains of Promathia at any time by simply walking into Lower Delkfutt's Tower from Qufim Island, you won't really be able to do any of the Promyvions until level 30. There's also farming opportunities in the Promyvions, so it's worth looking into once you hit 30.
Lastly, you will be able to do some of the Burning Circle Notorious Monsters (BCNMs) after hitting level 30. I won't go into the full details here, but in-short these are special NMs that you can fight by trading Beastmen's Seals for special orbs. These encounters can drop some great gear and spells, which you can either keep or sell.
It's very much worth spending the extra gil on a really good set of equipment for level 30. There's a lot of content that's capped at 30, so you will definitely get your gils worth.
Level 30-50: Leveling Stretch
At this point it's mostly just leveling until you hit 50. There's a lot of different camps you can use between these levels, so be sure to ask around or check the EXP Camps section for where to level. You can also work on any sub jobs, experiment with any of the advanced jobs you've unlocked, and maybe work on getting to rank 4, though you can wait until level 50 to do that to make it a little easier.
Level 50+: Rank 6 and Beyond
The next major goal is to achieve Rank 6. It's not uncommon for people to simply stop at rank 6 since the biggest benefits are available by this rank. After completing Mission 5-1 you will gain the Airship Pass which allows you to travel between Jeuno and the other nations as well as access to the Airship merchants. This can be invaluable if you haven't been able to do the supplies quests for the other nation's starting zones or if you're leveling certain crafts. It is recommended to be around level 50 for 5-1 as the fight for this mission is capped at level 50, but 5-2's fight is uncapped.
More importantly, after achieving rank 6 you will be able to start the Rise of Zilart expansion missions as well as Dynamis, an end-game activity providing strong equipment for each class. Zilart missions will provide access to Ru'Aun Gardens (AKA sky), a common leveling grounds and end game content. You can also make more progress in the Chains of Promatia expansion, which can give use access to new locations.
From there, keep leveling to 75, keep learning, and keep exploring. The world of Final Fantasy XI is yours to explore!
