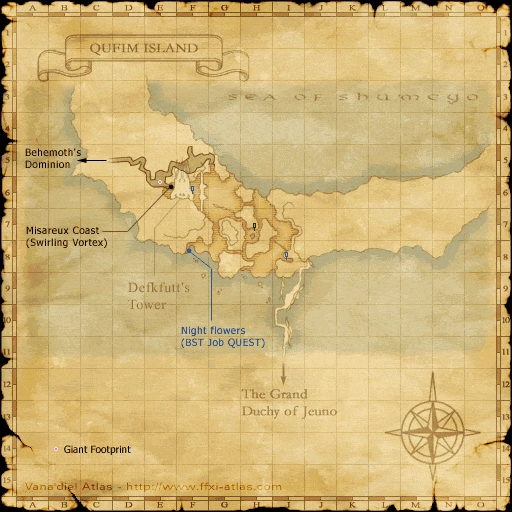
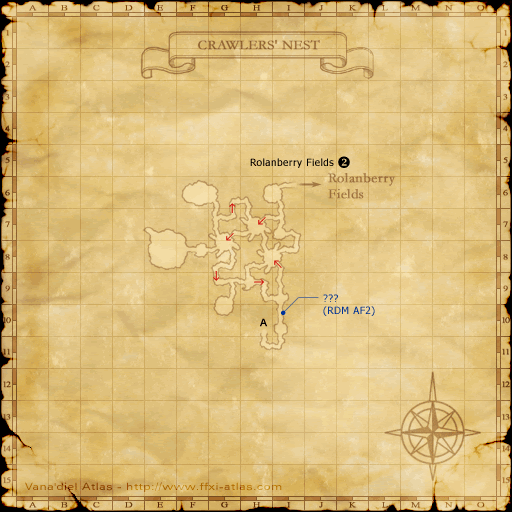
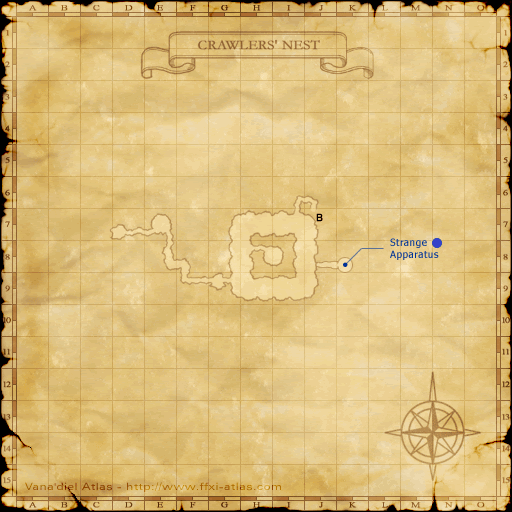
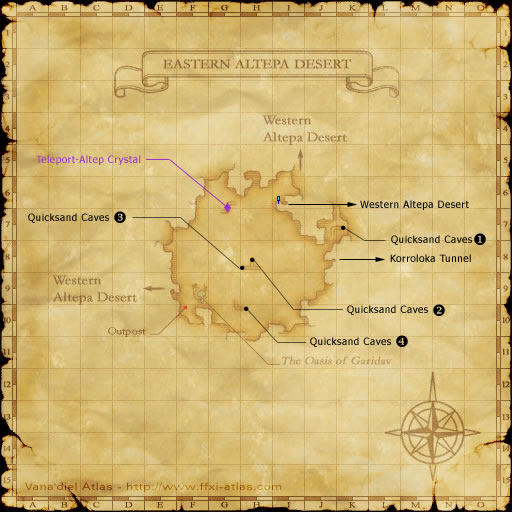
User:Chiimi000/Sandbox: Difference between revisions
From HorizonXI Wiki
| (21 intermediate revisions by the same user not shown) | |||
| Line 1: | Line 1: | ||
==Level 20== | |||
{| class="droppedby horizon-table sortable" | |||
! width="8%" | Level | |||
! width="17%" | Zone | |||
! width="18%" | Camp | |||
! width="17%" | Mob(s) | |||
! width="40%" | Notes | |||
|- | |||
|10-15 | |||
|[[Inner Horutoto Ruins]] | |||
| | |||
* Map 2 - Beetle's Burrow {{Location Tooltip|area=Inner Horutoto Ruins|map=Beetle's Burrow|pos=F-10|pos 2=F-11}} | |||
| | |||
* [[Beady Beetle]] (12-16) | |||
* [[Bat Battalion]] (12-15) | |||
* [[Goblin Tinkerer]], [[Goblin Butcher]], [[Goblin Ambusher]] (14-18) | |||
| | |||
* Camp outside Magic Gate of Horutoto | |||
* [[Silent Oil|Oils]] and [[Prism Powder|powders]] required. | |||
* Beetles and Bats don't aggro but do link via sound. | |||
* Enter via [[East Sarutabaruta]] {{Location Tooltip|area=East Sarutabaruta|pos=J-7}}. | |||
|- | |||
|11-15 | |||
|[[Carpenters' Landing]] via [[Northern San d'Oria]] Wooden Shutter entrance | |||
| | |||
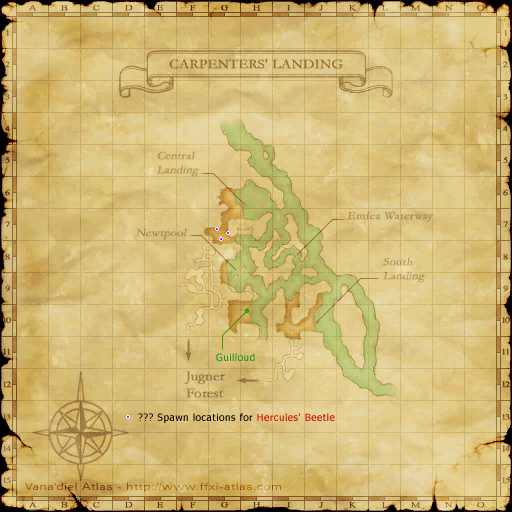
* {{Location Tooltip|area=Carpenters' Landing|pos=G-8}} | |||
| | |||
* [[Digger Wasp]] (14-17) | |||
* [[Beady Beetle]] (15-17) | |||
* [[Orcish Grunt]], [[Orcish Neckchopper]], [[Orcish Stonechucker]] (16-18) | |||
* [[Poison Funguar]] (17-19) | |||
* [[Flytrap]] (20-22) | |||
| | |||
* Wooden Shutter is at {{Location Tooltip|area=Northern San d'Oria|F-5}} | |||
* [[Antidotes]] and [[Echo Drop]]s strongly recommended. | |||
* WHM required. | |||
* Flytrap uses [[Soporific]], a small range [[Area of Effect|AOE]] sleep and potent paralyze ability. | |||
* Can support multiple parties and different level ranges. | |||
|- | |||
|11-14 | |||
|[[Valkurm Dunes]] | |||
| | |||
* {{Location Tooltip|area=Valkurm Dunes|pos=L-9|pos 2=L-10|pos 3=K-9|pos 4=D-7|pos 5=E-7|pos 6=E-6}} | |||
| | |||
* [[Hill Lizard]] (15-19) | |||
| | |||
* Welcome to the dunes. | |||
* [[Baleful Gaze]] petrifies the target it's looking at. Turn to avoid! | |||
* Lots of camps. | |||
* Level 11 parties take care when pulling level 18-19 lizards. | |||
|- | |||
|11-14 | |||
|[[Buburimu Peninsula]] | |||
| | |||
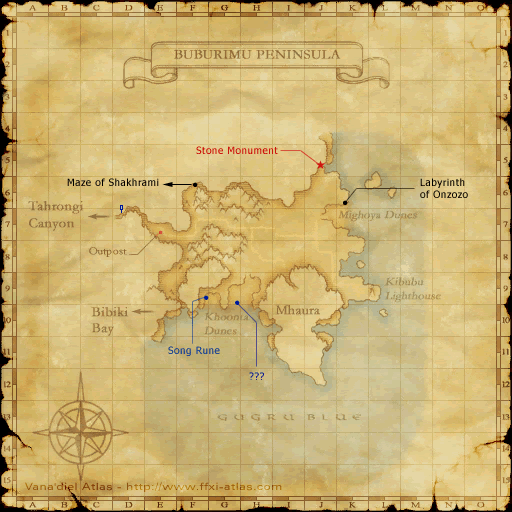
* Outpost {{Location Tooltip|area=Buburimu Peninsula|pos=E-7}}, {{Location Tooltip|area=Buburimu Peninsula|pos=F-8|pos 2=E-9}} | |||
| | |||
* [[Sylvestre]] (15-18), | |||
* [[Mighty Rarab]] (15-18) | |||
| | |||
* Try to avoid pulling 7 or more levels above your parties level. | |||
* Quick walk from Kolshushu Outpost. | |||
|- | |||
|12-15 | |||
|[[Tahrongi Canyon]] | |||
| | |||
* {{Location Tooltip|area=Tahrongi Canyon|pos=I-8}} | |||
| | |||
*{{Changes|Horizon custom mob}} [[Cactus Grub]] (19-20) | |||
*{{Changes|Horizon custom mob}} [[Canyon Wasp]] (15-19) | |||
| | |||
* Not far from Kolshushu Outpost. | |||
|- | |||
|12-15 | |||
|[[Tahrongi Canyon]] | |||
| | |||
* {{Location Tooltip|area=Tahrongi Canyon|pos=F-6}} | |||
| | |||
*{{Changes|Added mobs with higher level range}} [[Killer Bee]]s (15-20) | |||
* [[Goblin Tinkerer]] (18-20) | |||
| | |||
* Bees seem to use Pollen more often than others. | |||
* [[:Category:Goblins|Goblins]] in area. | |||
* Not too far from Kolshushu OP or teleport mea. | |||
|- | |||
|12-15 | |||
|[[Konschtat Highlands]] | |||
| | |||
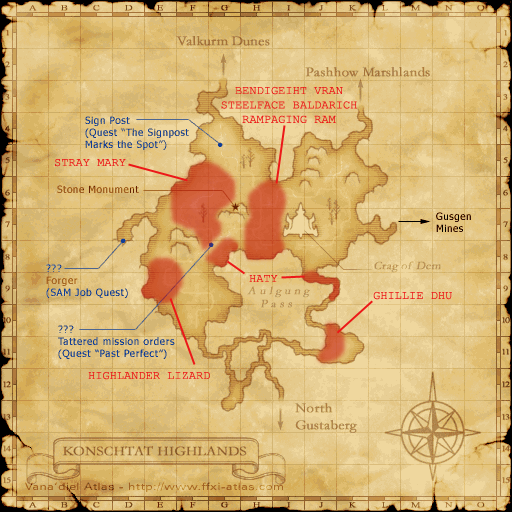
* {{Location Tooltip|area=Konschtat Highlands|pos=F-3|pos 2=I-5|pos 3=L-6}} | |||
| | |||
*{{Changes|Horizon custom mob}} [[Mineral Eater]] (15-19) | |||
*{{Changes|Horizon custom mob}} [[Yellow Jacket]]s (18-20) | |||
| | |||
* (F-3) Camp has a [[Goblin Digger]] that can extend chains. | |||
* (L-6) Camp has [[Poltergeist]]s (18-20) that can extend chains. | |||
|- | |||
|12-15 | |||
|[[La Theine Plateau]] | |||
| | |||
* {{Location Tooltip|area=La Theine Plateau|pos=H-11|pos 2=I-11}} | |||
| | |||
* {{Changes|Horizon custom mob}} [[Mineral Eater]] (15-18) | |||
* {{Changes|Horizon custom mob}} [[Plateau Hare]] (19-20) | |||
| | |||
* Hares link. | |||
* 1 orc spawn can also be used to fill chains. | |||
* Hares should not be fought until at least level 13. | |||
* Supports 1 party. | |||
|- | |||
|12-15 | |||
|[[La Theine Plateau]] | |||
| | |||
* Pond {{Location Tooltip|area=La Theine Plateau|pos=K-11}} | |||
| | |||
* {{Changes|Horizon custom mob}} [[Mineral Eater]] (15-19) | |||
* {{Changes|Horizon custom mob}} [[Snapper]] (17-20) | |||
| | |||
|- | |||
|12-15 | |||
|[[Ordelle's Caves]] | |||
| | |||
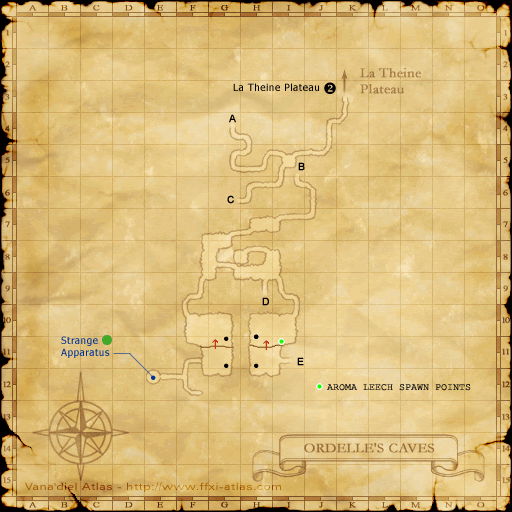
* Entrance {{Location Tooltip|area=Ordelle's Caves|pos=G-3|map= Map 2}} | |||
| | |||
* [[Stink Bats]] (15-18) | |||
* [[Snipper]] (18-20) | |||
| | |||
* Bats link. | |||
* {{Location Tooltip|area=La Theine Plateau|pos=F-7}} [[La Theine Plateau]] entrance. | |||
* Not far from Ronfaure OP. | |||
|- | |||
|12-15 | |||
|[[Ordelle's Caves]] | |||
| | |||
* {{Location Tooltip|area=Ordelle's Caves|pos=F-3|map=Map 2}} | |||
| | |||
* [[Blood Bunny|Blood Bunnies]] (17-19) | |||
| | |||
* {{Location Tooltip|area=La Theine Plateau|pos=F-7}} [[La Theine Plateau]] entrance, Can either sit in place or run up and down the tunnel. | |||
|- | |||
|13-15 | |||
|[[Maze of Shakhrami]] | |||
| | |||
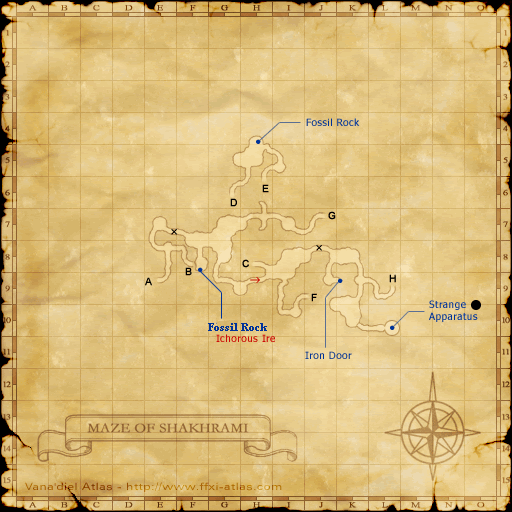
* {{Location Tooltip|area=Tahrongi Canyon|pos=K-5}} | |||
| | |||
* [[Maze Maker]] (18-21) | |||
* [[Bats]] (15-17) | |||
* [[Goblin Tinkerer]] | |||
* [[Goblin Butcher]] (16-17) | |||
| | |||
|- | |||
|14-16 | |||
|[[Valkurm Dunes]] | |||
| | |||
* Whitebone Sands {{Location Tooltip|area=Valkurm Dunes|pos=F-9}}''' | |||
* Oasis/ {{Location Tooltip|area=Valkurm Dunes|pos=I-7}} | |||
* North Forest {{Location Tooltip|area=Valkurm Dunes|pos=J-6}} | |||
* South Forest {{Location Tooltip|area=Valkurm Dunes|pos=J-8}} | |||
* West Forest {{Location Tooltip|area=Valkurm Dunes|pos=F-7}} | |||
* Siren Sands {{Location Tooltip|area=Valkurm Dunes|pos=I-9}} | |||
* Secret Beach {{Location Tooltip|area=Valkurm Dunes|pos=B-7}} | |||
| | |||
* [[Snipper]] (18-22) | |||
* [[Night Bats]] (12-15) | |||
* [[Star Bat]] (17-20) | |||
* [[Damselfly]] (20-23) | |||
* [[Brutal Sheep]] (20-23) | |||
| | |||
* Flies & snippers are primary targets. | |||
* Can throw in Sheep and Bats at night to keep chains going. | |||
|- | |||
|14-16 | |||
|[[Buburimu Peninsula]] | |||
| | |||
* {{Location Tooltip|area=Buburimu Peninsula|pos=G-6}} | |||
| | |||
* {{Changes|Horizon custom mob}} [[Cape Coney]] (20-21) | |||
* {{Changes|Horizon custom mob}} [[Cactus Bee]] (20-22) | |||
| | |||
* Supports up to 2 parties. | |||
* Quick walk from Kolshushu Outpost. | |||
|- | |||
|14-17 | |||
|[[Inner Horutoto Ruins]] | |||
| | |||
* Inside Magic Gate of Horutoto {{Location Tooltip|area=Inner Horutoto Ruins|pos=E-10|map=Beetle's Burrow}} | |||
| | |||
* [[Battle Bat]] (17-19) | |||
* [[Goblin Leecher]], [[Goblin Gambler]], [[Goblin Mugger]] (20-23) | |||
| | |||
* [[Silence]] recommended. | |||
* Could support 2 parties. | |||
* [[Silent Oil|Oils]] and [[Prism Powder|Powders]] required to reach camp. | |||
* All of the mobs are aggressive. | |||
* Enter via {{Location|East Sarutabaruta|J-7}}. | |||
|- | |||
|14-17 | |||
|[[Ordelle's Caves]] | |||
| | |||
* {{Location Tooltip|area=Ordelle's Caves|pos=H-7|map=Map 1}} | |||
| | |||
* [[Fly Agaric]] (21-23) | |||
* [[Hognosed Bat]] (17-19) | |||
| | |||
* Bats link. | |||
* Not far from Ronfaure OP. | |||
* WHM needed. | |||
* [[Silent Oil|Oils]] and [[Prism Powder|Powders]] needed to reach camp or fight your way there. | |||
|- | |||
|15-17 | |||
|[[Valkurm Dunes]] | |||
| | |||
* Signpost {{Location Tooltip|area=Valkurm Dunes|pos=J-7}} | |||
* Cliff Side {{Location Tooltip|area=Valkurm Dunes|pos=G-8}} | |||
| | |||
* [[Damselfly]] (20-23) | |||
* [[Brutal Sheep]] (20-23) | |||
| | |||
* Flies use [[Cursed Sphere]], an aoe damage TP attack and [[Venom]], a [[Poison]] TP attack. | |||
* Sheeps use [[Sheep Song]], an aoe sleep TP attack. | |||
|- | |||
|15-17 | |||
|[[Jugner Forest]] | |||
| | |||
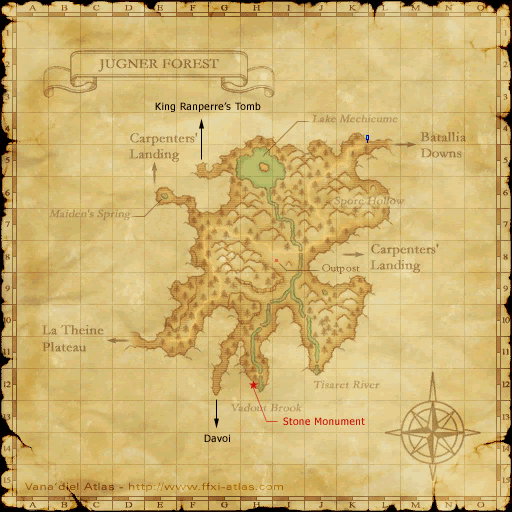
* {{Location Tooltip|area=Jugner Forest|pos=J-5}} | |||
| | |||
* [[Stag Beetle]] (20-23) | |||
| | |||
* 6 spawns, 1 beetle is around the corner, a little SW. | |||
* Norvallen OP warp is level 15+ from Jeuno. | |||
* Aggressive mobs on the way to camp. | |||
* Beetles have defense and evasion boosting TP abilities. | |||
|- | |||
|15-17 | |||
|[[Jugner Forest]] | |||
| | |||
* {{Location Tooltip|area=Jugner Forest|pos=H-11|pos 2=H-12}} | |||
| | |||
* [[Land Pugil]] (18-20) | |||
* [[Snipper]] (18-20) | |||
* [[Forest Tiger]] (22-24) | |||
| | |||
* Not far from Norvallen OP, which is level 15+ from Jeuno. | |||
* Aggressive mobs on the way to camp. | |||
* Tigers have a strong [[Paralyze]] TP attack. | |||
|- | |||
|15-18 | |||
|[[Dangruf Wadi]] | |||
| | |||
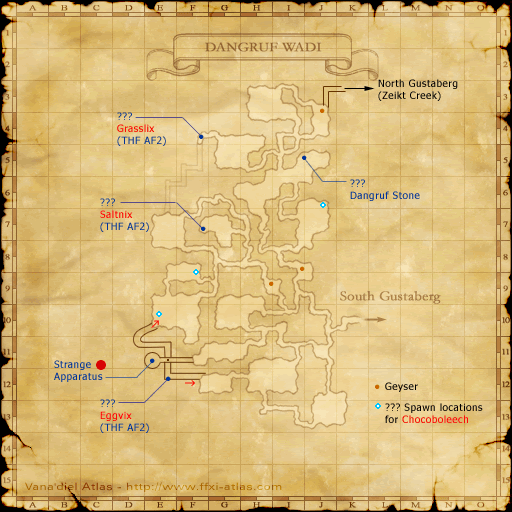
* {{Location Tooltip|area=Dangruf Wadi|pos=G-5|pos 2=H-3}} | |||
| | |||
* [[Goblin Leecher]], [[Goblin Mugger]], [[Goblin Gambler]] (21-23) | |||
| | |||
* Silence for [[Goblin Leecher]]'s is helpful. | |||
|- | |||
|15-18 | |||
|[[Buburimu Peninsula]] | |||
| | |||
* {{Location Tooltip|area=Buburimu Peninsula|pos=F-9|pos 2=E/9|pos 3=J-6|pos 4=J-7|pos 5=K-9|pos 6=G-8}} | |||
* {{Location Tooltip|area=Buburimu Peninsula||pos=I-8|pos 2=K-9}} | |||
| | |||
* [[Goblin Gambler]], [[Goblin Leecher]], [[Goblin Mugger]] (22-25) | |||
* [[Bull Dhalmel]] (20-23) | |||
* [[Zu]] (20-23) | |||
* [[Carnivorous Crawler]] (20-23) | |||
| | |||
* Silence for [[Goblin Leecher]]'s is helpful. | |||
* Crawlers use [[Sticky Thread]] which slows the targets infront of them. | |||
|- | |||
|15-18 | |||
| [[Pashhow Marshlands]] | |||
| | |||
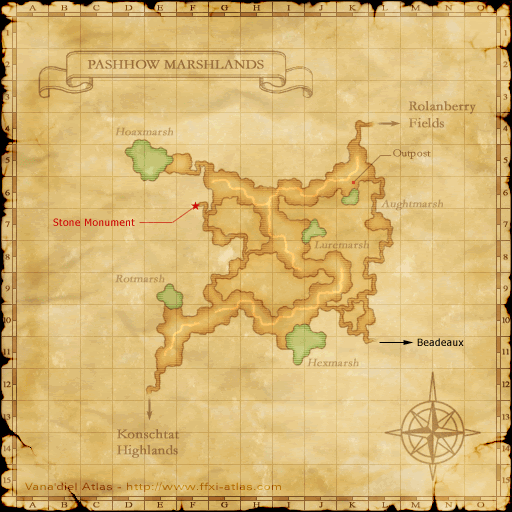
* {{Location Tooltip|area=Pashhow Marshlands|pos=G-9}} | |||
| | |||
* [[Gadfly]] (18-21) | |||
* [[Marsh Funguar]] (21-25) | |||
| | |||
* Funguars link by sound. | |||
* Derfland OP is level 15+ from Jeuno. | |||
|- | |||
|15-18 | |||
|[[Meriphataud Mountains]] | |||
| | |||
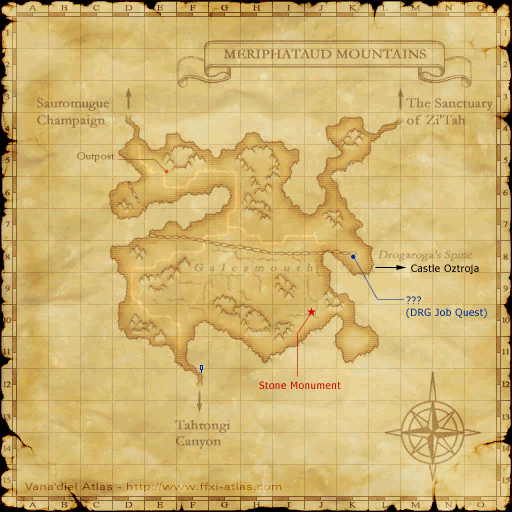
* {{Location Tooltip|area=Meriphataud Mountains|pos=E-6}} | |||
| | |||
* [[Crane Fly]] (18-21), | |||
* [[Hill Lizard]] (19-22) | |||
* [[Goblin Gambler]], [[Goblin Leecher]], [[Goblin Mugger]] (21-25) | |||
| | |||
* 2 Goblins around which may prove too much for a level 15/16 group. | |||
* Aragoneu OP warp is level 15+ from Jeuno. | |||
|- | |||
|15-18 | |||
|[[Carpenters' Landing]] | |||
| | |||
* {{Location Tooltip|area=Carpenters' Landing|pos=F-8|pos 2=F-9|pos 3=F-10}} | |||
| | |||
* [[Stag Beetle]] (20-23) | |||
* [[Marsh Funguar]] (21-24) | |||
| | |||
* Funguars use [[Paralyze (Status Effect)|Paralyze]], [[Blind (Status Effect)|Blind]], [[Poison (Status Effect)|Poison]] and [[Silence (Status Effect)|Silence]] TP abilities. | |||
* Use NW [[Jugner Forest]] zone at {{Location Tooltip|area=Jugner Forest|pos=E-6}}. | |||
* [[Sneak]] and [[Invisible]] required to reach camp if not on chocobo. | |||
* Fungur aggro sound and link. | |||
* Beetles link sight. | |||
* Not far from Norvallen OP, which is level 15+ from Jeuno. | |||
|- | |||
|15-17 | |||
|[[Pashhow Marshlands]] | |||
| | |||
* {{Location Tooltip|area=Pashhow Marshlands|pos=K-6}} | |||
| | |||
* [[Land Pugil]] (17-20) | |||
* [[Snipper]] (17-20) | |||
* [[Carnivorous Crawler]] (20-23) | |||
* [[Gadfly]] (18-21) | |||
| | |||
* Camp right at the outpost. | |||
* Defland OP warp is level 15+ from Jeuno. | |||
* Crawlers use [[Sticky Thread]] which slows the targets infront of them. | |||
* Flies use [[Cursed Sphere]], an aoe damage TP attack and [[Venom]], a [[Poison]] TP attack. | |||
|- | |||
|15-18 | |||
| [[Pashhow Marshlands]] | |||
| | |||
* {{Location Tooltip|area=Pashhow Marshlands|pos=F-5}} | |||
| | |||
* [[Crawlers]] (20-23) | |||
* [[Leeches]] (20-23) | |||
* [[Marsh Funguar]] (21-25) | |||
| | |||
* [[Water Elemental]] can sometimes spawn in the back. | |||
* Marsh Funguars spawn in the road leading to the area, possibly extending this camp to 19 depending on kill speed | |||
|- | |||
|15-19 | |||
|[[Korroloka Tunnel]] | |||
| | |||
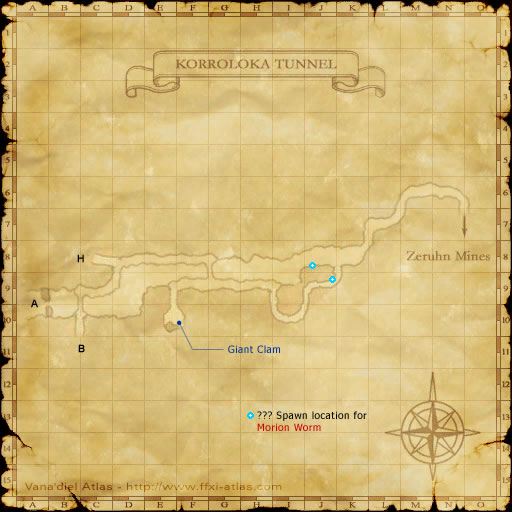
* {{Location Tooltip|area=Korroloka Tunnel|map=Map 1|pos=L-7|pos 2=L-6|pos 3=M-6}} | |||
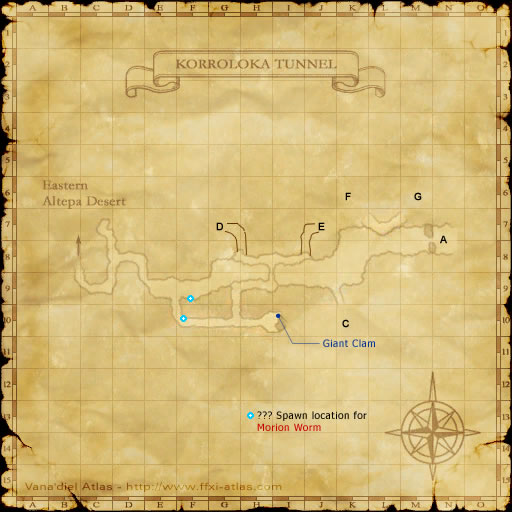
* {{Location Tooltip|area=Korroloka Tunnel|map=Map 2|pos=E-9|pos 2=D-8}} | |||
| | |||
* [[Land Worm]] (20-25) | |||
* [[Seeker Bats]] (22-26) | |||
| | |||
* Worms cast lots of spells, including [[Area of Effect|aoe]] spells. | |||
* Ideal for a ranged attack burn style party. | |||
* Bats take extra damage from piercing weapons. | |||
|- | |||
|16-18 | |||
|[[Valkurm Dunes]] | |||
| | |||
*Goblin Camp {{Location Tooltip|area=Valkurm Dunes|pos=E-7|pos 2=F-7}} | |||
| | |||
* [[Goblin Mugger]], [[Goblin Leecher]], [[Goblin Gambler]] (23-25) | |||
* [[Damselfly]] (20-23) | |||
* [[Brutal Sheep]] (20-23) | |||
| | |||
*[[Silence]] for Goblin Leecher's is helpful. | |||
*Watch out for sight-based links. | |||
*Supports 1 party. | |||
|- | |||
|16-18 | |||
|[[Meriphataud Mountains]] | |||
| | |||
*By Spine at {{Location Tooltip|area=Meriphataud Mountains|pos=D-6}} | |||
| | |||
* [[Boggart]] (25-27) | |||
* [[Couerl]] (22-26) | |||
* [[Goblin Mugger]], [[Goblin Leecher]], [[Goblin Gambler]] (21-25) | |||
* [[Crane Fly]] (18-21) | |||
| | |||
*Close to Aragoneu OP. | |||
* [[Paralyna]] and [[Silena]] recommended. | |||
|- | |||
|17-19 | |||
|[[Ordelle's Caves]] | |||
| | |||
*{{Location Tooltip|area=Ordelle's Caves|map= Map 1|pos=F-10}}, Going East from Entrance | |||
| | |||
* [[Dung Beetle]] (23-25) | |||
* [[Goblin Leecher]], [[Goblin Gambler]], [[Goblin Mugger]] (22-26) | |||
| | |||
*Further down, past the Fly Agarics. | |||
*Beetle's link. | |||
*BLM recommended. | |||
*[[Silent Oil|Oils]] and [[Prism Powder|powders]] needed to reach camp or fight your way there. | |||
|- | |||
|17-19 | |||
|[[Ordelle's Caves]] | |||
| | |||
*{{Location Tooltip|area=Ordelle's Caves|map= Map 1|pos=H-10}}, Going East from Entrance | |||
| | |||
* [[Vorpal Bunny]] (23-25) | |||
* [[Goblin Leecher]], [[Goblin Gambler]], [[Goblin Mugger]] (22-26) | |||
| | |||
*[[Silent Oil|Oils]] and [[Prism Powder|powders]] needed to reach camp or fight your way there. | |||
|- | |||
|17-19 | |||
|[[Jugner Forest]] | |||
| | |||
*{{Location Tooltip|area=Jugner Forest|pos=K-7}}, Spore Hollow | |||
*{{Location Tooltip|area=Jugner Forest|pos=K-9}} | |||
| | |||
* [[Jugner Funguar]] (22-25) | |||
| | |||
*Not far from Norvallen OP. | |||
*(K-9) camp is reached from the south. | |||
*Funguars link by sound | |||
|- | |||
|17-20 | |||
|[[Valkurm Dunes]] | |||
| | |||
*{{Location Tooltip|area=Valkurm Dunes|pos=B-7}} Secret Beach/Gustav Zone | |||
*{{Location Tooltip|area=Valkurm Dunes|pos=I-9|pos 2=E-9}} | |||
| | |||
* [[Beach Pugil]] (23-26) | |||
* [[Snipper]] (20-23) | |||
| | |||
*[[Silent Oil|Oils]] and [[Prism Powder|Powders]] help to reach Gustav zone. | |||
|- | |||
|17-19 | |||
|[[Rolanberry Fields]] | |||
| | |||
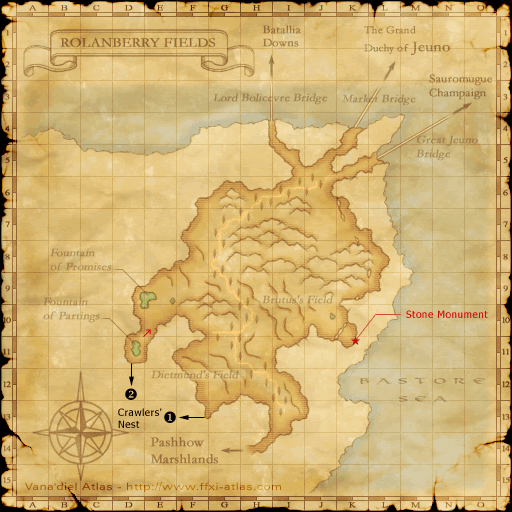
*{{Location Tooltip|area=Rolanberry Fields|pos=G-10|pos 2=J-10}} | |||
| | |||
* [[Death Wasp]] (23-26) | |||
* [[Clipper]] (24-26) | |||
* [[Poison Leech]] (24-27) | |||
| | |||
|- | |||
|17-19 | |||
|[[Buburimu Peninsula]] | |||
| | |||
*{{Location Tooltip|area=Buburimu Peninsula|pos=I-6}} | |||
| | |||
*{{changes|Horizon custom mob}} [[Cape Dhalmel]]s (24-26) | |||
* [[Goblin Leecher]], [[Goblin Gambler]], [[Goblin Mugger]] (21-25) | |||
| | |||
*Cape Dhalmels and Bull Dhalmels (20-23) will link, [[Bind]] or [[Sleep]] recommended. | |||
|- | |||
|17-20 | |||
|[[Maze of Shakhrami]] | |||
| | |||
* Map 2: {{Location Tooltip|area=Maze of Shakhrami|map= Map 2|pos=H-5}} | |||
| | |||
* [[Carnivorous Crawler]] (22-25) | |||
| | |||
*8 crawlers, 10 if you roam into the eastern tunnel. | |||
*[[Silent Oil|Oils]] and [[Prism Powder|Powders]] recommended to reach camp. | |||
*Enter from canyon. | |||
|- | |||
|17-20 | |||
|[[Buburimu Peninsula]] | |||
| | |||
*{{Location Tooltip|area=Buburimu Peninsula|pos=H-9|pos 2=J-7}} | |||
| | |||
* [[Poison Leech]] (21-25) | |||
* [[Snipper]]s (18-23) | |||
* [[Shoal Pugil]] (24-28) | |||
| | |||
*Watch for Bogy spawns at night. Both beaches have safe places to camp outside of blood aggro range. | |||
*Start on snippers at 17. Can start mixing pugs in at 18. | |||
|- | |||
|18-20 | |||
|[[Inner Horutoto Ruins]] | |||
| | |||
*Map 3 {{Location Tooltip|area=Inner Horutoto Ruins|map= Map 3|pos=H-9}} Rose Tower, 3 Mage Gate | |||
| | |||
* [[Boggart]] (23-26) | |||
| | |||
*[[Silent Oil|Oils]] and [[Prism Powder|Powders]] recommended to reach camp. All of the mobs are aggressive. *Enter via (J-7) in East Saru/Lilly Tower. | |||
|- | |||
|18-21 | |||
| [[Castle Oztroja]] | |||
| | |||
*Main Zone/Entry | |||
| | |||
* [[Yagudo Priest]], [[Yagudo Votary]], [[Yagudo Theologist]],[[Yagudo Persecutor]] (22-27) | |||
* [[Bastion Bats]] (18-21) | |||
| | |||
*All of the mobs aggro. | |||
|- | |||
|18-21 | |||
|[[Beadeaux]] | |||
| | |||
*Main Zone/Entry | |||
| | |||
* [[Copper Quadav]] (22-27) | |||
* [[Old Quadav]] (22-26) | |||
* [[Land Pugil]] (20-23) | |||
| | |||
*All of the mobs aggro. | |||
|- | |||
|19-21 | |||
|[[Qufim Island]] | |||
| | |||
*{{Location Tooltip|area=Qufim Island|pos=H-7|pos 2=I-8}} | |||
| | |||
* [[Clipper]] (25-27) | |||
* [[Land Worm]] (25-27) | |||
| | |||
*Circle around lake killing worms and crabs. | |||
*At night, banshees spawn at lake so you will need to camp in a tunnel and pull crabs to you. | |||
*Popular exp zone | |||
|- | |||
|19-21 | |||
|[[Qufim Island]] | |||
| | |||
*{{Location Tooltip|area=Qufim Island|pos=I-8|pos 2=I-7|pos 3=G-6|pos 4=H-6|pos 5=H-8}} | |||
| | |||
* [[Clipper]] (25-27) | |||
* [[Land Worm]] (25-27) | |||
* [[Dark Bats]] (25-27) | |||
* [[Glow Bat]]s (28-29) | |||
| | |||
*Potentially supports 2 parties at opposite ends of the cliff. | |||
*Popular exp zone | |||
|- | |||
|19-22 | |||
|[[Meriphataud Mountains]] | |||
| | |||
* {{Location Tooltip|area=Qufim Island|pos=H-5|pos 2=E-4|pos 3=D-5}} | |||
| | |||
* {{changes|Horizon custom mob}} [[Migrant Hawker]] (24-27) | |||
* {{changes|Horizon custom mob}} [[Dust Lizard]] (26-28) | |||
| | |||
*Quick walk from Aragoneu OP. | |||
*3 camps/supports 3 parties. | |||
|- | |||
|19-22 | |||
|[[Carpenters' Landing]] | |||
| | |||
*Center Landing Docks (NW Jugner Zone) | |||
| | |||
* [[Orcish Cursemaker]], [[Orcish Fighter]], [[Orcish Serjeant]] (21-25) | |||
* [[Forest Tiger]] (22-25) | |||
* [[Fosse Pugil]] (22-24) | |||
| | |||
*[[Silent Oil|Oils]] and [[Prism Powder|Powders]] recommended | |||
|- | |||
|19-22 | |||
|[[Davoi]] | |||
| | |||
*Jugner Zone | |||
| | |||
* [[Orcish Cursemaker]], [[Orcish Fighter]], [[Orcish Serjeant]] (22-28) | |||
| | |||
*[[Bats]] that pop at night aggro. | |||
|- | |||
|19-22 | |||
|[[Yughott Grotto]] | |||
| | |||
*Upper Grotto | |||
| | |||
* [[Orcish Cursemaker]], [[Orcish Fighter]], [[Orcish Serjeant]] (21-23) | |||
| | |||
*[[Silent Oil|Oils]] and [[Prism Powder|Powders]] required to reach either Horlais Peak zoneline. | |||
|- | |||
|} | |||
== Level 40-50== | == Level 40-50== | ||
<div class="flex-container"> | <div class="flex-container"> | ||
{| class="droppedby horizon-table | <div class="flex-container-item-1"> | ||
|+ | {| class="droppedby horizon-table mw-collapsible mw-collapsed sortable center-col-1" | ||
! | |+ | ||
|- | |||
! Level | |||
! width=15% |Zone | ! width=15% |Zone | ||
! width=15% |Camp | ! width=15% |Camp | ||
! width= | ! width=20% |Mob(s) | ||
! | ! Notes | ||
|- | |- | ||
|40-42 | |40-42 | ||
|'''[[Crawlers' Nest]]''' | |'''[[Crawlers' Nest]]''' | ||
| | | | ||
''Map 2 {{Location Tooltip|area=Crawlers' Nest|map=Map 2|pos=H-9}} '' | |||
''Map 3 {{Location Tooltip|area=Crawlers' Nest|map=Map 3|pos=I-8}} '' | |||
| | | | ||
* [[Soldier Crawler]] (47-49) | * [[Soldier Crawler]] (47-49) | ||
| Line 19: | Line 583: | ||
|- | |- | ||
|40-42 | |40-42 | ||
|'''[[Yhoator Jungle]]''' | |'''[[Yhoator Jungle]]''' | ||
| | | | ||
''Yhoat Telepoint at {{Location Tooltip|area=Yhoator Jungle|pos=F-9}}'' | |||
| | | | ||
* [[Master Coeurl]] (48-50) | * [[Master Coeurl]] (48-50) | ||
| Line 29: | Line 593: | ||
|'''[[Eastern Altepa Desert]]''' | |'''[[Eastern Altepa Desert]]''' | ||
| | | | ||
''{{Location Tooltip|area=Eastern Altepa Desert|pos=F-9|pos 2=F-10}}'' | |||
| | | | ||
* [[Goblin Poacher]] (45-52) | * [[Goblin Poacher]] (45-52) | ||
| Line 38: | Line 602: | ||
|- | |- | ||
|40-43 | |40-43 | ||
|'''[[Beaucedine Glacier]]''' | |'''[[Beaucedine Glacier]]''' | ||
| | | | ||
''{{Location Tooltip|area=Beaucedine Glacier|pos=J-8|pos 2=J-9}} Lower level, by the coast.'' | |||
| | | | ||
* {{changes|Horizon Drop Rate change}} [[Stone Golem]] (47-49) | * {{changes|Horizon Drop Rate change}} [[Stone Golem]] (47-49) | ||
| Line 48: | Line 612: | ||
|- | |- | ||
|41-44 | |41-44 | ||
|'''[[Yhoator Jungle]]''' | |'''[[Yhoator Jungle]]''' | ||
| | |||
''{{Location Tooltip|area=Yhoator Jungle|pos=K-10}}'' | |||
| | | | ||
*{{Changes|Horizon custom mob}} [[Opotrap]] (47-51) | *{{Changes|Horizon custom mob}} [[Opotrap]] (47-51) | ||
*{{Changes|Horizon custom mob}} [[Snap Jaw]] (48-51) | *{{Changes|Horizon custom mob}} [[Snap Jaw]] (48-51) | ||
|Mobs do not raise defense (Confirmed by Charsi) | |Mobs do not raise defense (Confirmed by Charsi) | ||
|- | |- | ||
|41-44 | |41-44 | ||
|'''[[Western Altepa Desert]]''' | |'''[[Western Altepa Desert]]''' | ||
| | |||
''{{Location Tooltip|area=Western Altepa Desert|pos=G-6|pos 2=H-6|pos 3=G-7|pos 4=H-7}}'' | |||
| | | | ||
* [[Desert Beetle]] (47-51) | * [[Desert Beetle]] (47-51) | ||
|Beetles all around Revelation Rock, supports many parties, Beetles link. | |Beetles all around Revelation Rock, supports many parties, Beetles link. | ||
|- | |- | ||
|42-45 | |42-45 | ||
|'''[[Xarcabard]]''' | |'''[[Xarcabard]]''' | ||
| | |||
''Baileys Zone, {{Location Tooltip|area=Xarcabard|pos=E-8}}'' | |||
| | | | ||
* [[Demon Knight]] (48-52) | * [[Demon Knight]] (48-52) | ||
| Line 74: | Line 639: | ||
|- | |- | ||
|43-45 | |43-45 | ||
|'''[[Yhoator Jungle]]''' | |'''[[Yhoator Jungle]]''' | ||
| | |||
''Ifrit Cauldron zone {{Location Tooltip|area=Yhoator Jungle|pos=H-6}}'' | |||
| | | | ||
* [[Goblin Bouncer]] (52-54) | * [[Goblin Bouncer]] (52-54) | ||
* [[Goblin Hunter]] (52-54) | * [[Goblin Hunter]] (52-54) | ||
|2 parties. RNG and WAR [[:Category:Goblins|Goblins]]. 6 Spawns at west entrance. 8 at east entrance. [[Barfira]] for bombs. | |2 parties. RNG and WAR [[:Category:Goblins|Goblins]]. 6 Spawns at west entrance. 8 at east entrance. [[Barfira]] for bombs. | ||
|- | |- | ||
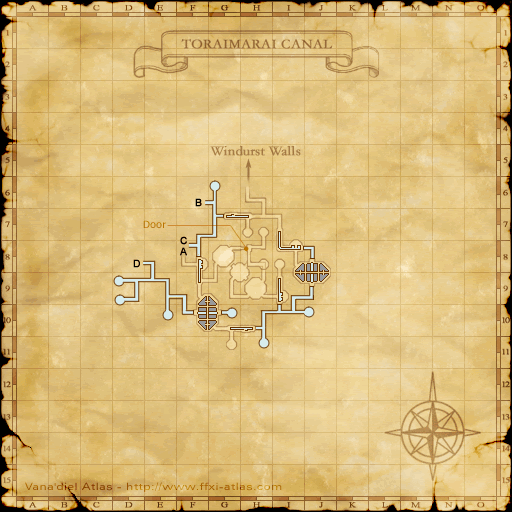
|43-45 | |43-45 | ||
|'''[[Toraimarai Canal]]''' | |'''[[Toraimarai Canal]]''' | ||
| | |||
''{{Location Tooltip|area=Toraimarai Canal|map=Map 2|pos=F-9}} 1st map, by Full Moon Fountain'' | |||
| | | | ||
* [[Bigclaw]] (49-52) | * [[Bigclaw]] (49-52) | ||
| Line 92: | Line 657: | ||
<small>''(~15 minute walk from Sarutabarta OP going through 3 mage gate)''.</small> | <small>''(~15 minute walk from Sarutabarta OP going through 3 mage gate)''.</small> | ||
|- | |- | ||
|43-45 | |43-45 | ||
|'''[[Crawlers' Nest]]''' | |'''[[Crawlers' Nest]]''' | ||
*''Map 2 | | | ||
*''Map 2 {{Location Tooltip|area=Crawlers' Nest|map=Map 2|pos=H-7}} '' | |||
| | | | ||
* [[Labyrinth Lizard]] (49-52) | * [[Labyrinth Lizard]] (49-52) | ||
| Line 103: | Line 668: | ||
|43-46 | |43-46 | ||
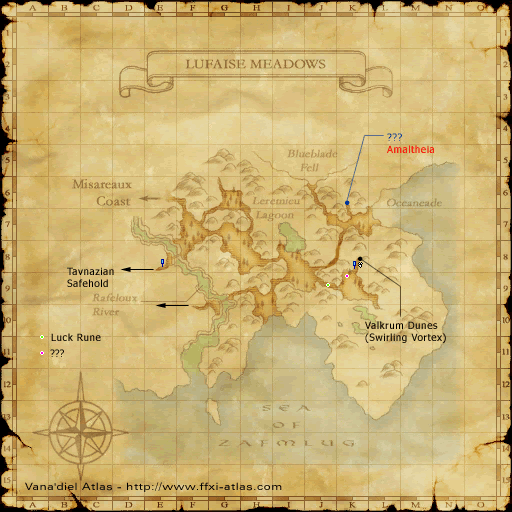
|'''[[Lufaise Meadows]]''' | |'''[[Lufaise Meadows]]''' | ||
| | |||
''{{Location Tooltip|area=Lufaise Meadows|pos=G-6}}'' | |||
| | | | ||
* [[Leshachikha]] (49-51) | * [[Leshachikha]] (49-51) | ||
| Line 110: | Line 676: | ||
<small>''Requires completion of [[Promathia Mission 1-3|CoP 1-3]]''</small> | <small>''Requires completion of [[Promathia Mission 1-3|CoP 1-3]]''</small> | ||
|- | |- | ||
|43-45 | |43-45 | ||
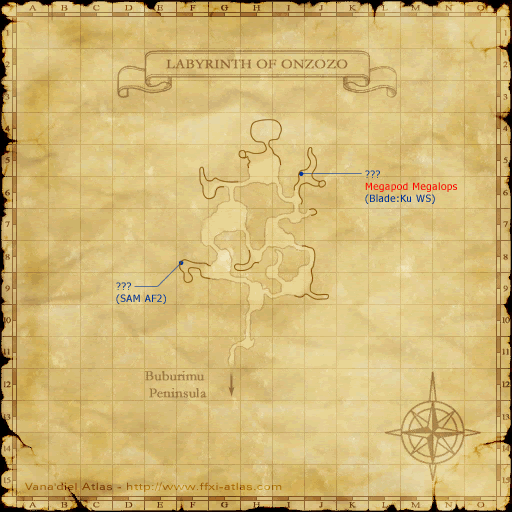
|'''[[Labyrinth of Onzozo]]''' | |'''[[Labyrinth of Onzozo]]''' | ||
| | |||
''{{Location Tooltip|area=Labyrinth of Onzozo|pos=I-9}}, in the two tunnels'' | |||
| | | | ||
* [[Cockatrice]] (50-53) | * [[Cockatrice]] (50-53) | ||
| Line 124: | Line 690: | ||
|44-47 | |44-47 | ||
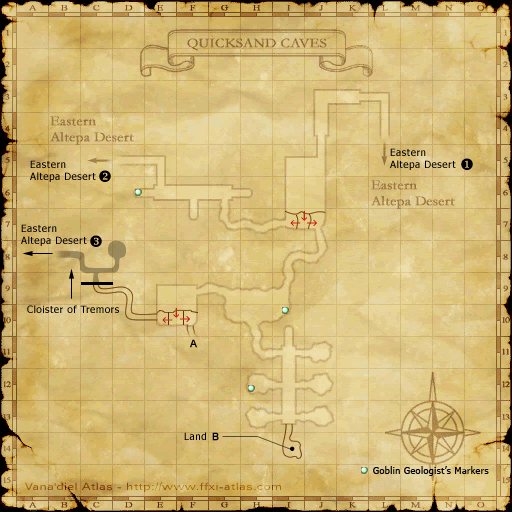
|'''[[Quicksand Caves]]''' | |'''[[Quicksand Caves]]''' | ||
| | |||
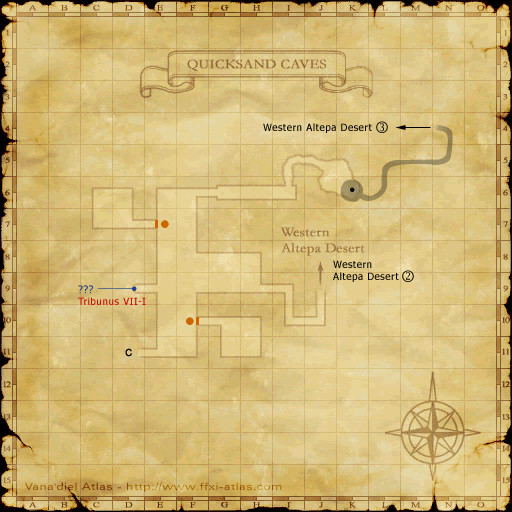
''Map 1 {{Location Tooltip|area=Quicksand Caves|map=Map 1|pos=J-5|pos 2=E-5}} '' | |||
| | | | ||
* [[Helm Beetle]] (51-54) | * [[Helm Beetle]] (51-54) | ||
| Line 130: | Line 697: | ||
* [[:Category:Antica|Antica]] (52-59) | * [[:Category:Antica|Antica]] (52-59) | ||
|Beetles and spiders no aggro but link. Bring WHM for Erase if you fight spiders. Antia have AoE silence. Supports 2 parties. Drops coffer keys. | |Beetles and spiders no aggro but link. Bring WHM for Erase if you fight spiders. Antia have AoE silence. Supports 2 parties. Drops coffer keys. | ||
<small>''Titan entrance from Eastern Altepa Desert | <small>''Titan entrance from Eastern Altepa Desert {{Location Tooltip|area=Eastern Altepa Desert|pos=K-7}}''</small> | ||
|- | |- | ||
|44-46 | |44-46 | ||
|'''[[Beaucedine Glacier]]''' | |'''[[Beaucedine Glacier]]''' | ||
| | |||
''{{Location Tooltip|area=Beaucedine Glacier|pos=J-5}} at [[Fei'Yin]] entrance''' | |||
| | | | ||
* {{Changes|Horizon custom mob}} [[Rime Lynx]] (51-53) | * {{Changes|Horizon custom mob}} [[Rime Lynx]] (51-53) | ||
| Line 141: | Line 709: | ||
|- | |- | ||
|44-47 | |44-47 | ||
|'''[[Crawlers' Nest]]''' | |'''[[Crawlers' Nest]]''' | ||
| | |||
''Map 3 {{Location Tooltip|area=Crawlers' Nest|map=Map 3|pos=J-8|pos 2=H-9}}'' | |||
| | | | ||
* [[Hornfly]] (50-53) | * [[Hornfly]] (50-53) | ||
| Line 151: | Line 720: | ||
|45-51 | |45-51 | ||
|'''[[Garlaige Citadel]]''' | |'''[[Garlaige Citadel]]''' | ||
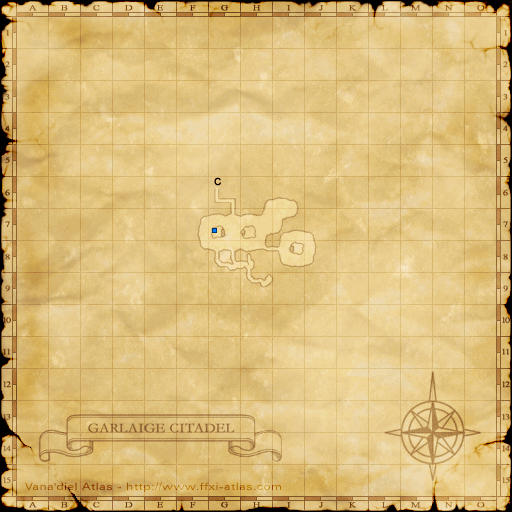
| | |||
'' Basement Map {{Location Tooltip|area=Garlaige Citadel|map=Map 4|pos=G-6|pos 2=J-8}}'' | |||
| | | | ||
* [[Funnel Bats]] (52-54) | * [[Funnel Bats]] (52-54) | ||
| Line 159: | Line 729: | ||
|- | |- | ||
|46-48 | |46-48 | ||
|'''[[Bostaunieux Oubliette]]''' | |'''[[Bostaunieux Oubliette]]''' | ||
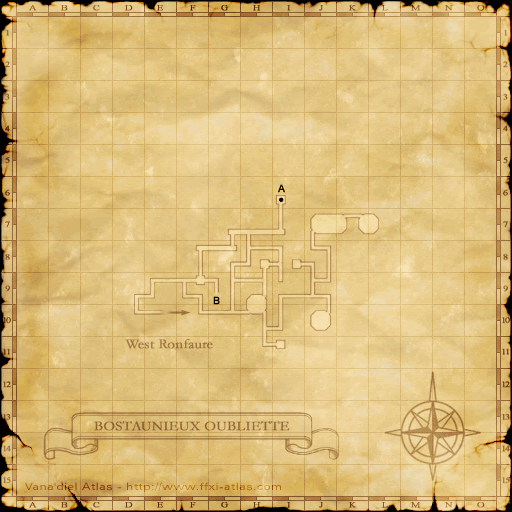
| | |||
''South of Sewer Hatch Landing, {{Location Tooltip|area=Bostaunieux Oubliette|map=Map 2|pos=G-8}}'' | |||
| | | | ||
* [[Funnel Bats]] (52-55) | * [[Funnel Bats]] (52-55) | ||
| Line 167: | Line 738: | ||
|- | |- | ||
|46-48 | |46-48 | ||
|'''[[Crawlers' Nest]]''' | |'''[[Crawlers' Nest]]''' | ||
| | |||
''Map 2 {{Location Tooltip|area=Crawlers' Nest|map=Map 2|pos=G-7}}'' | |||
''Map 3 {{Location Tooltip|area=Crawlers' Nest|map=Map 3|pos=G-9}}'' | |||
| | | | ||
* [[Rumble Crawler]] (53-55) | * [[Rumble Crawler]] (53-55) | ||
| Line 175: | Line 747: | ||
|- | |- | ||
|48-50 | |48-50 | ||
|'''[[Quicksand Caves]]''' | |'''[[Quicksand Caves]]''' | ||
| | |||
''Map 3 {{Location Tooltip|area=Quicksand Caves|map=Map 3|pos=H-9}}'' | |||
| | | | ||
* [[Helm Beetle]] (51-58) | * [[Helm Beetle]] (51-58) | ||
* [[:Category:Antica|Antica]] (52-59) | * [[:Category:Antica|Antica]] (52-59) | ||
|High level range of mobs. Bring echo drops and/or mages /whm for silena. | |High level range of mobs. Bring echo drops and/or mages /whm for silena. | ||
<small>''Entry at {{Location|Western Altepa Desert|J-9}}'' | <small>''Entry at {{Location|Western Altepa Desert|J-9}}''</small> | ||
|- | |- | ||
|48-50 | |48-50 | ||
|'''[[Misareaux Coast]]''' | |'''[[Misareaux Coast]]''' | ||
| | |||
''{{Location Tooltip|area=Misareaux Coast|pos=G-5|pos 2=G-7}}'' | |||
| | | | ||
* {{Changes|Horizon custom mob}} [[Migrant Dobsonfly]] (55-57) | * {{Changes|Horizon custom mob}} [[Migrant Dobsonfly]] (55-57) | ||
| Line 193: | Line 766: | ||
|- | |- | ||
| 48-50 | | 48-50 | ||
|'''[[Crawlers' Nest]]''' | |'''[[Crawlers' Nest]]''' | ||
| | |||
''Map 2 {{Location Tooltip|area=Crawlers' Nest|map=Map 2|pos=G-6|pos 2=F-6}}'' | |||
| | | | ||
* [[Dragonfly]] (55-58) | * [[Dragonfly]] (55-58) | ||
| Line 202: | Line 776: | ||
|- | |- | ||
|48-51 | |48-51 | ||
|'''[[Western Altepa Desert]]''' | |'''[[Western Altepa Desert]]''' | ||
| | |||
''{{Location Tooltip|area=Western Altepa Desert|pos=F-6|pos 2= G-6}} | |||
| | | | ||
* [[Antica Lanista]] (54-58) | * [[Antica Lanista]] (54-58) | ||
* [[Antica Hoplomachus]] (54-58) | * [[Antica Hoplomachus]] (54-58) | ||
|Pull Antica from below. They do not link. Bring RDM/Silencer- Lanista are BLM. Silena/echo drops recommended. Could also fight manticore and beetles in the area. | |Pull Antica from below. They do not link. Bring RDM/Silencer- Lanista are BLM. Silena/echo drops recommended. Could also fight manticore and beetles in the area. | ||
|- | |- | ||
| 49-51 | | 49-51 | ||
|'''[[Garlaige Citadel]]''' | |'''[[Garlaige Citadel]]''' | ||
| | |||
'' Basement Map {{Location Tooltip|area=Garlaige Citadel|map=Map 4|pos=G-6}} or {{Location Tooltip|area=Garlaige Citadel|map=Map 4|pos=J-8}}'' | |||
| | | | ||
* [[Chamber Beetle]] (56-58) | * [[Chamber Beetle]] (56-58) | ||
| Supports 2 parties in the basement. Another 2 behind banishing gate 2. BLM Recommended. | | Supports 2 parties in the basement. Another 2 behind banishing gate 2. BLM Recommended. | ||
|- | |||
|} | |} | ||
</div> | </div> | ||
</div> | |||
==Test Table 2== | |||
<div class="flex-container"> | |||
{| class="droppedby horizon-table sortable" | |||
|- | |||
! Level !! Zone !! Camp !! Mob(s) !! Note | |||
|- | |||
| 28-32 | |||
|| [[Lufaise Meadows]] | |||
||'''Lake''' | |||
* Tier 4 Orcs | |||
|| '''All members must complete [[:Category:Chains of Promathia Missions|CoP]] Chapter 1. [[Thunder Elemental]] danger.''' | |||
|- | |||
| 29-33 || [[Beaucedine Glacier]] || '''[[Ranguemont Pass]] (G-9) canyon (no mobs should pop in that spot) (H-9) (roaming tiger alley)''' | |||
* Tier 4 [[:Category:Goblins|Goblins]] | |||
* [[Tundra Tiger]] | |||
* [[Gigas's Tiger]] | |||
|| Mages must /whm. Take notice of mobs in area that detect magic. The H-9 camp is a roaming camp loaded with [[:Category:Tigers|tigers]] and little of the other mobs. Bring someone to kill all other mobs except for the BST Giga (will load a pet that is the same level as the [[Tundra Tiger]] but with a fourth of the HP). | |||
|- | |||
| 29-33 | |||
|| [[Castle Oztroja]] | |||
|| '''Behind Trap Door''' | |||
* Tier 4 [[:Category:Yagudo|Yagudo]] | |||
* [[Bats]] | |||
|| Layout of zone favors a moving party. | |||
|- | |||
|41-44 | |||
|[[Attohwa Chasm]] | |||
|(L-10) | |||
* [[Ogrefly]] | |||
* [[Master Coeurl]] | |||
|1 party. WHM is required. Mages must sub WHM. | |||
|- | |||
| || || || | |||
|}</div> | |||
Latest revision as of 22:22, 7 February 2025
Level 20
| Level | Zone | Camp | Mob(s) | Notes |
|---|---|---|---|---|
| 10-15 | Inner Horutoto Ruins |
|
|
|
| 11-15 | Carpenters' Landing via Northern San d'Oria Wooden Shutter entrance |
|
| |
| 11-14 | Valkurm Dunes |
|
| |
| 11-14 | Buburimu Peninsula |
|
| |
| 12-15 | Tahrongi Canyon |
|
| |
| 12-15 | Tahrongi Canyon |
|
| |
| 12-15 | Konschtat Highlands |
|
| |
| 12-15 | La Theine Plateau |
|
| |
| 12-15 | La Theine Plateau |
|
|
|
| 12-15 | Ordelle's Caves |
|
|
|
| 12-15 | Ordelle's Caves |
|
| |
| 13-15 | Maze of Shakhrami |
|
||
| 14-16 | Valkurm Dunes |
|
| |
| 14-16 | Buburimu Peninsula |
|
| |
| 14-17 | Inner Horutoto Ruins |
|
|
|
| 14-17 | Ordelle's Caves |
|
||
| 15-17 | Valkurm Dunes |
|
| |
| 15-17 | Jugner Forest |
|
| |
| 15-17 | Jugner Forest |
|
| |
| 15-18 | Dangruf Wadi |
|
| |
| 15-18 | Buburimu Peninsula |
|
| |
| 15-18 | Pashhow Marshlands |
|
| |
| 15-18 | Meriphataud Mountains |
|
| |
| 15-18 | Carpenters' Landing |
|
||
| 15-17 | Pashhow Marshlands |
|
| |
| 15-18 | Pashhow Marshlands |
|
| |
| 15-19 | Korroloka Tunnel |
|
| |
| 16-18 | Valkurm Dunes |
|
|
|
| 16-18 | Meriphataud Mountains |
|
|
|
| 17-19 | Ordelle's Caves |
|
|
|
| 17-19 | Ordelle's Caves |
|
|
|
| 17-19 | Jugner Forest |
|
| |
| 17-20 | Valkurm Dunes |
|
||
| 17-19 | Rolanberry Fields |
|
||
| 17-19 | Buburimu Peninsula |
|
||
| 17-20 | Maze of Shakhrami |
|
|
|
| 17-20 | Buburimu Peninsula |
|
| |
| 18-20 | Inner Horutoto Ruins |
|
|
|
| 18-21 | Castle Oztroja |
|
|
|
| 18-21 | Beadeaux |
|
|
|
| 19-21 | Qufim Island |
| ||
| 19-21 | Qufim Island |
| ||
| 19-22 | Meriphataud Mountains |
|
| |
| 19-22 | Carpenters' Landing |
|
|
|
| 19-22 | Davoi |
|
|
|
| 19-22 | Yughott Grotto |
|
|
Level 40-50
| Level | Zone | Camp | Mob(s) | Notes |
|---|---|---|---|---|
| 40-42 | Crawlers' Nest |
|
At least 2 camps. Dispel and/or BLM recommended for cocoon. Camp at rocks/boulders on map 3. | |
| 40-42 | Yhoator Jungle |
Yhoat Telepoint at F-9 |
|
Popular BST camp |
| 40-43 | Eastern Altepa Desert |
|
Goblins Bomb Toss can be an issue, stuns recommended. Lower level parties should beware of the diggers as they are higher in level. Supports 2 parties. | |
| 40-43 | Beaucedine Glacier |
J-8 / J-9 Lower level, by the coast. |
|
Supports 1 party. Dispel recommended. |
| 41-44 | Yhoator Jungle | Mobs do not raise defense (Confirmed by Charsi) | ||
| 41-44 | Western Altepa Desert |
|
Beetles all around Revelation Rock, supports many parties, Beetles link. | |
| 42-45 | Xarcabard |
Baileys Zone, E-8 |
|
1 party |
| 43-45 | Yhoator Jungle |
Ifrit Cauldron zone H-6 |
|
2 parties. RNG and WAR Goblins. 6 Spawns at west entrance. 8 at east entrance. Barfira for bombs. |
| 43-45 | Toraimarai Canal |
F-9 1st map, by Full Moon Fountain |
Supports 1 party. Dispel and BLM recommended. Need either (~15 minute walk from Sarutabarta OP going through 3 mage gate). | |
| 43-45 | Crawlers' Nest |
|
|
Supports 1 party. Lizards aggro sound and link!
About a 7.5 minute walk from Derfland OP. |
| 43-46 | Lufaise Meadows |
|
Beware of Thunder Elemental that spawns by Leshys. Uses damaging area-of-effect moves as well as Slumber Powder.
Requires completion of CoP 1-3 | |
| 43-45 | Labyrinth of Onzozo |
I-9, in the two tunnels |
|
Supports 2 parties. Know when Cockatrice in tunnels will repop. WHM required for Stona. Cockatrice do not link but are aggressive via sound. Echo Drops strongly recommended. Avoid Goblins Miners if possible (THF Goblins) |
| 44-47 | Quicksand Caves |
Map 1 J-5 / E-5 |
|
Beetles and spiders no aggro but link. Bring WHM for Erase if you fight spiders. Antia have AoE silence. Supports 2 parties. Drops coffer keys.
Titan entrance from Eastern Altepa Desert K-7 |
| 44-46 | Beaucedine Glacier |
|
Does NOT raise defenses. Bring silena and paralnya. Supports 1 party. 2 parties doubtful.
~8.5 minute walk from Fauregandi OP | |
| 44-47 | Crawlers' Nest |
Map 3 J-8 / H-9 |
|
Can also mix in Exorays(51-54) or other mobs in the area. Typically enough spawns for 2 parties, can camp at other entrances to room as well. |
| 45-51 | Garlaige Citadel |
Basement Map G-6 / J-8 |
|
Funnel Bats initially, moving up to Chamber Beetles around level ~48. Supports 2 parties. |
| 46-48 | Bostaunieux Oubliette |
South of Sewer Hatch Landing, G-8 |
|
Sneak up before dropping down, slimes below. Watch out for pops. Lots of link potential. Bring a Bard and/or Carby pull. Don't go past the hounds. Supports at least 2 parties.
(Must progress through certain rank missions to enter Chateau, have rank 3 Bastok and Windurst to enter) |
| 46-48 | Crawlers' Nest |
|
Dispel/Finale recommended. | |
| 48-50 | Quicksand Caves |
Map 3 H-9 |
|
High level range of mobs. Bring echo drops and/or mages /whm for silena.
Entry at Western Altepa Desert (J-9) |
| 48-50 | Misareaux Coast |
|
1 camp by the Qufim warp. Other camp is by waterfall near Sacrarium.
Requires completion of CoP 1-3 | |
| 48-50 | Crawlers' Nest |
Map 2 G-6 / F-6 |
|
Will need sneak/oils to reach camp. Take the NW tunnel at the sack room (H-8) to the 2nd map. Supports 1 party. Flies link.
About a 10.5 minute walk from Derfland OP |
| 48-51 | Western Altepa Desert |
|
Pull Antica from below. They do not link. Bring RDM/Silencer- Lanista are BLM. Silena/echo drops recommended. Could also fight manticore and beetles in the area. | |
| 49-51 | Garlaige Citadel |
|
Supports 2 parties in the basement. Another 2 behind banishing gate 2. BLM Recommended. |
Test Table 2
| Level | Zone | Camp | Mob(s) | Note |
|---|---|---|---|---|
| 28-32 | Lufaise Meadows | Lake
|
All members must complete CoP Chapter 1. Thunder Elemental danger. | |
| 29-33 | Beaucedine Glacier | Ranguemont Pass (G-9) canyon (no mobs should pop in that spot) (H-9) (roaming tiger alley)
|
Mages must /whm. Take notice of mobs in area that detect magic. The H-9 camp is a roaming camp loaded with tigers and little of the other mobs. Bring someone to kill all other mobs except for the BST Giga (will load a pet that is the same level as the Tundra Tiger but with a fourth of the HP). | |
| 29-33 | Castle Oztroja | Behind Trap Door | Layout of zone favors a moving party. | |
| 41-44 | Attohwa Chasm | (L-10) | 1 party. WHM is required. Mages must sub WHM. | |


