EXP Camps: Difference between revisions
From HorizonXI Wiki
→Level 30-40: Added several missing links, fixed grammar and updated some of the notes for consistency and ease-of-use. All Zones in this table should now link to a page, whether or not the zone has one. Will update later when Goblin, Moblin, and Bugbear pages exist for the individual mobs. |
Continued cleanup, added more page links. Fixed table for 20-30 range (About 5 rows down the table's Camp and Mob sections merged into one previously.) Trying to make things more clear/understandable for newer players who may not know all the terminology. |
||
| Line 5: | Line 5: | ||
*These camps are all aimed at standard 6 member [[Party|parties]]. | *These camps are all aimed at standard 6 member [[Party|parties]]. | ||
*Consider targeting lower level mobs (no higher than 8 levels above your party) with a non-standard party setup. | *Consider targeting lower level mobs (no higher than 8 levels above your party) with a non-standard party setup. | ||
*If your party has a strong line-up, eats food, and is coordinated with | *If your party has a strong line-up, eats food, and is coordinated with [[Skillchains]]/[[Magic Burst]]s, you can target a higher level camp. | ||
*Monsters on Horizon may have levels that differ from that of retail, be wary when using exp camp guides outside of this wiki as they may not be the same level. | *Monsters on Horizon may have levels that differ from that of retail, be wary when using exp camp guides outside of this wiki as they may not be the same level. | ||
*Starting at level 50 adventures will gain an experience point bonus | *Starting at level 50 adventures will gain an experience point bonus by simply having the [[Signet]] buff, up to a total of 10%, in conquest (Vanilla/RoZ/CoP) areas {{Changes }}. | ||
*Starting at level 50, adventurers will gain a 5% experience point bonus for defeating foes in conquest regions that their nation does not control while having [[ | *Starting at level 50, adventurers will gain a 5% experience point bonus for defeating foes in conquest regions that their nation does not control while having [[Signet]]{{Changes }}. Consider camping in regions that your nation doesn't control for maximum experience point gains! | ||
== Camps - Verify if viable == | == Camps - Verify if viable == | ||
| Line 35: | Line 35: | ||
* Via [[Ranguemont Pass]]: {{Location Tooltip|area=Beaucedine Glacier|pos=G-9|pos 2=H-9}} | * Via [[Ranguemont Pass]]: {{Location Tooltip|area=Beaucedine Glacier|pos=G-9|pos 2=H-9}} | ||
| | | | ||
* [[Gigas's Tiger]] (33-35) | |||
* [[Goblin Furrier]], [[Goblin Pathfinder]], [[Goblin Smithy]], [[Goblin Shaman]] (35-38) | * [[Goblin Furrier]], [[Goblin Pathfinder]], [[Goblin Smithy]], [[Goblin Shaman]] (35-38) | ||
* [[Tundra Tiger]] (34-37) | * [[Tundra Tiger]] (34-37) | ||
| | | | ||
* Mages must | * Mages must sub [[WHM]]. | ||
* Mobs in area that detect magic. | * Mobs in area that detect magic. | ||
* The H-9 camp is a mostly a roaming camp loaded with [[:Category:Tigers|tigers]] | * The {{Location Tooltip|area=Beaucedine Glacier|pos=H-9}} camp is a mostly a roaming camp loaded with [[:Category:Tigers|tigers]] | ||
* Bring someone to kill all other mobs except for the BST | * Bring someone to kill all other mobs except for the [[BST]] Gigas (will load a pet that is the same level as the [[Tundra Tiger]] but with a fourth of the HP). | ||
|- | |- | ||
| 29-33 | | 29-33 | ||
| [[Castle Oztroja]] | | [[Castle Oztroja]] | ||
| | | | ||
* Behind Trap Door | * Behind Trap Door. | ||
| | | | ||
*[[Yagudo Drummer]] (33-37) | * [[Yagudo Drummer]] (33-37) | ||
*[[Yagudo Oracle]] (34-38) | * [[Yagudo Oracle]] (34-38) | ||
* [[Yagudo Interrogator]] (35-39) | * [[Yagudo Interrogator]] (35-39) | ||
| Line 65: | Line 65: | ||
| | | | ||
* Supports one party. | * Supports one party. | ||
* WHM is required. | * [[WHM]] is required. | ||
* Mages must sub WHM. | * Mages must sub [[WHM]]. | ||
|- | |- | ||
|} | |} | ||
| Line 91: | Line 91: | ||
* [[Goblin Tinkerer]], [[Goblin Butcher]], [[Goblin Ambusher]] (14-18) | * [[Goblin Tinkerer]], [[Goblin Butcher]], [[Goblin Ambusher]] (14-18) | ||
| | | | ||
* Camp outside | * Camp outside [[Three Mage Gate]] | ||
* [[Silent Oil|Oils]] and [[Prism Powder|powders]] required. | * [[Silent Oil|Oils]] and [[Prism Powder|powders]] required. | ||
* Beetles and Bats don't aggro but do link via sound. | * [[Beady Beetles|Beetles]] and [[Bats]] don't aggro but do link via sound. | ||
* Enter via [[East Sarutabaruta]] {{Location Tooltip|area=East Sarutabaruta|pos=J-7}}. | * Enter via [[East Sarutabaruta]] {{Location Tooltip|area=East Sarutabaruta|pos=J-7}}. | ||
|- | |- | ||
| Line 107: | Line 107: | ||
* [[Flytrap]] (20-22) | * [[Flytrap]] (20-22) | ||
| | | | ||
* Wooden Shutter is at {{Location Tooltip|area=Northern San d'Oria|F-5}} | * Wooden Shutter is at [[Northern San d'Oria]] ({{Location Tooltip|area=Northern San d'Oria|pos=F-5}}) | ||
* [[Antidotes]] and [[Echo Drop]]s strongly recommended. | * [[Antidotes]] and [[Echo Drop]]s strongly recommended. | ||
* WHM required. | * [[WHM]] required. | ||
* Flytrap uses [[Soporific]], a small range [[Area of Effect|AOE]] | * Flytrap uses [[Soporific]], a small range [[Area of Effect|AOE]] [[Sleep (Status Effect)|Sleep]] and potent [[Paralyze (Status Effect)|Paralyze]] ability. | ||
* Can support multiple parties and different level ranges. | * Can support multiple parties and different level ranges. | ||
|- | |- | ||
| Line 121: | Line 121: | ||
| | | | ||
* Welcome to the dunes. | * Welcome to the dunes. | ||
* [[Baleful Gaze]] | * [[Baleful Gaze]] [[Petrification|Petrifies]] the target it's looking at. Turn to avoid! | ||
* Lots of camps. | * Lots of camps. | ||
* Level 11 parties take care when pulling level 18-19 | * Level 11 parties take care when pulling level 18-19 Lizards. | ||
|- | |- | ||
|11-14 | |11-14 | ||
| Line 133: | Line 133: | ||
* [[Mighty Rarab]] (15-18) | * [[Mighty Rarab]] (15-18) | ||
| | | | ||
* Try to avoid pulling 7 or more levels above your | * Try to avoid pulling 7 or more levels above your party's level. | ||
* Quick walk from Kolshushu Outpost. | * Quick walk from [[Kolshushu]] [[Outpost Teleportation|Outpost]]. | ||
|- | |- | ||
|12-15 | |12-15 | ||
| Line 144: | Line 144: | ||
*{{Changes|Horizon custom mob}} [[Canyon Wasp]] (15-19) | *{{Changes|Horizon custom mob}} [[Canyon Wasp]] (15-19) | ||
| | | | ||
* Not far from Kolshushu Outpost. | * Not far from [[Kolshushu]] [[Outpost Teleportation|Outpost]]. | ||
|- | |- | ||
|12-15 | |12-15 | ||
| Line 151: | Line 151: | ||
* {{Location Tooltip|area=Tahrongi Canyon|pos=F-6}} | * {{Location Tooltip|area=Tahrongi Canyon|pos=F-6}} | ||
| | | | ||
*{{Changes|Added mobs with higher level range}} [[Killer Bee]] | *{{Changes|Added mobs with higher level range}} [[Killer Bee]] (15-20) | ||
* [[Goblin Tinkerer]] (18-20) | * [[Goblin Tinkerer]] (18-20) | ||
| | | | ||
* Bees seem to use Pollen more often than others. | * Bees seem to use Pollen more often than others. | ||
* [[:Category:Goblins|Goblins]] in area. | * [[:Category:Goblins|Goblins]] in area. | ||
* Not too far from Kolshushu | * Not too far from [[Kolshushu]] [[Outpost Teleportation|Outpost]] or [[Teleport-Mea]]. | ||
|- | |- | ||
|12-15 | |12-15 | ||
| Line 164: | Line 164: | ||
| | | | ||
*{{Changes|Horizon custom mob}} [[Mineral Eater]] (15-19) | *{{Changes|Horizon custom mob}} [[Mineral Eater]] (15-19) | ||
*{{Changes|Horizon custom mob}} [[Yellow Jacket]] | *{{Changes|Horizon custom mob}} [[Yellow Jacket]] (18-20) | ||
| | | | ||
* (F-3) Camp has a [[Goblin Digger]] that can extend chains. | * (F-3) Camp has a [[Goblin Digger]] that can extend chains. | ||
| Line 178: | Line 178: | ||
| | | | ||
* Hares link. | * Hares link. | ||
* 1 | * 1 Orc spawn can also be used to fill chains. | ||
* Hares should not be fought until at least level 13. | * Hares should not be fought until at least level 13. | ||
* Supports 1 party. | * Supports 1 party. | ||
| Line 199: | Line 199: | ||
* [[Snipper]] (18-20) | * [[Snipper]] (18-20) | ||
| | | | ||
* Bats link. | * [[Bats]] link. | ||
* {{Location Tooltip|area=La Theine Plateau|pos=F-7}} [[La Theine Plateau]] entrance. | * {{Location Tooltip|area=La Theine Plateau|pos=F-7}} [[La Theine Plateau]] entrance. | ||
* Not far from Ronfaure | * Not far from [[Ronfaure]] [[Outpost Teleportation|Outpost]]. | ||
|- | |- | ||
|12-15 | |12-15 | ||
| Line 218: | Line 218: | ||
| | | | ||
* [[Maze Maker]] (18-21) | * [[Maze Maker]] (18-21) | ||
* [[Bats]] (15-17) | * [[Stink Bats]] (15-17) | ||
* [[Goblin Tinkerer]] | * [[Goblin Tinkerer]] | ||
* [[Goblin Butcher]] (16-17) | * [[Goblin Butcher]] (16-17) | ||
| Line 240: | Line 240: | ||
* [[Brutal Sheep]] (20-23) | * [[Brutal Sheep]] (20-23) | ||
| | | | ||
* Flies & | * Flies & Snippers are primary targets. | ||
* Can throw in Sheep and Bats at night to keep chains going. | * Can throw in Sheep and Bats at night to keep chains going. | ||
|- | |- | ||
| Line 252: | Line 252: | ||
| | | | ||
* Supports up to 2 parties. | * Supports up to 2 parties. | ||
* Quick walk from Kolshushu Outpost. | * Quick walk from [[Kolshushu]] [[Outpost Teleportation|Outpost]]. | ||
|- | |- | ||
|14-17 | |14-17 | ||
| Line 277: | Line 277: | ||
| | | | ||
* Bats link. | * Bats link. | ||
* Not far from Ronfaure | * Not far from [[Ronfaure]] [[Outpost Teleportation|Outpost]]. | ||
* WHM needed. | * [[WHM]] needed. | ||
* [[Silent Oil|Oils]] and [[Prism Powder|Powders]] needed to reach camp or fight your way there. | * [[Sneak]]/[[Silent Oil|Oils]] and [[Invisible]]/[[Prism Powder|Powders]] needed to reach camp or fight your way there. | ||
|- | |- | ||
|15-17 | |15-17 | ||
| Line 301: | Line 301: | ||
| | | | ||
* 6 spawns, 1 beetle is around the corner, a little SW. | * 6 spawns, 1 beetle is around the corner, a little SW. | ||
* Norvallen | * [[Norvallen]] [[Outpost Teleportation|Outpost Warp]] is level 15+ from [[Jeuno]]. | ||
* Aggressive mobs on the way to camp. | * Aggressive mobs on the way to camp. | ||
* Beetles have defense and evasion boosting TP abilities. | * Beetles have defense and evasion boosting TP abilities. | ||
| Line 314: | Line 314: | ||
* [[Forest Tiger]] (22-24) | * [[Forest Tiger]] (22-24) | ||
| | | | ||
* Not far from Norvallen | * Not far from [[Norvallen]] [[Outpost Teleportation|Outpost]], which is a level 15+ warp from [[Jeuno]]. | ||
* Aggressive mobs on the way to camp. | * Aggressive mobs on the way to camp. | ||
* Tigers have a strong [[Paralyze]] TP attack. | * Tigers have a strong [[Paralyze]] TP attack. | ||
| Line 325: | Line 325: | ||
* [[Goblin Leecher]], [[Goblin Mugger]], [[Goblin Gambler]] (21-23) | * [[Goblin Leecher]], [[Goblin Mugger]], [[Goblin Gambler]] (21-23) | ||
| | | | ||
* Silence for [[Goblin Leecher]] | * Silence for [[Goblin Leecher]] is helpful. | ||
|- | |- | ||
|15-18 | |15-18 | ||
| Line 338: | Line 338: | ||
* [[Carnivorous Crawler]] (20-23) | * [[Carnivorous Crawler]] (20-23) | ||
| | | | ||
* Silence for [[Goblin Leecher]] | * Silence for [[Goblin Leecher]] is helpful. | ||
* Crawlers use [[Sticky Thread]] which slows the targets | * Crawlers use [[Sticky Thread]] which slows the targets in front of them. | ||
|- | |- | ||
|15-18 | |15-18 | ||
| Line 350: | Line 350: | ||
| | | | ||
* Funguars link by sound. | * Funguars link by sound. | ||
* Derfland | * [[Derfland]] [[Outpost Teleportation|Outpost Warp]] is level 15+ from [[Jeuno]]. | ||
|- | |- | ||
|15-18 | |15-18 | ||
| Line 362: | Line 362: | ||
| | | | ||
* 2 Goblins around which may prove too much for a level 15/16 group. | * 2 Goblins around which may prove too much for a level 15/16 group. | ||
* Aragoneu | * [[Aragoneu]] [[Outpost Teleportation|Outpost Warp]] is level 15+ from [[Jeuno]]. | ||
|- | |- | ||
|15-18 | |15-18 | ||
| Line 377: | Line 377: | ||
* Fungur aggro sound and link. | * Fungur aggro sound and link. | ||
* Beetles link sight. | * Beetles link sight. | ||
* Not far from Norvallen | * Not far from [[Norvallen]] [[Outpost Teleportation|Outpost]], which is a level 15+ warp from [[Jeuno]]. | ||
|- | |- | ||
|15-17 | |15-17 | ||
| Line 390: | Line 390: | ||
| | | | ||
* Camp right at the outpost. | * Camp right at the outpost. | ||
* Defland | * [[Defland]] [[Outpost Teleportation|Outpost Warp]] is level 15+ from [[Jeuno]]. | ||
* Crawlers use [[Sticky Thread]] which slows the targets infront of them. | * Crawlers use [[Sticky Thread]] which slows the targets infront of them. | ||
* Flies use [[Cursed Sphere]], an aoe damage TP attack and [[Venom]], a [[Poison]] TP attack. | * Flies use [[Cursed Sphere]], an aoe damage TP attack and [[Venom]], a [[Poison]] TP attack. | ||
| Line 405: | Line 405: | ||
| | | | ||
* [[Water Elemental]] can sometimes spawn in the back. | * [[Water Elemental]] can sometimes spawn in the back. | ||
* Marsh Funguars spawn in the road leading to the area, possibly extending this camp to 19 depending on kill speed | * Marsh Funguars spawn in the road leading to the area, possibly extending this camp to 19 depending on kill speed. | ||
|- | |- | ||
|15-19 | |15-19 | ||
| Line 429: | Line 429: | ||
* [[Brutal Sheep]] (20-23) | * [[Brutal Sheep]] (20-23) | ||
| | | | ||
*[[Silence]] for Goblin Leecher | *[[Silence]] for [[Goblin Leecher]] is helpful. | ||
*Watch out for sight-based links. | *Watch out for sight-based links. | ||
*Supports 1 party. | *Supports 1 party. | ||
| Line 444: | Line 444: | ||
* [[Crane Fly]] (18-21) | * [[Crane Fly]] (18-21) | ||
| | | | ||
*Close to Aragoneu | *Close to [[Aragoneu]] [[Outpost Teleportation|Outpost]]. | ||
* [[Paralyna]] and [[Silena]] recommended. | * [[Paralyna]] and [[Silena]] recommended. | ||
|- | |- | ||
| Line 457: | Line 457: | ||
*Further down, past the Fly Agarics. | *Further down, past the Fly Agarics. | ||
*Beetle's link. | *Beetle's link. | ||
*BLM recommended. | *[[BLM]] recommended. | ||
*[[Silent Oil|Oils]] and [[Prism Powder|powders]] needed to reach camp or fight your way there. | *[[Sneak]]/[[Silent Oil|Oils]] and [[Invisible]]/[[Prism Powder|powders]] needed to reach camp or fight your way there. | ||
|- | |- | ||
|17-19 | |17-19 | ||
| Line 468: | Line 468: | ||
* [[Goblin Leecher]], [[Goblin Gambler]], [[Goblin Mugger]] (22-26) | * [[Goblin Leecher]], [[Goblin Gambler]], [[Goblin Mugger]] (22-26) | ||
| | | | ||
*[[Silent Oil|Oils]] and [[Prism Powder|powders]] needed to reach camp or fight your way there. | *[[Sneak]]/[[Silent Oil|Oils]] and [[Invisible]]/[[Prism Powder|powders]] needed to reach camp or fight your way there. | ||
|- | |- | ||
|17-19 | |17-19 | ||
| Line 478: | Line 478: | ||
* [[Jugner Funguar]] (22-25) | * [[Jugner Funguar]] (22-25) | ||
| | | | ||
*Not far from Norvallen | *Not far from [[Norvallen]] [[Outpost Teleportation|Outpost]]. | ||
*(K-9) camp is reached from the | *(K-9) camp is reached from the South. | ||
*Funguars link by sound | *Funguars link by sound. | ||
|- | |- | ||
|17-20 | |17-20 | ||
| Line 492: | Line 492: | ||
* [[Snipper]] (20-23) | * [[Snipper]] (20-23) | ||
| | | | ||
*[[Silent Oil|Oils]] and [[Prism Powder|Powders]] help to reach Gustav zone. | *[[Sneak]]/[[Silent Oil|Oils]] and [[Invisible]]/[[Prism Powder|Powders]] help to reach Gustav zone. | ||
|- | |- | ||
|17-19 | |17-19 | ||
| Line 521: | Line 521: | ||
* [[Carnivorous Crawler]] (22-25) | * [[Carnivorous Crawler]] (22-25) | ||
| | | | ||
*8 | *8 Crawlers, 10 if you roam into the Eastern tunnel. | ||
*[[Silent Oil|Oils]] and [[Prism Powder|Powders]] recommended to reach camp. | *[[Silent Oil|Oils]] and [[Prism Powder|Powders]] recommended to reach camp. | ||
*Enter from | *Enter from [[Tahrongi Canyon]] {{Location Tooltip|area=Tahrongi Canyon|pos=K-5}}. | ||
|- | |- | ||
|17-20 | |17-20 | ||
| Line 531: | Line 531: | ||
| | | | ||
* [[Poison Leech]] (21-25) | * [[Poison Leech]] (21-25) | ||
* [[Snipper]] | * [[Snipper]] (18-23) | ||
* [[Shoal Pugil]] (24-28) | * [[Shoal Pugil]] (24-28) | ||
| | | | ||
*Watch for Bogy spawns at night. Both beaches have safe places to camp outside of blood aggro range. | *Watch for [[Bogy]] spawns at night. Both beaches have safe places to camp outside of blood aggro range. | ||
*Start on | *Start on Snippers at Level 17. Can start mixing Pugils in at 18. | ||
|- | |- | ||
| Line 541: | Line 541: | ||
|[[Inner Horutoto Ruins]] | |[[Inner Horutoto Ruins]] | ||
| | | | ||
*Map 3 {{Location Tooltip|area=Inner Horutoto Ruins|map= Map 3|pos=H-9}} Rose Tower, | *Map 3 {{Location Tooltip|area=Inner Horutoto Ruins|map= Map 3|pos=H-9}} Rose Tower, [[Three Mage Gate]] | ||
| | | | ||
* [[Boggart]] (23-26) | * [[Boggart]] (23-26) | ||
| Line 578: | Line 578: | ||
| | | | ||
*Circle around lake killing worms and crabs. | *Circle around lake killing worms and crabs. | ||
*At night, | *At night, Banshees spawn at lake so you will need to camp in a tunnel and pull crabs to you. | ||
*Popular exp zone | *Popular exp zone. | ||
|- | |- | ||
|19-21 | |19-21 | ||
| Line 589: | Line 589: | ||
* [[Land Worm]] (25-27) | * [[Land Worm]] (25-27) | ||
* [[Dark Bats]] (25-27) | * [[Dark Bats]] (25-27) | ||
* [[Glow Bat]] | * [[Glow Bat]] (28-29) | ||
| | | | ||
*Potentially supports 2 parties at opposite ends of the cliff. | *Potentially supports 2 parties at opposite ends of the cliff. | ||
*Popular exp zone | *Popular exp zone. | ||
|- | |- | ||
|19-22 | |19-22 | ||
| Line 602: | Line 602: | ||
* {{changes|Horizon custom mob}} [[Dust Lizard]] (26-28) | * {{changes|Horizon custom mob}} [[Dust Lizard]] (26-28) | ||
| | | | ||
*Quick walk from Aragoneu | *Quick walk from [[Aragoneu]] [[Outpost Teleportation|Outpost]]. | ||
*3 camps/supports 3 parties. | *3 camps/supports 3 parties. | ||
|- | |- | ||
| Line 614: | Line 614: | ||
* [[Fosse Pugil]] (22-24) | * [[Fosse Pugil]] (22-24) | ||
| | | | ||
*[[Silent Oil|Oils]] and [[Prism Powder|Powders]] recommended | *[[Sneak]]/[[Silent Oil|Oils]] and [[Invisible]]/[[Prism Powder|Powders]] recommended | ||
|- | |- | ||
|19-22 | |19-22 | ||
| Line 632: | Line 632: | ||
* [[Orcish Cursemaker]], [[Orcish Fighter]], [[Orcish Serjeant]] (21-23) | * [[Orcish Cursemaker]], [[Orcish Fighter]], [[Orcish Serjeant]] (21-23) | ||
| | | | ||
*[[Silent Oil|Oils]] and [[Prism Powder|Powders]] required to reach either Horlais Peak zoneline. | *[[Sneak]]/[[Silent Oil|Oils]] and [[Invisible]]/[[Prism Powder|Powders]] required to reach either [[Horlais Peak]] zoneline. | ||
|- | |- | ||
| Line 660: | Line 660: | ||
| | | | ||
*[[Acid bolt]]s recommended. | *[[Acid bolt]]s recommended. | ||
*Quadav and | *[[Quadav]] and [[Ochu]] aggro sound. | ||
*Can fill in with | *Can fill in with [[Bats]] at night. | ||
|- | |- | ||
|20-23 | |20-23 | ||
| Line 672: | Line 672: | ||
* [[Goliath Beetle]] (29-31) | * [[Goliath Beetle]] (29-31) | ||
| | | | ||
* | *Clippers link by sound. | ||
*Take care of bomb. | *Take care of bomb. | ||
*Use | *Use Eastern La Theine zone. | ||
*[[Sneak]] required to reach camp. | *[[Sneak]]/[[Silent Oil|Oil]] required to reach camp. | ||
*Supports 1 party. | *Supports 1 party. | ||
|- | |- | ||
| Line 681: | Line 681: | ||
|[[The Sanctuary of Zi'Tah]] | |[[The Sanctuary of Zi'Tah]] | ||
| | | | ||
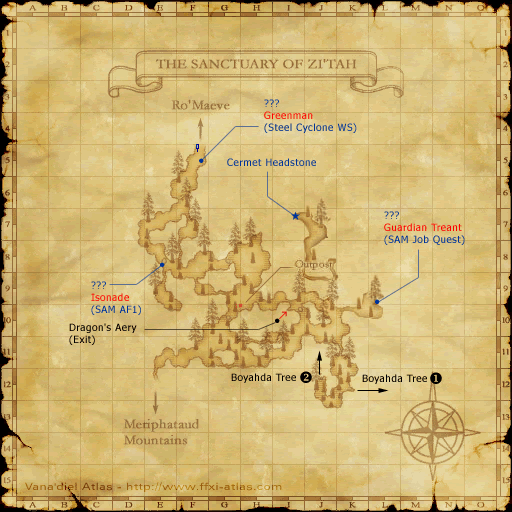
*Zone to Meriphataud, ({{Location Tooltip|area=The Sanctuary of Zi'Tah|pos=G-10}}) | *Zone to [[Meriphataud Mountains|Meriphataud]], ({{Location Tooltip|area=The Sanctuary of Zi'Tah|pos=G-10}}) | ||
| | | | ||
* [[Goblin Mugger]], [[Goblin Gambler]] (26-29) | * [[Goblin Mugger]], [[Goblin Gambler]] (26-29) | ||
* [[Ancient Bat]] | * [[Ancient Bat]] (26-28) | ||
| | | | ||
*Camp only supports 1 party, however, the | *Camp only supports 1 party, however, the Southwest part of the zone is littered with [[:Category:Goblins|Goblins]] and [[Bats]]. | ||
*Highly recommended to bring a BRD to | *Highly recommended to bring a [[BRD]] to [[Sleep]] [[Bats]] pops ([[Bats]] will not resist [[Sheep Song]]/[[Lullaby]]). | ||
*Beware of [[Rock Golem]] (magic sensitive and will destroy your party). | *Beware of [[Rock Golem]] (magic sensitive and will destroy your party). | ||
|- | |- | ||
| Line 699: | Line 699: | ||
* [[Seeker Bats]] (25-28) | * [[Seeker Bats]] (25-28) | ||
| | | | ||
*Strongly recommended to bring someone to neutralize the [[Ooze]] located in between the [[:Category:Goblins|Goblins]] pops. | *Strongly recommended to bring someone to neutralize the [[Ooze]] located in-between the [[:Category:Goblins|Goblins]] pops. | ||
*[[Sneak]] required to reach H-10 camp. | *[[Sneak]] required to reach H-10 camp. | ||
|- | |- | ||
| Line 713: | Line 713: | ||
*Shriekers ([[Sneak]]) aggro/Beetles link by sight. | *Shriekers ([[Sneak]]) aggro/Beetles link by sight. | ||
*2 parties. | *2 parties. | ||
*Quick walk from Norvallen | *Quick walk from [[Norvallen]] [[Outpost Teleportation|Outpost]]. | ||
*Sneak & Invisible recommended. | *Sneak & Invisible recommended. | ||
*[[Silena]] or [[Echo Drop]]s recommended. | *[[Silena]] or [[Echo Drop]]s recommended. | ||
| Line 720: | Line 720: | ||
|[[Lower Delkfutt's Tower]] | |[[Lower Delkfutt's Tower]] | ||
|'''Qufim Zone (H-10), Stairs Between 1F/2F, North (F-7) and West (F-10), (K-7) ''' | |'''Qufim Zone (H-10), Stairs Between 1F/2F, North (F-7) and West (F-10), (K-7) ''' | ||
| | |||
* [[ | * [[Giant Gatekeeper]], [[Giant Guard]], [[Giant Lobber]], [[Giant Sentry]] (28-30) | ||
* [[Goblin Leecher]], [[Goblin Mugger]], [[Goblin Gambler]] (27-30) | * [[Goblin Leecher]], [[Goblin Mugger]], [[Goblin Gambler]] (27-30) | ||
* [[Ancient Bat]]s (27-29) | * [[Ancient Bat]]s (27-29) | ||
* [[Seeker Bats]] (25-27) | * [[Seeker Bats]] (25-27) | ||
|[[ | |[[Giant Lobber]]s hurt. Pull with caution. | ||
|- | |- | ||
| 22-26 | | 22-26 | ||
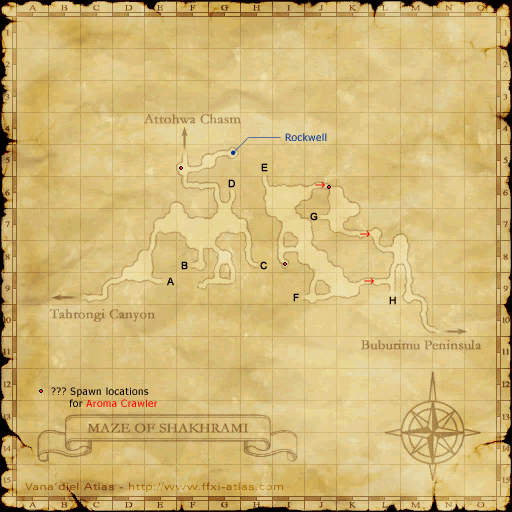
|| [[Maze of Shakhrami]] | || [[Maze of Shakhrami]] | ||
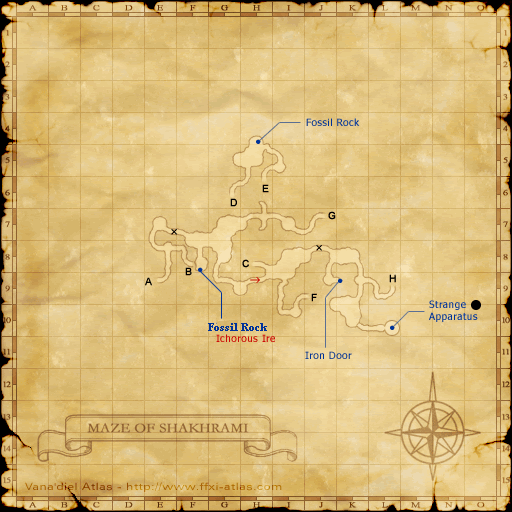
|| '''({{Location Tooltip|area=Maze of Shakhrami|pos=L-8}})''' | || '''({{Location Tooltip|area=Maze of Shakhrami|pos=L-8}})''' | ||
| | |||
* [[Ancient Bat]]s (26-29) | * [[Ancient Bat]]s (26-29) | ||
* [[Caterchipillar]] (30-31) | * [[Caterchipillar]] (30-31) | ||
* [[Goblins Smithy]], [[Goblin Shaman]], [[Goblin Pathfinder]] (31-34) | * [[Goblins Smithy]], [[Goblin Shaman]], [[Goblin Pathfinder]] (31-34) | ||
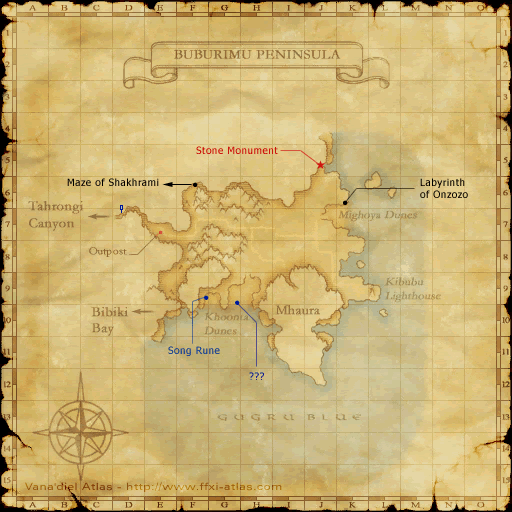
|| Buburimu Side/ | || Buburimu Side/[[Outpost Teleportation|Outpost]]. Enter at ({{Location Tooltip|area=Buburimu Peninsula|pos=F-6}}). Lower level parties focus on [[Bats]] and [[Caterchipillar|Crawlers]]. | ||
|- | |- | ||
|22-24 | |22-24 | ||
|[[Qufim Island]] | |[[Qufim Island]] | ||
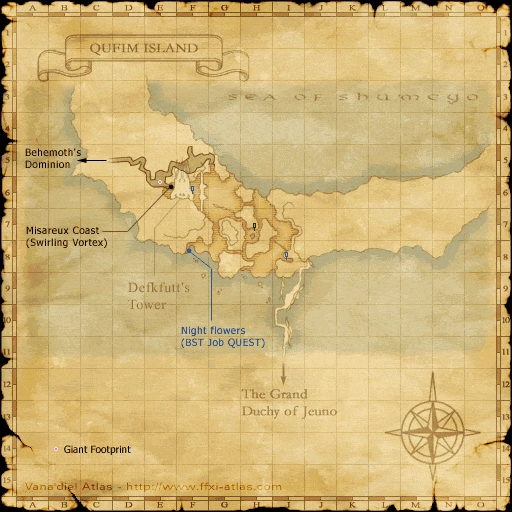
|'''({{Location Tooltip|area=Qufim Island|pos=H-6}}), ({{Location Tooltip|area=Qufim Island|pos=G-6}}), ({{Location Tooltip|area=Qufim Island|pos=H-8}})/({{Location Tooltip|area=Qufim Island|pos=H-9}}), ({{Location Tooltip|area=Qufim Island|pos=F-8}})''' | |'''({{Location Tooltip|area=Qufim Island|pos=H-6}}), ({{Location Tooltip|area=Qufim Island|pos=G-6}}), ({{Location Tooltip|area=Qufim Island|pos=H-8}})/({{Location Tooltip|area=Qufim Island|pos=H-9}}), ({{Location Tooltip|area=Qufim Island|pos=F-8}})''' | ||
| | |||
* [[Greater Pugil]] (28-30) | * [[Greater Pugil]] (28-30) | ||
* [[:Category:Gigas|Gigas]] (28-30) | * [[:Category:Gigas|Gigas]] (28-30) | ||
| Line 747: | Line 749: | ||
|[[Meriphataud Mountains]] {{Changes }} | |[[Meriphataud Mountains]] {{Changes }} | ||
|'''({{Location Tooltip|area=Meriphataud Mountains|pos=D-10}}), ({{Location Tooltip|area=Meriphataud Mountains|pos=G-10}})''' | |'''({{Location Tooltip|area=Meriphataud Mountains|pos=D-10}}), ({{Location Tooltip|area=Meriphataud Mountains|pos=G-10}})''' | ||
| | |||
* [[Puma]] {{Changes }} (29-33) | * [[Puma]] {{Changes }} (29-33) | ||
* [[Drooling Hound]] {{Changes }} (31-35) | * [[Drooling Hound]] {{Changes }} (31-35) | ||
| Line 760: | Line 763: | ||
|[[Sauromugue Champaign]] | |[[Sauromugue Champaign]] | ||
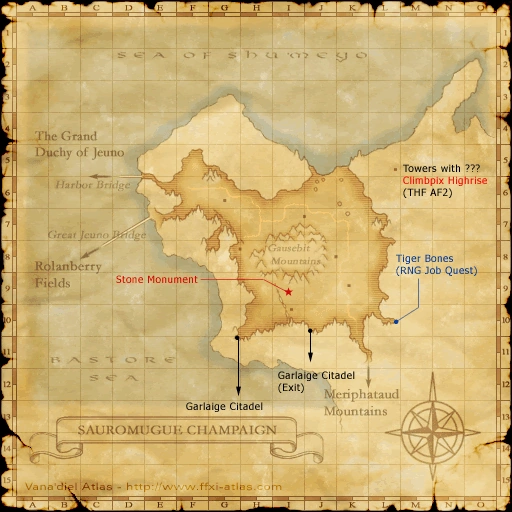
|'''(J-9)''' | |'''(J-9)''' | ||
| | |||
* [[Goblin Mugger]], [[Goblin Leecher]], [[Goblin Pathfinder]], [[Goblin Smithy]], [[Goblin Furrier]] (28-33) | * [[Goblin Mugger]], [[Goblin Leecher]], [[Goblin Pathfinder]], [[Goblin Smithy]], [[Goblin Furrier]] (28-33) | ||
* [[Champaign Coeurl]] (32) | * [[Champaign Coeurl]] (32) | ||
| Line 769: | Line 772: | ||
|[[Ranguemont Pass]] | |[[Ranguemont Pass]] | ||
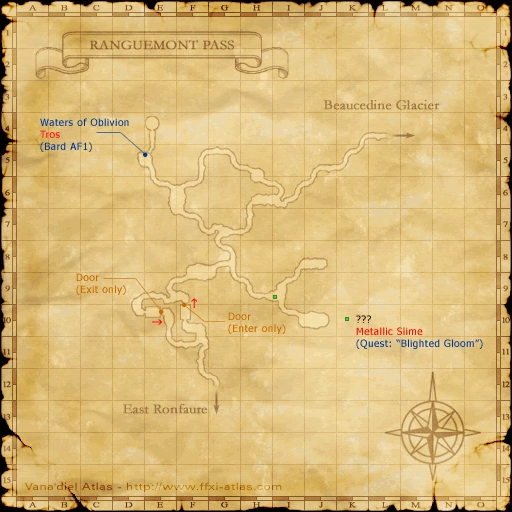
|'''(J-5), (I-8)''' | |'''(J-5), (I-8)''' | ||
| | |||
* [[Stirge]] (30-33) | * [[Stirge]] (30-33) | ||
* [[Hecteyes]] (31-33) | * [[Hecteyes]] (31-33) | ||
| Line 776: | Line 780: | ||
|[[Sauromugue Champaign]] | |[[Sauromugue Champaign]] | ||
|'''(I-7)''' | |'''(I-7)''' | ||
| | |||
* [[Sauromugue Skink]] (28-32) | * [[Sauromugue Skink]] (28-32) | ||
* [[Diving Beetle]] (30-32) | * [[Diving Beetle]] (30-32) | ||
| Line 784: | Line 789: | ||
|[[Carpenters' Landing]] | |[[Carpenters' Landing]] | ||
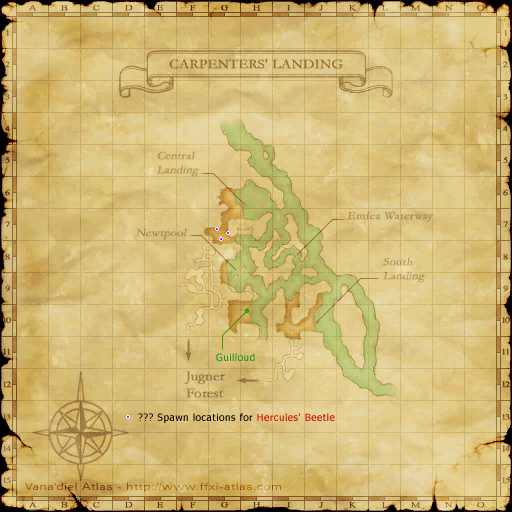
|'''Camp by the Logs near Dock(J-10)''' | |'''Camp by the Logs near Dock(J-10)''' | ||
| | |||
* [[Spinous Pugil]] (29-31) | * [[Spinous Pugil]] (29-31) | ||
* [[Sabretooth Tiger]] (29-32) | * [[Sabretooth Tiger]] (29-32) | ||
| Line 795: | Line 800: | ||
|[[Yuhtunga Jungle]] '''([[Kazham Airship Pass]] required)''' | |[[Yuhtunga Jungle]] '''([[Kazham Airship Pass]] required)''' | ||
|'''(G-6),(G-7),(H-6)''' | |'''(G-6),(G-7),(H-6)''' | ||
| | |||
* [[Yuhtunga Mandragora]] (30-33) | * [[Yuhtunga Mandragora]] (30-33) | ||
|Beware patrolling [[Goblin Smithy]] | |Beware patrolling [[Goblin Smithy]] | ||
| Line 808: | Line 814: | ||
|[[Sauromugue Champaign]] | |[[Sauromugue Champaign]] | ||
| '''(H-7)''' | | '''(H-7)''' | ||
| | |||
* [[Yagudo Priest]], [[Yagudo Votary]], [[Yagudo Theologist]], [[Yagudo Oracle]] (26-36) | * [[Yagudo Priest]], [[Yagudo Votary]], [[Yagudo Theologist]], [[Yagudo Oracle]] (26-36) | ||
* [[Sauromuge Skink]] (28-32) | * [[Sauromuge Skink]] (28-32) | ||
| Line 816: | Line 823: | ||
|[[Ranguemont Pass]] {{Changes }} | |[[Ranguemont Pass]] {{Changes }} | ||
|'''(E-6)/(F-6)''' | |'''(E-6)/(F-6)''' | ||
| | |||
* [[Stirge]] (30-33) | * [[Stirge]] (30-33) | ||
* [[Goblin Smithy]], [[Goblin Pathfinder]] {{Changes }} (32-36) | * [[Goblin Smithy]], [[Goblin Pathfinder]] {{Changes }} (32-36) | ||
| Line 823: | Line 831: | ||
|[[Yuhtunga Jungle]] '''([[Kazham Airship Pass]] required)''' | |[[Yuhtunga Jungle]] '''([[Kazham Airship Pass]] required)''' | ||
|'''(J-7),(K-7)''' | |'''(J-7),(K-7)''' | ||
| | |||
* [[Ivory Lizard]] (32-35) | * [[Ivory Lizard]] (32-35) | ||
* [[Jungle Coeurl]] (35-38) | * [[Jungle Coeurl]] (35-38) | ||
| Line 832: | Line 841: | ||
|[[Bibiki Bay]] | |[[Bibiki Bay]] | ||
|'''(H-7) Docks''' | |'''(H-7) Docks''' | ||
| | |||
* [[Eft]] (33-36), | * [[Eft]] (33-36), | ||
* [[Raven]] (36-38) | * [[Raven]] (36-38) | ||
| Line 841: | Line 851: | ||
|[[Yuhtunga Jungle]] '''([[Kazham Airship Pass]] required)''' | |[[Yuhtunga Jungle]] '''([[Kazham Airship Pass]] required)''' | ||
|'''(I-7)''' | |'''(I-7)''' | ||
| | |||
* [[Death Jacket]] (33-37) | * [[Death Jacket]] (33-37) | ||
|'''BEE LOG'''. Camp inside the tunnel. | |'''BEE LOG'''. Camp inside the tunnel. | ||
| Line 847: | Line 858: | ||
|| [[Attohwa Chasm]] | || [[Attohwa Chasm]] | ||
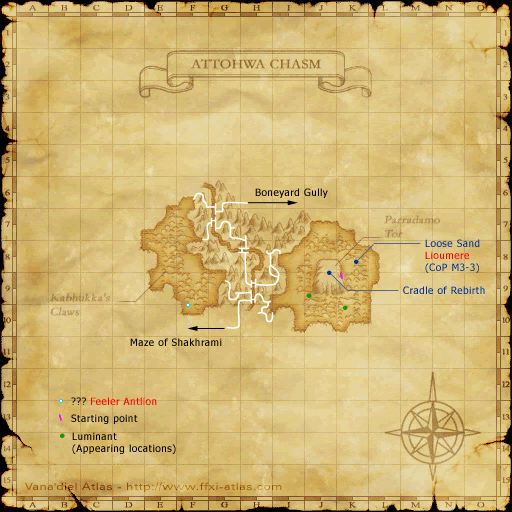
||'''(H-9)''' | ||'''(H-9)''' | ||
| | |||
* [[Flesh Eater]] (35-37) | * [[Flesh Eater]] (35-37) | ||
* [[Hecteyes]] (35-38) | * [[Hecteyes]] (35-38) | ||
| Line 854: | Line 866: | ||
|| [[Oldton Movalpolos]] | || [[Oldton Movalpolos]] | ||
|| '''(F-8), (G-9), (H-10), (G-13)''' | || '''(F-8), (G-9), (H-10), (G-13)''' | ||
| | |||
* Tier 1 [[Goblin Craftsman]], [[Goblin Hammerman]], [[Goblin Leadman]], [[Goblin Gutterman]] (33-36) | * Tier 1 [[Goblin Craftsman]], [[Goblin Hammerman]], [[Goblin Leadman]], [[Goblin Gutterman]] (33-36) | ||
* Tier 1 [[:Moblin Ragman]], [[Moblin Chapman]], [[Moblin Witchman]], [[Moblin Pickman]] (33-36) | * Tier 1 [[:Moblin Ragman]], [[Moblin Chapman]], [[Moblin Witchman]], [[Moblin Pickman]] (33-36) | ||
| Line 863: | Line 876: | ||
|[[Yuhtunga Jungle]] '''([[Kazham Airship Pass]] required)''' | |[[Yuhtunga Jungle]] '''([[Kazham Airship Pass]] required)''' | ||
|'''(G-11) - Outpost''' | |'''(G-11) - Outpost''' | ||
| | |||
* [[Young Opo-Opo]] (34-36) | * [[Young Opo-Opo]] (34-36) | ||
* [[:Category:Goblins|Goblins]] (32-37) | * [[:Category:Goblins|Goblins]] (32-37) | ||
| Line 871: | Line 884: | ||
|[[Sauromugue Champaign]] | |[[Sauromugue Champaign]] | ||
|'''(L-9)''' | |'''(L-9)''' | ||
| | |||
*[[Champaign Coeurl]] (35-37) | *[[Champaign Coeurl]] (35-37) | ||
*[[Diving Beetle]] (35-37) | *[[Diving Beetle]] (35-37) | ||
| Line 880: | Line 894: | ||
|[[Yhoator Jungle]] '''([[Kazham Airship Pass]] required)''' | |[[Yhoator Jungle]] '''([[Kazham Airship Pass]] required)''' | ||
|'''(F-7), (F-8)''' | |'''(F-7), (F-8)''' | ||
| | |||
* [[Yhoator Mandragora]] (35-37) | * [[Yhoator Mandragora]] (35-37) | ||
| | | | ||
| Line 888: | Line 902: | ||
|[[Yuhtunga Jungle]] '''([[Kazham Airship Pass]] required)''' | |[[Yuhtunga Jungle]] '''([[Kazham Airship Pass]] required)''' | ||
|'''(F-11/G-11)''' | |'''(F-11/G-11)''' | ||
| | |||
* [[;Category:Sahagin|Sahagin]] (34-38), | * [[;Category:Sahagin|Sahagin]] (34-38), | ||
* [[Makara]] (35-38) | * [[Makara]] (35-38) | ||
| Line 896: | Line 910: | ||
|[[Sauromugue Champaign]] | |[[Sauromugue Champaign]] | ||
|'''(G-7)''' | |'''(G-7)''' | ||
| | |||
* [[Evil Weapon]]s (34-38) {{changes|adjusted level range 34-38 instead of 36-38}} | * [[Evil Weapon]]s (34-38) {{changes|adjusted level range 34-38 instead of 36-38}} | ||
|The weapons on Horizon here spawn as low as 34 (retail was 36). Supports 1 party. | |The weapons on Horizon here spawn as low as 34 (retail was 36). Supports 1 party. | ||
| Line 904: | Line 918: | ||
|[[Batallia Downs]] | |[[Batallia Downs]] | ||
|'''(J-10)''' | |'''(J-10)''' | ||
| | |||
* [[Evil Weapon]] (36-38) | * [[Evil Weapon]] (36-38) | ||
* [[Goblin Shaman]], [[Goblin Pathfinder]], [[Goblin Furrier]] (31-36) | * [[Goblin Shaman]], [[Goblin Pathfinder]], [[Goblin Furrier]] (31-36) | ||
| Line 913: | Line 927: | ||
|[[Rolanberry Fields]] | |[[Rolanberry Fields]] | ||
|'''(K-7)''' | |'''(K-7)''' | ||
| | |||
* [[Evil Weapon]] (36-38) | * [[Evil Weapon]] (36-38) | ||
|Only 4 spawns. If you sit at the end of the spine, you can pull weapons from both sides | |Only 4 spawns. If you sit at the end of the spine, you can pull weapons from both sides | ||
| Line 920: | Line 934: | ||
|[[Bibiki Bay]] | |[[Bibiki Bay]] | ||
|'''(H-6),(H-7),(I-6),(I-7)''' | |'''(H-6),(H-7),(I-6),(I-7)''' | ||
| | |||
* [[Eft]] (33-36), | * [[Eft]] (33-36), | ||
* [[Island Rarab]] (34-38), | * [[Island Rarab]] (34-38), | ||
Revision as of 05:13, 25 February 2025
New Horizon specific camps are marked with  .
.
Notes:
- These camps are all aimed at standard 6 member parties.
- Consider targeting lower level mobs (no higher than 8 levels above your party) with a non-standard party setup.
- If your party has a strong line-up, eats food, and is coordinated with Skillchains/Magic Bursts, you can target a higher level camp.
- Monsters on Horizon may have levels that differ from that of retail, be wary when using exp camp guides outside of this wiki as they may not be the same level.
- Starting at level 50 adventures will gain an experience point bonus by simply having the Signet buff, up to a total of 10%, in conquest (Vanilla/RoZ/CoP) areas
 .
. - Starting at level 50, adventurers will gain a 5% experience point bonus for defeating foes in conquest regions that their nation does not control while having Signet
 . Consider camping in regions that your nation doesn't control for maximum experience point gains!
Camps - Verify if viable
| Level | Zone | Camp | Mob(s) | Notes |
|---|---|---|---|---|
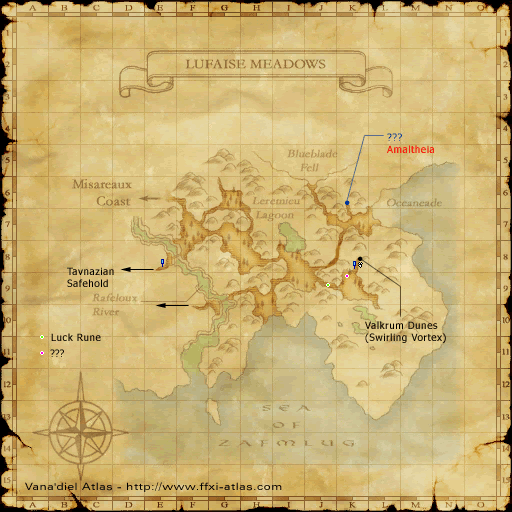
| 28-32 | Lufaise Meadows |
|
| |
| 29-33 | Beaucedine Glacier |
|
|
|
| 29-33 | Castle Oztroja |
|
|
|
| 41-44 | Attohwa Chasm |
Level 10-20
| Level | Zone | Camp | Mob(s) | Notes |
|---|---|---|---|---|
| 10-15 | Inner Horutoto Ruins |
|
|
|
| 11-15 | Carpenters' Landing via Northern San d'Oria Wooden Shutter entrance |
|
| |
| 11-14 | Valkurm Dunes |
|
| |
| 11-14 | Buburimu Peninsula |
|
||
| 12-15 | Tahrongi Canyon |
|
||
| 12-15 | Tahrongi Canyon |
|
| |
| 12-15 | Konschtat Highlands |
|
| |
| 12-15 | La Theine Plateau |
|
| |
| 12-15 | La Theine Plateau |
|
|
|
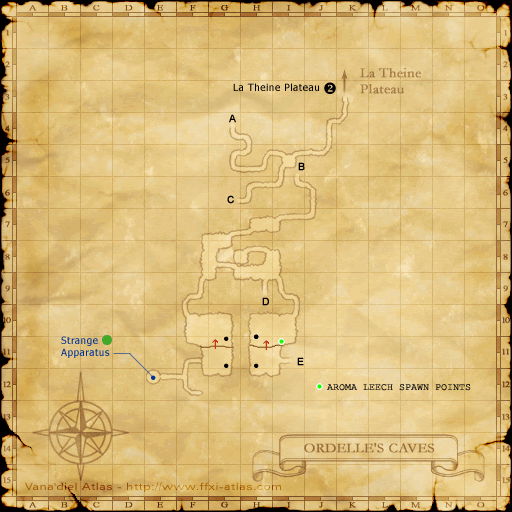
| 12-15 | Ordelle's Caves |
|
|
|
| 12-15 | Ordelle's Caves |
|
| |
| 13-15 | Maze of Shakhrami |
|
||
| 14-16 | Valkurm Dunes |
|
| |
| 14-16 | Buburimu Peninsula |
|
||
| 14-17 | Inner Horutoto Ruins |
|
|
|
| 14-17 | Ordelle's Caves |
|
||
| 15-17 | Valkurm Dunes |
|
| |
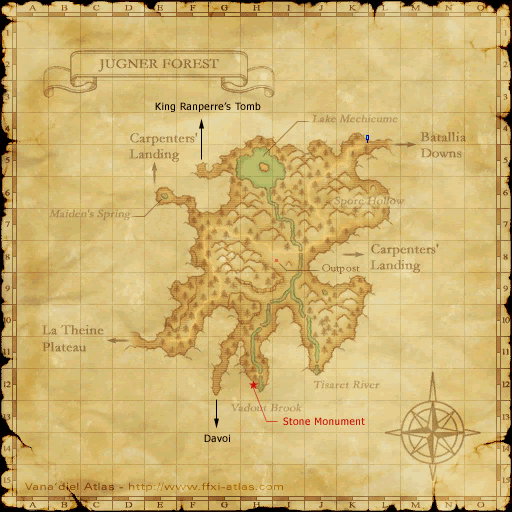
| 15-17 | Jugner Forest |
|
| |
| 15-17 | Jugner Forest |
|
||
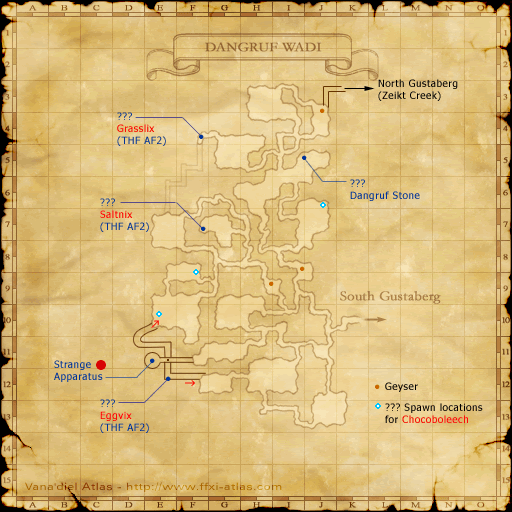
| 15-18 | Dangruf Wadi |
|
| |
| 15-18 | Buburimu Peninsula |
|
| |
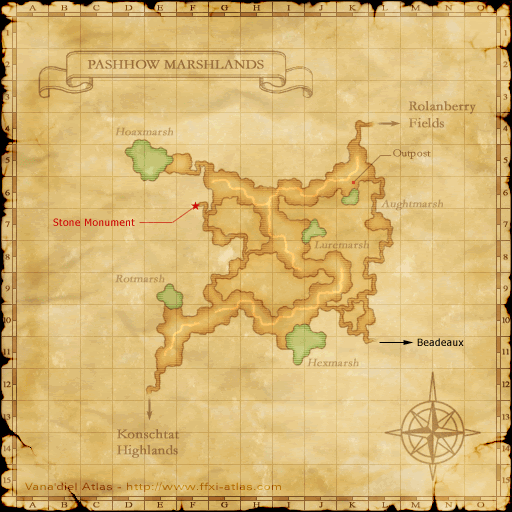
| 15-18 | Pashhow Marshlands |
|
| |
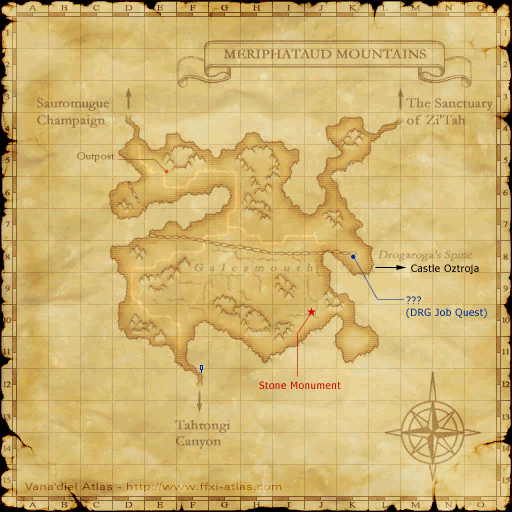
| 15-18 | Meriphataud Mountains |
|
| |
| 15-18 | Carpenters' Landing |
|
||
| 15-17 | Pashhow Marshlands |
|
| |
| 15-18 | Pashhow Marshlands |
|
| |
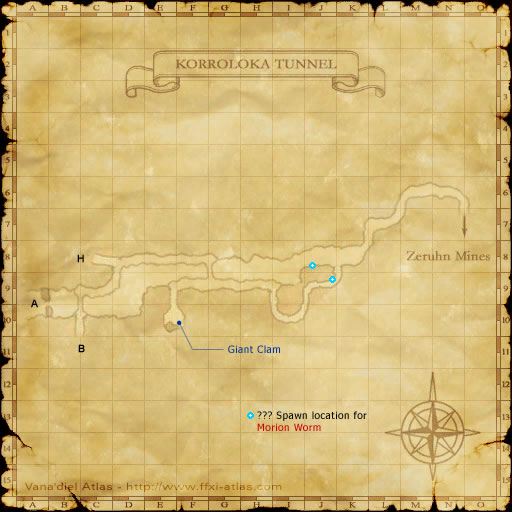
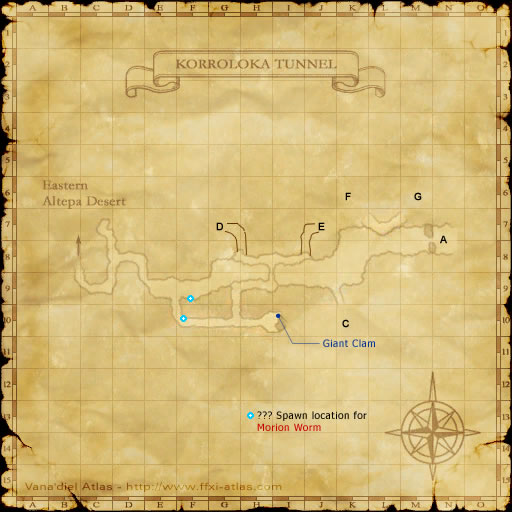
| 15-19 | Korroloka Tunnel |
|
| |
| 16-18 | Valkurm Dunes |
|
|
|
| 16-18 | Meriphataud Mountains |
|
|
|
| 17-19 | Ordelle's Caves |
|
|
|
| 17-19 | Ordelle's Caves |
|
|
|
| 17-19 | Jugner Forest |
|
||
| 17-20 | Valkurm Dunes |
|
||
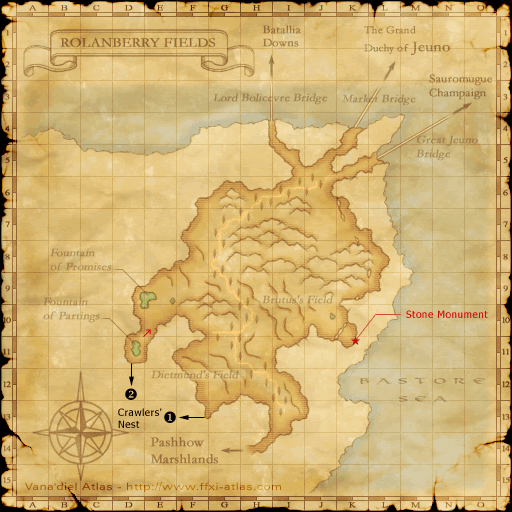
| 17-19 | Rolanberry Fields |
|
||
| 17-19 | Buburimu Peninsula |
|
||
| 17-20 | Maze of Shakhrami |
|
|
|
| 17-20 | Buburimu Peninsula |
|
| |
| 18-20 | Inner Horutoto Ruins |
|
|
|
| 18-21 | Castle Oztroja |
|
|
|
| 18-21 | Beadeaux |
|
|
|
| 19-21 | Qufim Island |
| ||
| 19-21 | Qufim Island |
| ||
| 19-22 | Meriphataud Mountains |
|
||
| 19-22 | Carpenters' Landing |
|
|
|
| 19-22 | Davoi |
|
|
|
| 19-22 | Yughott Grotto |
|
|
|
Level 20-30
| Level | Zone | Camp | Mob(s) | Notes |
|---|---|---|---|---|
| 20-22 | Rolanberry Fields |
|
| |
| 20-23 | Ordelle's Caves |
|
|
|
| 21-23 | The Sanctuary of Zi'Tah |
|
|
|
| 21-24 | Ranguemont Pass |
|
|
|
| 22-24 | Carpenters' Landing |
|
|
|
| 22-24 | Lower Delkfutt's Tower | Qufim Zone (H-10), Stairs Between 1F/2F, North (F-7) and West (F-10), (K-7) |
|
Giant Lobbers hurt. Pull with caution. |
| 22-26 | Maze of Shakhrami | (L-8) |
|
Buburimu Side/Outpost. Enter at (F-6). Lower level parties focus on Bats and Crawlers. |
| 22-24 | Qufim Island | (H-6), (G-6), (H-8)/(H-9), (F-8) |
|
Supports 3 parties. Popular exp zone consider /searching the zone and choosing another area to exp in if there are many parties in zone. Take care with thunder elemental spawn at (F-8) during thunder weather. |
| 23-27 | Meriphataud Mountains 
|
(D-10), (G-10) |
|
Can be done at level 23 if going slow between pulls, at level 25 Drooling Hounds can enter rotation. EXP tapers during level 26 but can still produce 8-10k exp/hr without rings because kills go quickly. Easy chain 5's with a solid party.
|
| 24-26 | Sauromugue Champaign | (J-9) |
|
Bonfire camp. Next to flying beetles. Could possibly support 2 parties. |
| 24-26 | Ranguemont Pass | (J-5), (I-8) | Silence highly recommended. Sneak/invis needed to reach camp. (J-5) has about 8 bat spawns along the tunnel. May need to roam a bit. ~12 minute walk from Ronfaure OP | |
| 24-27 | Sauromugue Champaign | (I-7) |
|
Camp at fallen pillar/crumbling wall or outside of fort. Mob density a bit scarce. Yagudo have a high level range. |
| 24-27 | Carpenters' Landing | Camp by the Logs near Dock(J-10) |
|
Use SE Jugner Forest zone, (J-8). Traps AoE Sleep, Single-Target paralyze, Tigers AoE paralyze. WHM recommended. Be mindful of big Tiger crits. Tigers aggro/link by sight, traps don't aggro or link. Pugils aggro by sound. Sneak needed to reach camp. |
| 25-27 | Yuhtunga Jungle (Kazham Airship Pass required) | (G-6),(G-7),(H-6) |
|
Beware patrolling Goblin Smithy |
| 25-27 | Sauromugue Champaign | (F-8), (G-8)
|
Supports maybe 2 parties. BLM and WHM recommended. | |
| 25-27 | Sauromugue Champaign | (H-7) |
|
Camp on hill by bonfire Yagudo camp. Beware of links. Bring a smn, rdm, blm, or brd for crowd control. Yagudo have high level range. |
| 26-28 | Ranguemont Pass 
|
(E-6)/(F-6) |
|
4 Gob spawns (Era+) with 3-4 Bat spawns in the same open area and connecting caves. May be able to extend camp to 28 depending on kill speed. Will need sneak/invis to reach camp. ~11.5 minute walk from Ronfaure OP |
| 26-30 | Yuhtunga Jungle (Kazham Airship Pass required) | (J-7),(K-7) |
|
Need Silena and Paralyna. Start with lizards at level 26. Mix in coeurls at level 28+.
Take chocobo from Kazham to H-6 and drop down. Then after emerging from the tunnel after the drop, go down ramp when you see the Overgrown Rose (Marbolo), into another tunnel. Camp at the edge of the cliff overlooking the Volcano. |
| 27-31 | Bibiki Bay | (H-7) Docks | Start on Efts. Efts link by the way. Move to ravens around level 29. Ravens link too. Bring the sleeps and the lullabys. | |
| 27-31 | Yuhtunga Jungle (Kazham Airship Pass required) | (I-7) |
|
BEE LOG. Camp inside the tunnel. |
| 27-30 | Attohwa Chasm | (H-9) |
|
Mages must /whm. Huge level Difference of Flesh Eaters in the zone. Silence recommended. |
| 27-29 | Oldton Movalpolos | (F-8), (G-9), (H-10), (G-13) |
|
Not too bad of a walk from Dem. Invisible required to reach camps. Escape or Warp is recommended. Mages must /whm. Earth Elemental danger at E-4 camp. Silence highly recommended. Drops gil and craft materials. |
| 27-30 | Yuhtunga Jungle (Kazham Airship Pass required) | (G-11) - Outpost |
|
Beware of holes when pulling. WHM recommended for Curaga and Barfira. |
| 28-30 | Sauromugue Champaign | (L-9) |
|
1 party. Have Paralyna and Silena ready. BLM recommended. |
| 28-30 | Yhoator Jungle (Kazham Airship Pass required) | (F-7), (F-8) |
|
|
| 29-31 | Yuhtunga Jungle (Kazham Airship Pass required) | (F-11/G-11) | Close to the zone for Sea Serpent Grotto | |
| 29-31 | Sauromugue Champaign | (G-7) |
|
The weapons on Horizon here spawn as low as 34 (retail was 36). Supports 1 party. |
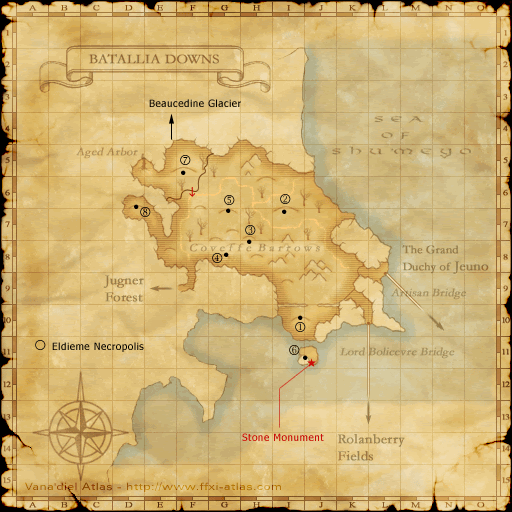
| 29-31 | Batallia Downs | (J-10) |
|
1 party. Only 5 spawns. Pull Goblins by the coast to fill in. Not a bad alternate camp if Sauromugue is taken and party members don't have OPs, kaz pass, or crystals. |
| 29-31 | Rolanberry Fields | (K-7) |
|
Only 4 spawns. If you sit at the end of the spine, you can pull weapons from both sides |
| 29-31 | Bibiki Bay | (H-6),(H-7),(I-6),(I-7) |
|
Dhalmels can silence, the area supports 3 parties |
Level 30-40
| Level | Zone | Camp/Mob(s) | Notes |
|---|---|---|---|
| 30-32 | Bibiki Bay - Purgonorgo Isle | (Everywhere)
|
Take the Manaclipper (need Manaclipper Ticket or Manaclipper multi-ticket: 80gil for 1 ride, 500gil for 10, sold on pier), have Reraise or hope for a WHM fisher if NM is up. Once on the island you may find a Clot in your camp, kill it, there are more spawns than Clots and you can push them off your camp. Don't touch the Urganite. No Sneak or Invisible needed if you can avoid clots and bombs (both very rare). Island can support probably 8 parties. |
| 30-34 | Attohwa Chasm | (I-9)/(I-10)
|
Sneak required, and cross the first bridge. Camp against the wall. Beware of doom scorpions. |
| 30-33 | Sea Serpent Grotto (Kazham Airship Pass Req) | (J-10), hallway, First Map
|
Need Sneak/Silent Oil to reach. Supports 1 party. Camp in hallway in front of the ornamental door. Sahagin link. Beware bats that pop in back of the hallway (don't aggro but will link with other bats). |
| 31-33 | Eastern Altepa Desert (Altepa Gate Crystal req) |
|
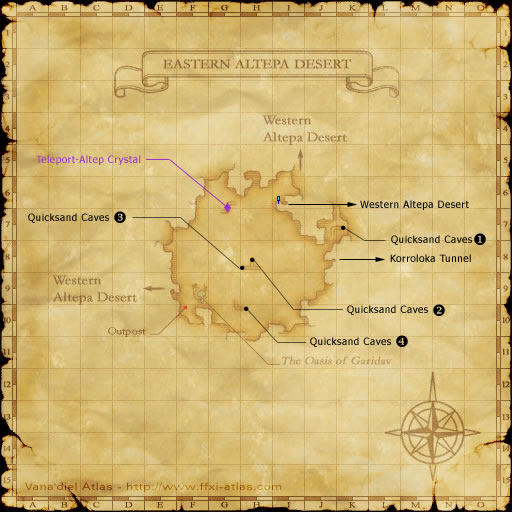
Supports 3 parties, 1 at each location. Watch out for Goblins(Invisible), Scorpions (Sneak), and Anticans(Sneak) aggro when traveling to camp. |
| 31-33 | Yuhtunga Jungle (Kazham Airship Pass Req) | (E-9)
|
Will need Sneak and Invisible if walking from Lower Elshimo OP. Beware wandering goblins. |
| 32-34 | Yhoator Jungle (Kazham Airship Pass Req) | (G-7),(H-8)
|
Camp on top of bridge or in top tunnel (G-7). Watch out for links and Goblins aggro. Can also kill Goblins. Supports 1 party at (G-7). 2 parties at (H-8), camp up top, either side. |
| 34-36 | Eldieme Necropolis | Enter at (G-8) Batallia Downs
|
|
| 34-37 | Garlaige Citadel | Entrance, in front of Banishing Gate 1, (I-8)/(I-7)
|
Beetles sight aggro, bats link, beetles will be difficult at 34. Sufficient mobs for at least 3 parties. BLM or Dispel recommended for beetles. |
| 35-38 | The Sanctuary of Zi'Tah | (H-10) Outpost, (I-9), (J-9) Hidden path, (F-8)
|
Barfira recommended if fighting at OP,(F-8)/gobs. Silena recommended at (J-9) camp/Goobbues. Supports many parties. Level 36+ parties recommended at OP and (F-8) camp for Goblins. |
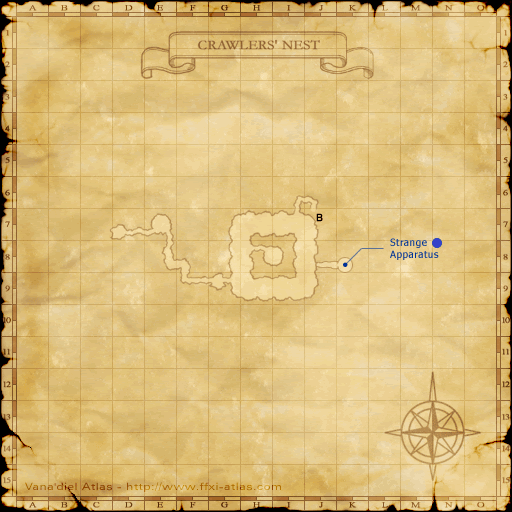
| 35-38 | Crawlers' Nest | (K-8) (I-9) Map 1
|
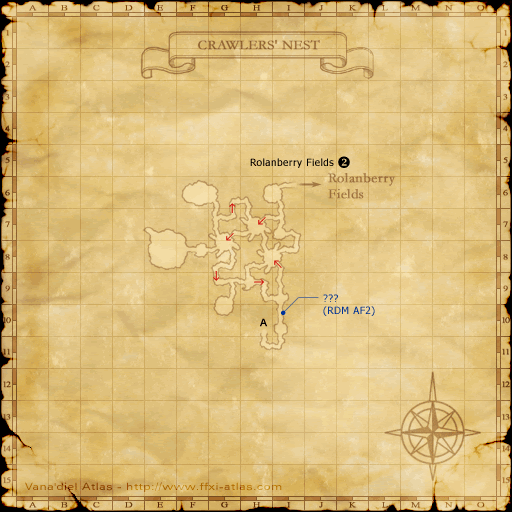
Many total spawns, easily supports 2+ parties. BLM or Dispel recommended for Crawlers. |
| 35-38 | Western Altepa Desert (Altepa Gate Crystal req) | (M-8) - Korroloka Zone, (L-6) - near Rabao Zone
|
|
| 35-38 | Oldton Movalpolos | (I-8), (J-10). (K-10) | Not too bad of a walk from Dem. Invisible required to reach camps. Escape or Warp is recommended. Beware Moblin Gourneyman and Goblin Freelance as they are a much higher level (~47). Silence highly recommended. Drops gil and craft materials. If the Moblins are allowed to use Crispy Candle and damage themselves, they will not give EXP. Avoid them or bring a stun. |
| 36-39 | Sanctuary of Zi'Tah | (E-8)
|
Need Silena and Paralyna. 2 Hellhounds (47-50) pop at night in the area but shouldn't be a problem. |
| 36-43 | Yhoator Jungle (Kazham Airship Pass Req) | Bloodlet Spring (J-7)
|
Beware of NM at J-7 camp |
| 37-39 | Yhoator Jungle (Kazham Airship Pass Req) | (F-9) Yhoat Telepoint, (F-10)
|
|
| 37-40 | Yhoator Jungle (Kazham Airship Pass Req) | (J-11) Temple of Uggalepih entrance
|
Dispel and/or BLM recommended. Not far from Uplands OP. Sneak/oils and invis/powders needed to reach camp. |
| 38-40 | Sea Serpent Grotto | Behind Silver Beastcoin Door (J-11) Map 2,
|
Will need Sneak/Silent Oil to get to camp. Sahagin link. Bring Sleepga/Lullaby. Party may need to roam a bit. Lots of spawns but high respawn time (~16min). Beware NM spawn at (J-10) area. |
| 38-41 | Crawler's Nest | (G-9) Map 1
|
Supports 1 good party, 2 parties is questionable. BLM or Dispel recommended for beetles. |
| 38-41 | Fei'Yin | Hallway east of Fountain Room | 2 parties. Beware of farmers in area. Ninja tank and White Mage with Erase required. Beware of weaker bats. |
| 39-42 | Western Altepa Desert (Altepa Gate Crystal req) | (I-8)
|
Dhalmels found on all sides of the fork, watch out for Antican aggro. Could also pull nearby Sand Beetle. |
| 39-42 | Gustav Tunnel | (K-7) Valkurm Side | Sufficient mobs for 2 parties. |
| 39-41 | Garlaige Citadel | Right behind banishing gate #1
|
Careful of potential links. |
| 39-41 | Misareaux Coast (CoP Chapter 2 Req) | (F-8)
|
Have Paralyna, Erase, Poisona, and Silena, ready. |
| 39-44 | Misareaux Coast (CoP Chapter 2 Req) | (G-5) | Scenic. Bigclaws, Makaras, and Mantraps for 39-42 level party. Diatryma for 42-44 party. Need to be on at least on Chapter 2 CoP. Diatryma resists melee damage except for piercing. |
Level 40-50
| Level | Zone/Camp | Mob(s) | Notes |
|---|---|---|---|
| 40-42 | Crawlers' Nest |
|
At least 2 camps. Dispel and/or BLM recommended for cocoon. Camp at rocks/boulders on map 3. |
| 40-43 | Beaucedine Glacier |
|
Supports 1 party. Dispel recommended. |
| 41-43 | Yhoator Jungle
|
|
Popular BST camp |
| 41-43 | Eastern Altepa Desert | Goblins Bomb Toss can be an issue, stuns recommended. Lower level parties should beware of the diggers as they are higher in level. Supports 2 parties. | |
| 41-44 | Yhoator Jungle
|
Mobs do not raise defense (Confirmed by Charsi) | |
| 42-44 | Western Altepa Desert |
|
Beetles all around Revelation Rock, supports many parties, Beetles link. BLM or Dispel recommended for beetles. |
| 43-45 | Xarcabard
|
|
1 party |
| 43-45 | Yhoator Jungle
|
|
2 parties. RNG and WAR Goblins. 6 Spawns at west entrance. 8 at east entrance. Barfira for bombs. |
| 43-45 | Toraimari Canal | (F-9) 1st map, by Full Moon Fountain
|
Supports 1 party. Dispel and/or BLM recommended. Need either portal charm for 3 mage gate or rhinostery certificate to access. Will need sneak/oils to access without aggro. (~15 minute walk from Sarutabarta OP going through 3 mage gate). |
| 43-45 | Crawler's Nest | (H-7) 2nd Map
|
Supports 1 party. Lizards aggro sound and link! Reliable Sleep, Bind, or Lullaby recommended.About a 7.5 minute walk from Derfland OP. |
| 43-46 | Lufaise Meadows (Req. CoP Crag completion) | (G-6)
|
Beware of Thunder Elemental that spawns by Leshys. All members must complete CoP Chapter 1. Uses damaging area-of-effect moves as well as Slumber Powder. |
| 44-46 | Labyrinth of Onzozo | (I-9), 2 tunnels
|
Supports 2 parties. Know when Cockatrice in tunnels will repop (Reliable sleep/bind/lullaby recommended). WHM required for Stona. Cockatrice do not link but are aggressive via sound. Echo Drops strongly recommended. Avoid Goblins Miners if possible (THF Goblins) |
| 44-46 | Beaucedine Glacier 
|
(J-5) By Fei Yin
|
Does NOT raise defenses. Bring silena and paralnya. Supports 1 party. 2 parties doubtful. ~8.5 minute walk from Fauregandi OP |
| 44-47 | Crawler's Nest | (J-8), (H-9) Map 3
|
Can also mix in Exorays(51-54) or other mobs in the area. Typically enough spawns for 2 parties, can camp at other entrances to room as well. BLM or Dispel recommended for beetles. |
| 45-47 | Quicksand Caves | (J-5), (E-5) Map 1. Titan entrance from East Desert (K-7)
|
Beetles and spiders no aggro but link. BLM or Dispel recommended for beetles. Bring WHM for Erase if you fight spiders. Antia have AoE silence. Supports 2 parties. Drops coffer keys. |
| 45-51 | Garlaige Citadel | (G-6) or (J-8) Basement Map
|
Funnel Bats initially, moving up to Chamber Beetles around level ~48. Supports 2 parties. BLM or Dispel recommended for beetles. |
| 46-48 | Bostaunieux Obuliette (Must progress through certain rank missions to enter Chateau, have rank 3 Bastok and Windurst to enter) | South of Sewer Hatch Landing, (G-8)
|
Sneak up before dropping down, slimes below. Watch out for pops. Lots of link potential. Bring a Bard and/or Carby pull. Don't go past the hounds. Supports at least 2 parties. |
| 46-48 | Crawler's Nest | (G-9) Map 3, (G-7) Map 2
|
Dispel/Finale or BLM recommended. |
| 48-50 | Quicksand Caves | (H-9) Map 3. Entry at West Desert (J-9)
|
High level range of mobs. Bring echo drops and/or mages /whm for silena. BLM or Dispel recommended for beetles. |
| 48-50 | Misareaux Coast 
|
(G-7), (G-5)
|
1 camp by the Qufim warp. Other camp is by waterfall near Sacrarium. Need to be at least on CoP Chapter 2 to access. |
| 49-51 | Crawler's Nest | (G-6, F-6) 2nd map
|
Will need sneak/oils to reach camp. Take the NW tunnel at the sack room (H-8) to the 2nd map. Supports 1 party. Flies link. BLM or Dispel recommended for beetles. About a 10.5 minute walk from Derfland OP |
| 49-51 | Western Altepa Desert | (F-6), (G-6)
|
Pull Antica from below. They do not link. Bring RDM/Silencer- Lanista are BLM. Silena/echo drops recommended. Could also fight manticore and beetles in the area. |
| 49-51 | Garlaige Citadel | Basement, Behind banishing gate 2
|
Supports 2 parties in the basement. Another 2 behind banishing gate 2. BLM or Dispel recommended. |
Level 50-60
| Level | Zone | Camp/Mob | Notes |
|---|---|---|---|
| 50-52 | Bostaunieux Oubliette | Zone to West Ronfaure (D-9), (G-7)
|
Supports 2 parties. Need sneak/oils to reach camp, before you drop down. ~8 minute walk from Ronfaure OP. |
| 50-54 | Toraimarai Canal | (G-7) 2nd Map, (F-10) 2nd Map, Windurst Walls Entrance
|
Very close to Windurst Walls entrance (Head west, in tunnel. Keep going south to 2nd camp with crabs). All party members will need the Rhinostey certificate for quick access. Or go through the 3 mage gate (portal charm) (~15 minute walk from Sarutabarta OP going through 3 mage gate). Need sneak/oils to get to camp. Pugs don't link. Dispel/BLM recommended. |
| 52-54 | Uleguerand Range | (G-11)
|
Having a support highly recommended for AOEs/paralyze. Hares link. Hares give +10% exp bonus. |
| 52-54 | Garliage Citadel | (H-9) Basement Map
|
Typically a "bridge" camp after leveling to 51 from beetles. Not too many higher mobs present. Drops coffer keys. BLM/Dispel recommended. |
| 53-55 | Crawler's Nest | (F-9) 3rd map, Take South tunnel on the first map
|
BLM and/or Dispel recommended. Drops coffer keys. Supports 1 party |
| 54-56 | Crawler's Nest | (E-7) 2nd map
|
Take the NW tunnel at the sack room (H-8) to the 2nd map. Dispel or BLM needed for cocoon. Drops coffer keys. Supports 1 party. |
| 54-56 | Boyahda Tree | (L-9)/Entrance
|
Drops coffer keys. Lots of links! Bring a BRD and/or BLM and a WHM. Spiders have a nasty aoe slow and critical attack ability. Death Caps have a gross breath attack with silence and paralyze. Can be a challenging camp but will make you some money with web drops. |
| 54-56 | Kuftal Tunnel | Cape Terrigan Exit, (J-7)First Map, Western Altepa Entrance, Amemet Camp
|
Plenty of crabs to go around, supports at least 3 parties, just be cautious for Guivre (sight aggro) when getting to your camp. Sneak will be required to travel through this area. Drops coffer keys. Dispel or BLM recommended. |
| 55-57 | Ro'Maeve | (H-11), (H-9)
|
Can camp right at zone entrance. But beware of pop at zone. Can also camp in hallway at (H-9). Supports maybe 2 parties. /NIN recommended for melee for Whirl of Rage spam. |
| 55-57 | King Ranperre's Tomb | (G-7),(H-8) Map 2
|
Worm's dont aggro but link. Bats aggro by sound. Eyes good alternative when bats or worms are full. One Dire Bats sits on camp, but theres a small room full of Thousand Eyes that do not link next to it. There are only 4 beetles so not enough to make a camp for a full higher level party.
Warning: Thousand Eyes are farmed for Eyes for high level item. You might find max levels farming these enemies. |
| 55-57 | Ifrit's Cauldron 
|
(G-9), (J-7)/(J-8) 4th map
|
West entrance. Supports 2 parties. Yes aggro. Yes link. |
| 56-58 | Uleguerand Range | (E-9)
|
Supports 1 party. Beware of NM Buffalo. Viruna/WHM highly recommended. |
| 56-58 | Cape Terrigan | Outpost, (H-7)
|
Have Stona ready for Lizards. |
| 56-58 | Western Altepa Desert
|
(D-11, E-11)
|
Supports 1 party. No defense up. |
| 56-58 | Toraimarai Canal | 2nd Map (I-10)
|
Close to Windurst Walls entrance (Head east, downstairs, then south, in tunnel). All party members will need the Rhinostey certificate for quick access. Or go through the 3 mage gate (portal charm)(~15 minute walk from Sarutabarta OP going through 3 mage gate). Need sneak/oils to get to camp. Pugs don't link. Dispel/BLM recommended. |
| 57-59 | The Boyahda Tree | Map 1 (G-8), (J-9), (E-6), (D-4)
|
Many camps/mobs, supports at least two parties. Drops coffer keys. Bring dispeler or blm. |
| 58-60 | Attohwa Chasm | (F-6)
|
Bring WHM and/or a support for healing heavy AoE Damage. Flies like to spam Cursed Sphere. |
| 58-60 | Toraimarai Canal | (H-8) 2nd Map
|
Dispel/BLM recommended. Past Stygian Pugils, north up stairs. |
| 58-61 | Cape Terrigan | (I-8), (I-9), (G-6), (H-6), (H-8)
|
Supports at least 4 parties. Viruna suggested if you plan on fighting many raptors. BLM or Dispel recommended for crabs. Beware Sand Cockatrice, aggro sight, will be difficult (lvl 71-74). |
| 59-61 | Uleguerand Range | (J-11)
|
Support and/or melee sub /nin recommended for AoE. Hares link. Hares give +10% exp bonus. |
| 59-61 | Pso'Xja | (I-7) 2nd Map
|
Note this is a popular spot where high levels farm Florid Stones. Enter from Beaucedine Glacier (F-7). Follow the right wall, apply sneak and drop down the hole at (I-8). Camp in circular room with elevator. WHM recommended for Erase. |
| 59-61 | Kuftal Tunnel | (H-8) Map 4, (L-7) Map 1
|
Supports 2 parties. Viruna highly recommended. Go down the path at (F-7) map #1 to reach basement camp. Sneak needed. Beware NM Yowie. |
| 59-61 | Newton Movalpolos | (D-10)
|
Enter from (I-12) or (J-11) from Oldton. |
Level 60-75
| Level | Zone | Camp/Mob | Notes |
|---|---|---|---|
| 60-62 | Valley of Sorrows | (G-7) (corner), (J-9) (zone line)
|
Supports 1 party at twilight beach entrance. Supports 2 parties at J-8 Cape Terrigan entrance. Viruna/whm recommended. |
| 60-63 | Uleguerand Range | (I-10), (J-10), (J-11)
|
Supports at least 2 parties. Paralyna highly recommended. |
| 62-64 | Labryinth of Onzozo | (H-6), (I-6)
|
Supports up to 2 parties. Have silena, echo drops, and paralyna ready. Beware NM Ose. |
| 63-65 | Attohwa Chasm | (F-7)
|
Supports 1 party. Blindna and erase recommended. |
| 63-66 | Bibiki Bay | (G-6)
|
Supports 1 party. Tragopans link by sight when pulled. Recommend barfira for goblins and silence for Fascinator. |
| 64-67 | Boyhada Tree | (I-6) map 2
|
Rabbits no aggro. Water elemental spawns during weather on i-6 and will aggro frequently. |
| 65-67 | Cape Terrigan | (I-7) Boulder, (I-8) Boulder
|
WHM with Stona pretty much required. Can pull lower level velociraptors to fill in. Beware Manticores (lvl 77-79), sight aggro, will be difficult. |
| 66-70 | Boyhada Tree | (3rd map, down waterfall at (F-8) up top) (H-6), (H-10), (H-9), (F-9), (F-12), (H-8)
|
Supports multiple parties. Dispel/finale/chi blast/acid bolts/blm nukes recommended for defense up on crawlers and crabs. Echo drops recommended if targeting gobbues. Higher level parties can start to roam around the rooms instead of camp. Can pull additional Processionaires in the tunnels. Link potentials. Have sleepga/lullaby ready. Consider targeting Darters and Blood Balls at level 68+. |
| 67-69 | Boyhada Tree | map 2, up top (F-6), (G-10)
|
Silena/echo drops highly recommended. Could also fill in Processionaires (72-75) at (G-10) camp. Link potentials. Have sleepga/lullaby ready. |
| 67-69 | Den of Rancor | (I-8) map 6, in front of Cloister of Tides
|
Supports 1 party. 1 party member needs a Paintbrush of Souls to reach. Enter den from Temple of Uggalepih paintbrush room. *Note: 15 minute respawn. A good party can wipe all mobs and be sitting waiting for repops. |
| 67-69 | Pso'Xja | Nue Tower Entrance, Golden-Tongued Culberry Map
|
Drop down to the bottom map. Need sneak and invis. Can support 2 parties. East and west sides/drop downs. |
| 68-70 | Den of Rancor (I-9), (F-7) | Bloodlet Springs Entrance from Yhoater Jungle
|
Lots of links. Have sleep(ga)/lullaby ready. Mages stay back from puks for dreamflower. Stona/WHM recommended for lizards. |
| 68-71 | Cape Terrigan  |
Zone to Gustav Tunnel (J-6)
|
Erase (Manticore Debuff Max HP/MP Debuff) & Stona Recommended. Your party can camp between the boulder and wall for faster pulls with some add potential...or up the ramp to be more safe. |
| 69-71 | Bibiki Bay | (G-8), (G-10)
|
- Mobs AoE Dispel and AoE shadow wipe.. better for BST burns |
| 69-75 | Newton Movalpolos | Exit from Mine shaft #2716 entry
|
Get twinkbrix to teleport you to the mine shaft. Camp favors a roaming party. Sleep and silence recommended. Teleport Dem and escape recommended for faster travel. |
| 69-75 | Cape Terrigan | (G-5)
|
Erase recommended. Silena and Stona recommended if lower level parties are fighing Cockatrice as well. Mages stay back due to Riddle (max mp down). Greater Manticores give +10% exp bonus. Camp will make you some money. |
| 70-75 | Kuftal Tunnel | (H-6), (I-8) Map #3
|
Past moving boulder at (G-9). Path opens at certain times depending on moon phase. Maximum up time is about 15 minutes (6 game hours). Supports at least 2 parties. Will need paralyna for tigers, stona and poisona for cockatrice. Ladons have dispelga move and give +23% exp bonus. Camp will make you some money. |
| 70-75 | Ro'Maeve | (N-9), (D-5) Behind East and West Moongates. (M-9), (C-9) outside of Moongates
|
Supports 4 parties. No moon pass needed for 2 camps. 2 more camps available behind each moongate. Lots of AOE. Melee DPS subbing /nin is a good idea. Behind moongate your party can camp on far bridges for faster pulls with some aggro potential (have sleepga/lullaby ready)... or use a side room to be more safe. |
| 71-75 | Bibiki Bay  |
(G-6), (F-7), (F-8), (G-9)
|
Supports 4 parties. Berserk is your friend. Healing wind spam can be annoying if cows aren't dealt with swiftly. Fill in with Rarabs and Efts. (F-8) camp has lots of Goblins. Watch out for bombs/AoE, Barfira up. |
Sky Camps (63-75+) (Sky Access Required)
| Level | Zone | Camp/Mob | Notes |
|---|---|---|---|
| 63-66 | Ru'Aun Gardens | (F-9)Earth, (E-8) Ice, (F-6) Dark, (G-5) Light, (I-5) Air, (J-6) Thunder, (K-8) Fire, (J-9) Water
|
Up to 8 camps. |
| 71-75 | The Shrine of Ru'Avitau | (G-10), (I-10) Map #2, (H-8) Map #3
|
Enter at Ru'Aun Gardens (H-9), south entrance. Can also enter at Olla entrance and take 1st teleport up to map #3 for another camp. Lots of AOE. Melee DPS subbing /nin is a good idea. Consider roaming. |
| 72-75 | The Shrine of Ru'Avitau | (I-8), (G-8)) Map #2
|
Enter at Ru'Aun Gardens (J-6) Genbu entrance. Lots of AOE. Melee DPS subbing /nin is a good idea. Consider roaming. |
| 74-75+ | The Shrine of Ru'Avitau | The Nexus Loop (H-8) Map #1, Ullikummi Camp
|
Enter at Ru'Aun Gardens (J-6), Genbu entrance to reach both camps. Have someone enter the shrine's south entrance to make sure yellow gate is open. |
Merit Camps
- These camps are designed for higher levels (75+) to exp/gain merit points on.
- If your party has a strong line up, and is coordinated, you could start exping at these camps earlier.
- Some camps can turn into roaming camps for faster kills at higher levels.
| Zone | Camp/Mob(s) | Notes |
|---|---|---|
| Newton Movalpolos | Exit from Mine shaft #2716 entry
|
Get twinkbrix to teleport you to the mine shaft. Roaming party. Sleep and silence recommended. Lots of bombs, AoEs. Teleport Dem and escape recommended for faster travel. |
| Cape Terrigan | (G-5)
|
Erase recommended. No AoEs, but conals. Can roam around a bit. Cockatrice may agro but can be easily dealt with. Mages stay back due to Riddle (reduces max mp). Greater Manticores give +10% exp bonus. Manticore drops will make you some money. |
| Kuftal Tunnel | (H-6), (I-8) Map #3
|
Past moving boulder at (G-9). Path opens at certain times depending on moon phase. Maximum up time is about 15 minutes (6 game hours). Supports at least 2 parties. Roam around. Will need paralyna for tigers, stona and poisona for cockatrice. Ladons have dispelga move and give +23% exp bonus. Camp will make you some money. |
| Ro'Maeve | (N-9), (D-5) Behind East and West Moongates. (M-9), (C-9) outside of Moongates
|
Supports 4 parties. No moon pass needed for 2 camps. 2 more camps available behind each moongate. Lots of physical AOE. Melee DPS subbing /nin is a good idea. Camp on far bridges and/or roam around. |
| Lufaise Meadows | (K-7)
|
Need to be on CoP Chapter 2+ to access. Lot's of magical AoE, will wipe shadows and still cause damage. WHM recommended for AoE healing Stona and Erase. Camp will make you some money. Tavnazian Rams give +23% exp bonus. |
| The Shrine of Ru'Avitau | (I-8), (G-8)) Map #2
|
**Need Sky Access** Enter at Ru'Aun Gardens (J-6) Genbu entrance. Open yellow gate. Roaming camp. Lot's of physical AoE. ~8 minute walk from crag shortcut or ~15 minute walk from Li'Telor OP without Mazurka. |
Ro'Maeve 
|
(0-9) (A-9). Behind East and West Moon gates.
|
Supports 2 parties. Lots of physical AoE, graviga, and slowga. Pull weapons to fill to maintain chain.~7 minute walk from Li'Telor OP without Mazurka |
Fei'Yin 
|
Basement (H-6), (H-5)
|
Supports 1 party. Not much AoE or conal. Roam around as needed. ~12.5 minute walk from Fauregandi OP without Mazurka |
| The Shrine of Ru'Avitau | The Nexus Loop (H-8) Map #1, Ullikummi Camp
|
**Need Sky Access** Enter at Ru'Aun Gardens (J-6), Genbu entrance to reach both camps. Have someone enter the shrine's south entrance to make sure yellow gate is open. Drops Diorite, Ullikummi pop item. Lot's of AoE/wipes shadows, bindga, and stunga. Roam around the Nexus loop. Can roam around a bit at Ullikummi. |
Meriphataud Mountains 
|
(J-9)
|
Supports 1 party. South of spine. Raptors have virus and slow. Flies have lots of AoE and poison. |
Misareaux Coast 
|
Close to Tavnazia Safehold Zone (J-8)
|
Mobs seem to be blunt resistant. Mages stay back due to AoE sleep. Dispel/acid bolts/chi blast recommedned for defense up abilities. |
Toriamarai Canal 
|
(J-8, 9) Map 2
|
Need Could also use 3 mage gate to get to but need portal charm. Some magical AoE. Dispel/acid bolts/chi blast recommedned for defense up abilities.(~16 minute walk from Sarutabarta OP, going through 3 mage gate, without Mazurka) |
Bibiki Bay, Purgonorgo Isle 
|
(H-10), (H-11)
|
Right by the CoP warmachine. Take Manaclipper. Takes time to get to. Supports 1 party. Not much AoE. Some conals. |
| Uleguerand Range | (I-5), (F-6)
|
Bit of a walk. Go east/counter-clockwise from the entrance to climb up. Will need Sneak/invis/meds. Watch out for true sight tauri on the way up. Roam around. Slowga. Conals. Blind. Doom.
Note: 3 mobs per kilometer, molech has doom (they look at you and you die) NOT WORTH IT tested by blacklung |
| Uleguerand Range | (G-8)
|
A bit further of a walk. Past Jormy, by frozen waterfall. Plague. |
Uleguerand Range 
|
(G-7)
|
Before you get to Jormy. You probably want to have decent gear and a few merits under your belt before meriting on these. Lots of physical AoE and conals. Melee subbing /nin isn't a bad idea. |
Alpha Camps 
- Coming soon in patch 1.2
| Level | Zone | Mob | Notes |
|---|
Shatter Camps 
- Coming soon in patch 1.2
| Level | Zone | Mob | Notes |
|---|
Mana Burn Camps 
- These camps are ideally for SMNx2 BLMx4 parties as these are era+ mobs that raise their defenses at the start of the battle. The defense is lost with a Skillchain + Magic Burst combo.
- SMN x2, 3 BLM, 1 Support (BRD, RDM) works.
- These camps were originally intended for a traditional party with skill chaining and more than 1 BLM magic bursting.
| Level | Zone | Camp/Mob(s) | Notes |
|---|---|---|---|
| 12-16 | La Theine Plateau | (G-6) Carbuncle Quest
|
Raises defenses at start of fight. MP Burn recommended or magic burst required. Ghosts pop at night. |
| 17-20 | Qufim Island | (F-5)
|
Raises defenses. |
| 20-25 | Qufim Island | (G-6)/(H-6) | G-6 camp is at the top middle of the quadrant, safe from undead. Our composition was 5 x BLM and 1 x RDM, bouncing hate between us. No need for a tank, just brave mages. Pulled 10k/hour (with band up) and no deaths. Move to pugil alley at (H-6) at 23. |
| 23-25 | Qufim Island | (G-8)
|
Raises defense at start of fight. MP Burn recommended or magic burst required. |
| 25-28 | Eastern Altepa Desert | (J-9)
|
Raises defense at the start of fight, MP Burn recommended or magic burst required. |
| 29-32 | Sauromugue Champaign | (J-9)
|
Raises defense at start of fight, MP Burn recommended or magic burst required, does not link |
| 31-34 | Eastern Altepa Desert | (F-6)
|
Raises defense at start of fight, MP Burn recommended or magic burst required, Doesn't Link |
| 33-37 | Sauromugue Champaign | (K-5)
|
Raises defenses. Wide level range. Higher levels (40-42) seem to spawn more on the western side of camp. Have poisona and paralyna ready. |
| 29-32 | Rolanberry Fields | (E-9)
|
Raises defense at start of fight, MP Burn recommended or magic burst required, Doesn't Link |
| 33-36 | Beaucedine Glacier | (G-10) Pond
|
Raises defenses |
| 31-33 | Beaucedine Glacier | (J-9) Upper level
|
Raises defenses. |
| 33-37 | Beaucedine Glacier | (H-7)/(I-7)
|
Quick run from Outpost/Telepoint Vahzl. Raises defenses. Can use Lowing which is AoE Plague (TP/MP drain). WHM/SMN recommended for SC closer if possible. |
| 36-40 | Yuhtunga Jungle | (H-10)
|
Raises defense at start of fight, MP Burn recommended or magic burst required, does not link |
| 34-39 | Batallia Downs | I-10 / J-10
|
Are Shielded. |
| 36-41 | Beaucedine Glacier | (J-8)
|
Raises defense at start of fight. Similar name to crabs on the other side of the coast but different level range. |
| 39-42 | Battalia Downs | (H-5)
|
Raises defense at start of fight, MP burn recommended or magic burst required. Resistant to piercing damage. Fast movement. Recommend having someone with silence. REALLY FAST CASTS (Data updated as of 5/16) |
| 42-46 | Yhoator Jungle | (I-11)
|
Raises defense at start of fight, MP burn recommended or magic burst required. Resistant to piercing damage. |
| 44-47 | Western Altepa Desert | (E-11)
|
Raises defense at start of fight, MP Burn recommended or magic burst required, does not link |
| 47-50 | Western Altepa Desert | (E-9)
|
Raises defense at start of fight, MP burn recommended or magic burst required. |
| 50-53 | Western Altepa Desert | (F-7)
|
On pull, Raises it's Defenses - Goes away during the day |
| 49-54 | Eastern Altepa Desert | (F-9)
|
Raises defense at start of fight. |
| 50-56 | Western Altepa Desert | (H-10)
|
Defense boost possible, untested. |
| 51-56 | Eastern Altepa Desert | (I-10)
|
Raises defense at start of fight. |
| 57-62 | Beaucedine Glacier | (J-9) Lower level
|
Raises defense at start of fight. |
| 64-75 | Misareaux Coast | (G-8)
|
Raises defense at start of fight. |
| 66-75 | Xarcabard | (I-9)
|
Raises defense at start of fight. Supports 2 manaburn parties. |
| 66-75 | Xarcabard | (I-8)
|
Raises defense at start of fight. Viruna recommended for plague. |
Undead Burn Camps
| Level | Zone | Camp/Mob(s) | Notes |
|---|---|---|---|
| 11-13 | Gusgen Mines | Konschtat Zone | Monk or manaburn party recommended. |
| 16-19 | Gusgen Mines | Stairs
|
Camp is for MNK/PLD/WHM (Holy Party) |
| 20-23 | Outer Horutoto Ruins | Strange Apparatus Room | Use northernmost West Sarutabaruta zone. Monk or manaburn party recommended. Sneak required to reach camp |
| 21-28 | Gusgen Mines | G-7) Map 2 behind first center door on staircase, Gadfly/Bogy Room, Behind East Banshee Door. | WHM Cure Burn party. WHM/NIN with Utsusemi recommended (if not able, Blink is required). Bring assistance for Raise and Viruna as the TP moves from Banshee really hurt and Rot Gas virus effect can last up to 5 minutes. Level sync 21-25 on Bogy Room and 24-29 behind the east Banshee door where no mobs spawn. Sneak is required to reach camp. |
| 30-33 | Sea Serpent Grotto | F-8 Map 1 where Royal Leech spawns in the tunnel just east of Namtar room.
|
WHM Cure Burn party. Level Sync 29 is too low. 31 is preferred. Blink, Stoneskin, and Reraise is a must. Sneak is required to reach camp. |
| 34-37 | Xarcabard | (E-8)/(F-8), (J-9) | Outpost warp or Vazhl gate crystal required to reach camp. WHM x6 Cure Burn party. |
| 34-37 | Eldieme Necropolis | Main entrance from Batallia Downs
|
Level Sync 32 too low, 33 still iffy. |
| 41-47 | Eldieme Necropolis | E-7 Map 1, Just east of where you land in drop A, Beaucedine entrance
|
Earth Elemental Danger at E-7 and Hume Bones camp. |
| 41-44 | Garlaige Citadel | Behind Banishing Gate 3 at I-6 Map 2 or Map 2 at F-9 near Funnel [[Bats spawn
|
Bring extra player with both Tractor and/or Raise behind Gate 3 camp to help cheese replacements to camp. |
| 50-54 | Eldieme Necropolis | M-7 Map 2, M-11 Map 2, South center pit landing from south room in Map 1
|
2x SMN 4x WHM. Holy and Banishga II burst from Ifrit Fusion. Coffer key mobs. Dark Stalkers (55-57) may be used to extend chains if using M-11 camp. |
| 50-54 | Garlaige Citadel | In basement H-8/I-8 tunnel or behind Banishing Gate 2 J-8 (Strange Apparatus Room)
|
2x SMN/4x WHM burn party. Basement camp is preferred camp but need another party targeting beetles/bats; the other camp lacks those mobs but just 5 undead spawns to work with. Mobs drop coffer keys required for white mage artifact hat. |
| 55-57 | Gustav Tunnel | I-7 Map 2
|
2x SMN/4x WHM for skeletons. Black Mage manaburn parties can also target Robber Crabs (which are never engaged by the white mage party). |
| 65-67 |
Gustav Tunnel | (H-7), (G-8)
|
2x SMN/4x WHM. Skeleton DRKs, BLMs, and Ghosts. Doom Guard on camp, all WHM should be /BLM for Elemental Seal > Silence on everything. Care for Typhoon Wyverns that are in the area. Taxim (Doom Warlock NM) also spawns here, but easy to kill with usual strats. |
| 73+ | King Ranperre's Tomb | Map 2 (E-7) | Monk burn, mana burn, or the 2x SMN/4x WHM groups work. White mage burn parties can start at 65. |

